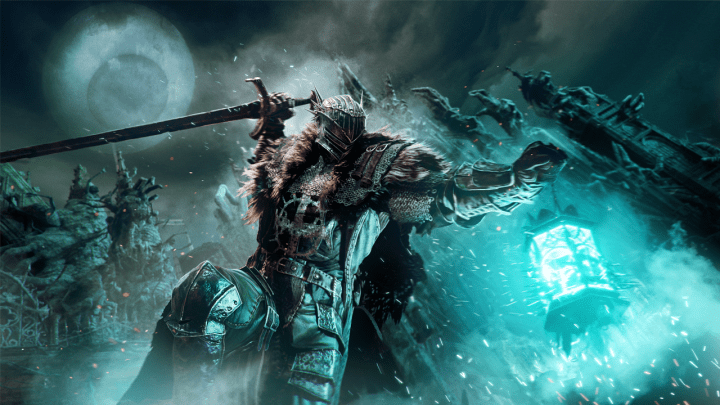
Guillaume Hecht breaks down ‘The Rally Point’
Guillaume Hecht is a Level Artist for Ubisoft based in Paris, France. As a personal challenge to himself, he spent over a year creating an original scene in Unreal Engine inspired by Gears of War and Dishonored. Here, he breaks down his process, planning and more for this epic project titled “The Rally Point”.
Where did your ideas, references, inspiration come from?
At the very beginning, before getting into making a full UE4 scene, it was mostly making various experiments. During summer 2017, I made multiple little projects: Substance Designer tests, some 3D models, nothing really fancy.
However, I came up with some interesting shapes with one of these 3D sketches, inspired by the Dishonored franchise. This ark shaped thing became a “3d brush”. I used it by bending it, twisting it, scaling it, with other basic objects to shape up the first layout.

This grey block scene was the starting point on which I wanted to improve and iterate. I kept playing with designs and proportions. The more I did, the more I was starting to take inspiration from both Gears Of War and Dishonored franchises. The way architecture, proportions and lines are treated on these game are particular, I wanted to adapt to what I was seeing from my references without fully copying them.
However, despite the fact that my references were good looking on their own, some were too different from the others, and mixing up styles wasn’t always possible. I decided to narrow my selection, and stick to only 2-3 images:
 After a few iterations and a lot of back and forth on the lighting and the base materials, the direction became clearer, and the “art code” of my environment was settled. It was easier for me to set the global tone of the scene, and create my props according to it, making the design match and modeling it as a “whole”.
What was your process for the piece? How did you breakdown the different elements?
My process for this piece was a bit particular, as its beginnings was “sketchy”.
As I said, I started with bent, twisted and scaled shapes to get my first layout. Converting this grey block scene to something usable was a lot of work. The first step was to split my buildings into different reusable pieces, with clear metrics, to avoid inconsistent sizes and length issues later in the production.
I didn’t have any concept to rely on. Instead, I was working more pictures I was inspired by. So, this part was quite time-consuming as I was creating designs of my models on the go. I needed a lot of back and forth between Maya and Unreal, as I wanted to check the feeling of each new piece I added.
I also had to find the right balance between stone and metallic parts on my construction. In the Gears of War universe, there are a lot of metallic ornaments and trims that create a rhythm of structures.
As soon as my placeholder facades sections were cleaned up, it became necessary to create metallic trim sheets I could reuse as much as I can in the scene, even if it would only be used as a draft.
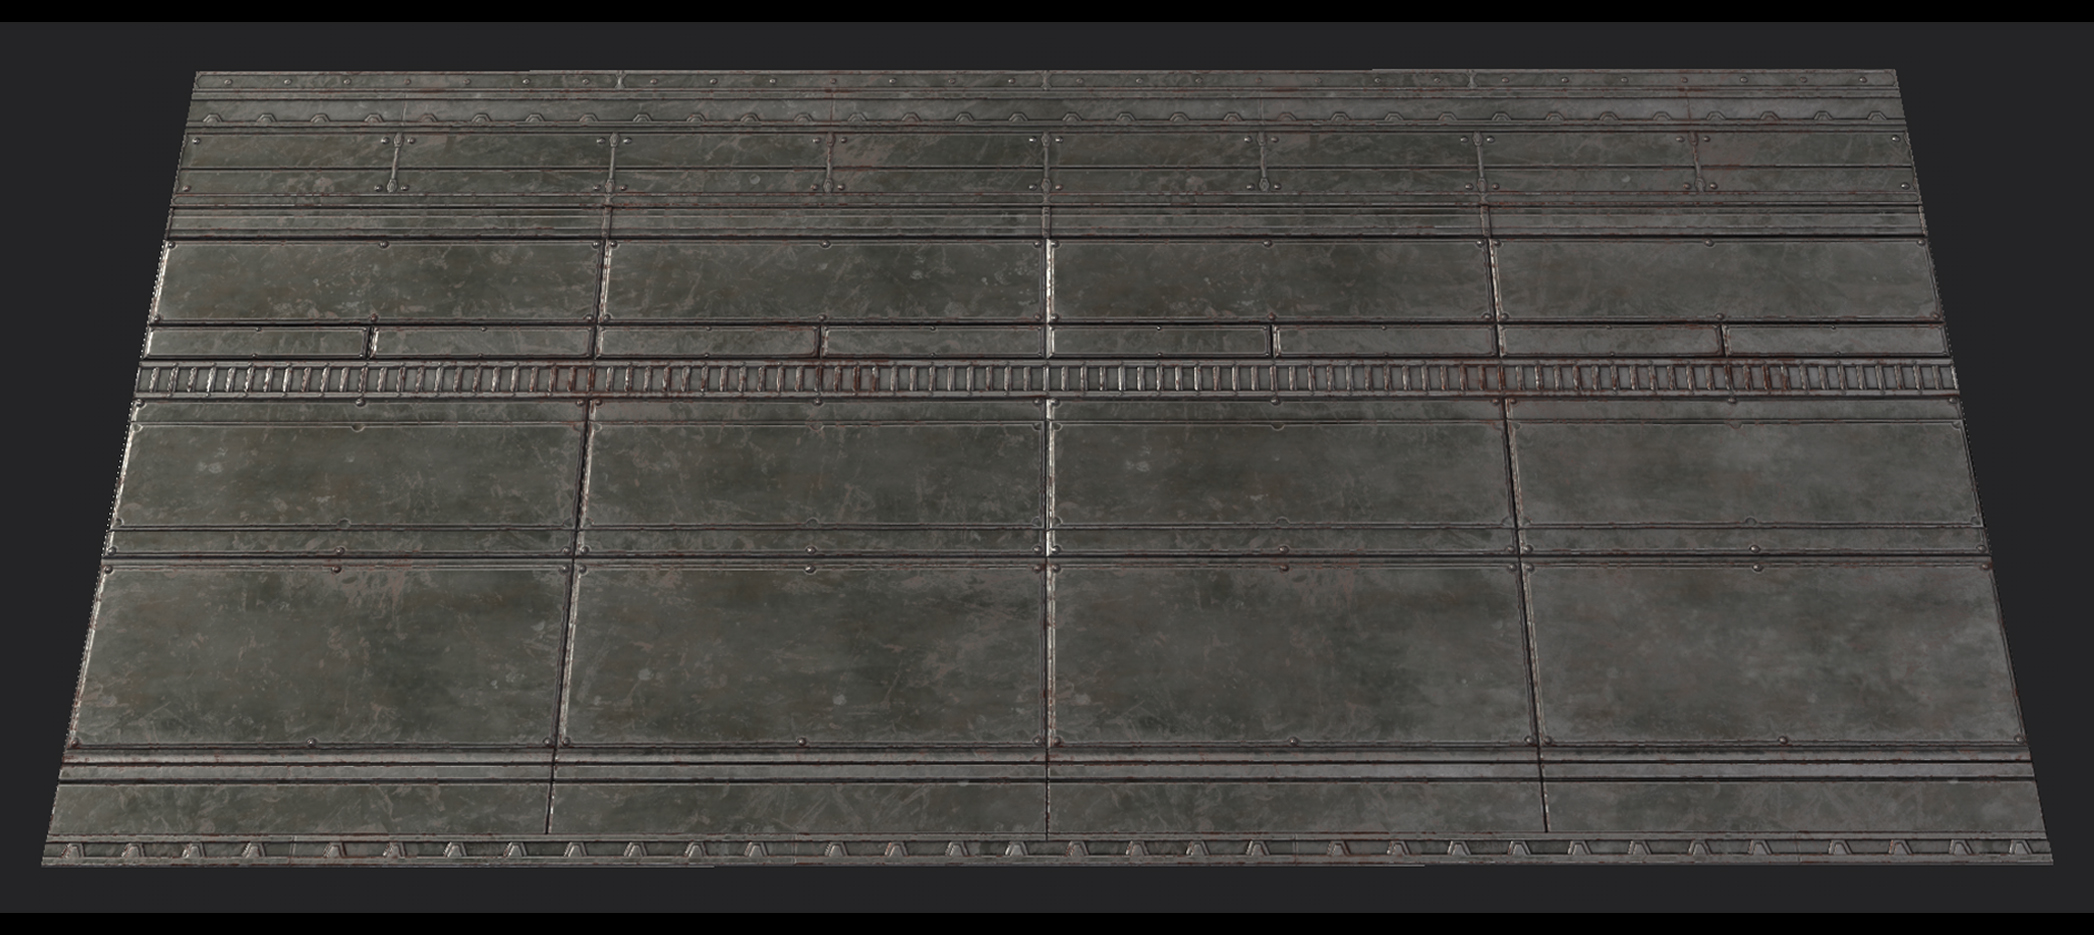
By cleaning up my main building, setting up metrics, and make my trim map, I had a good base to work with. This way it was easier for me to make the rest of the scene by creating variants of what I already had created since my main monument was a sort of “benchmark” of my environment.
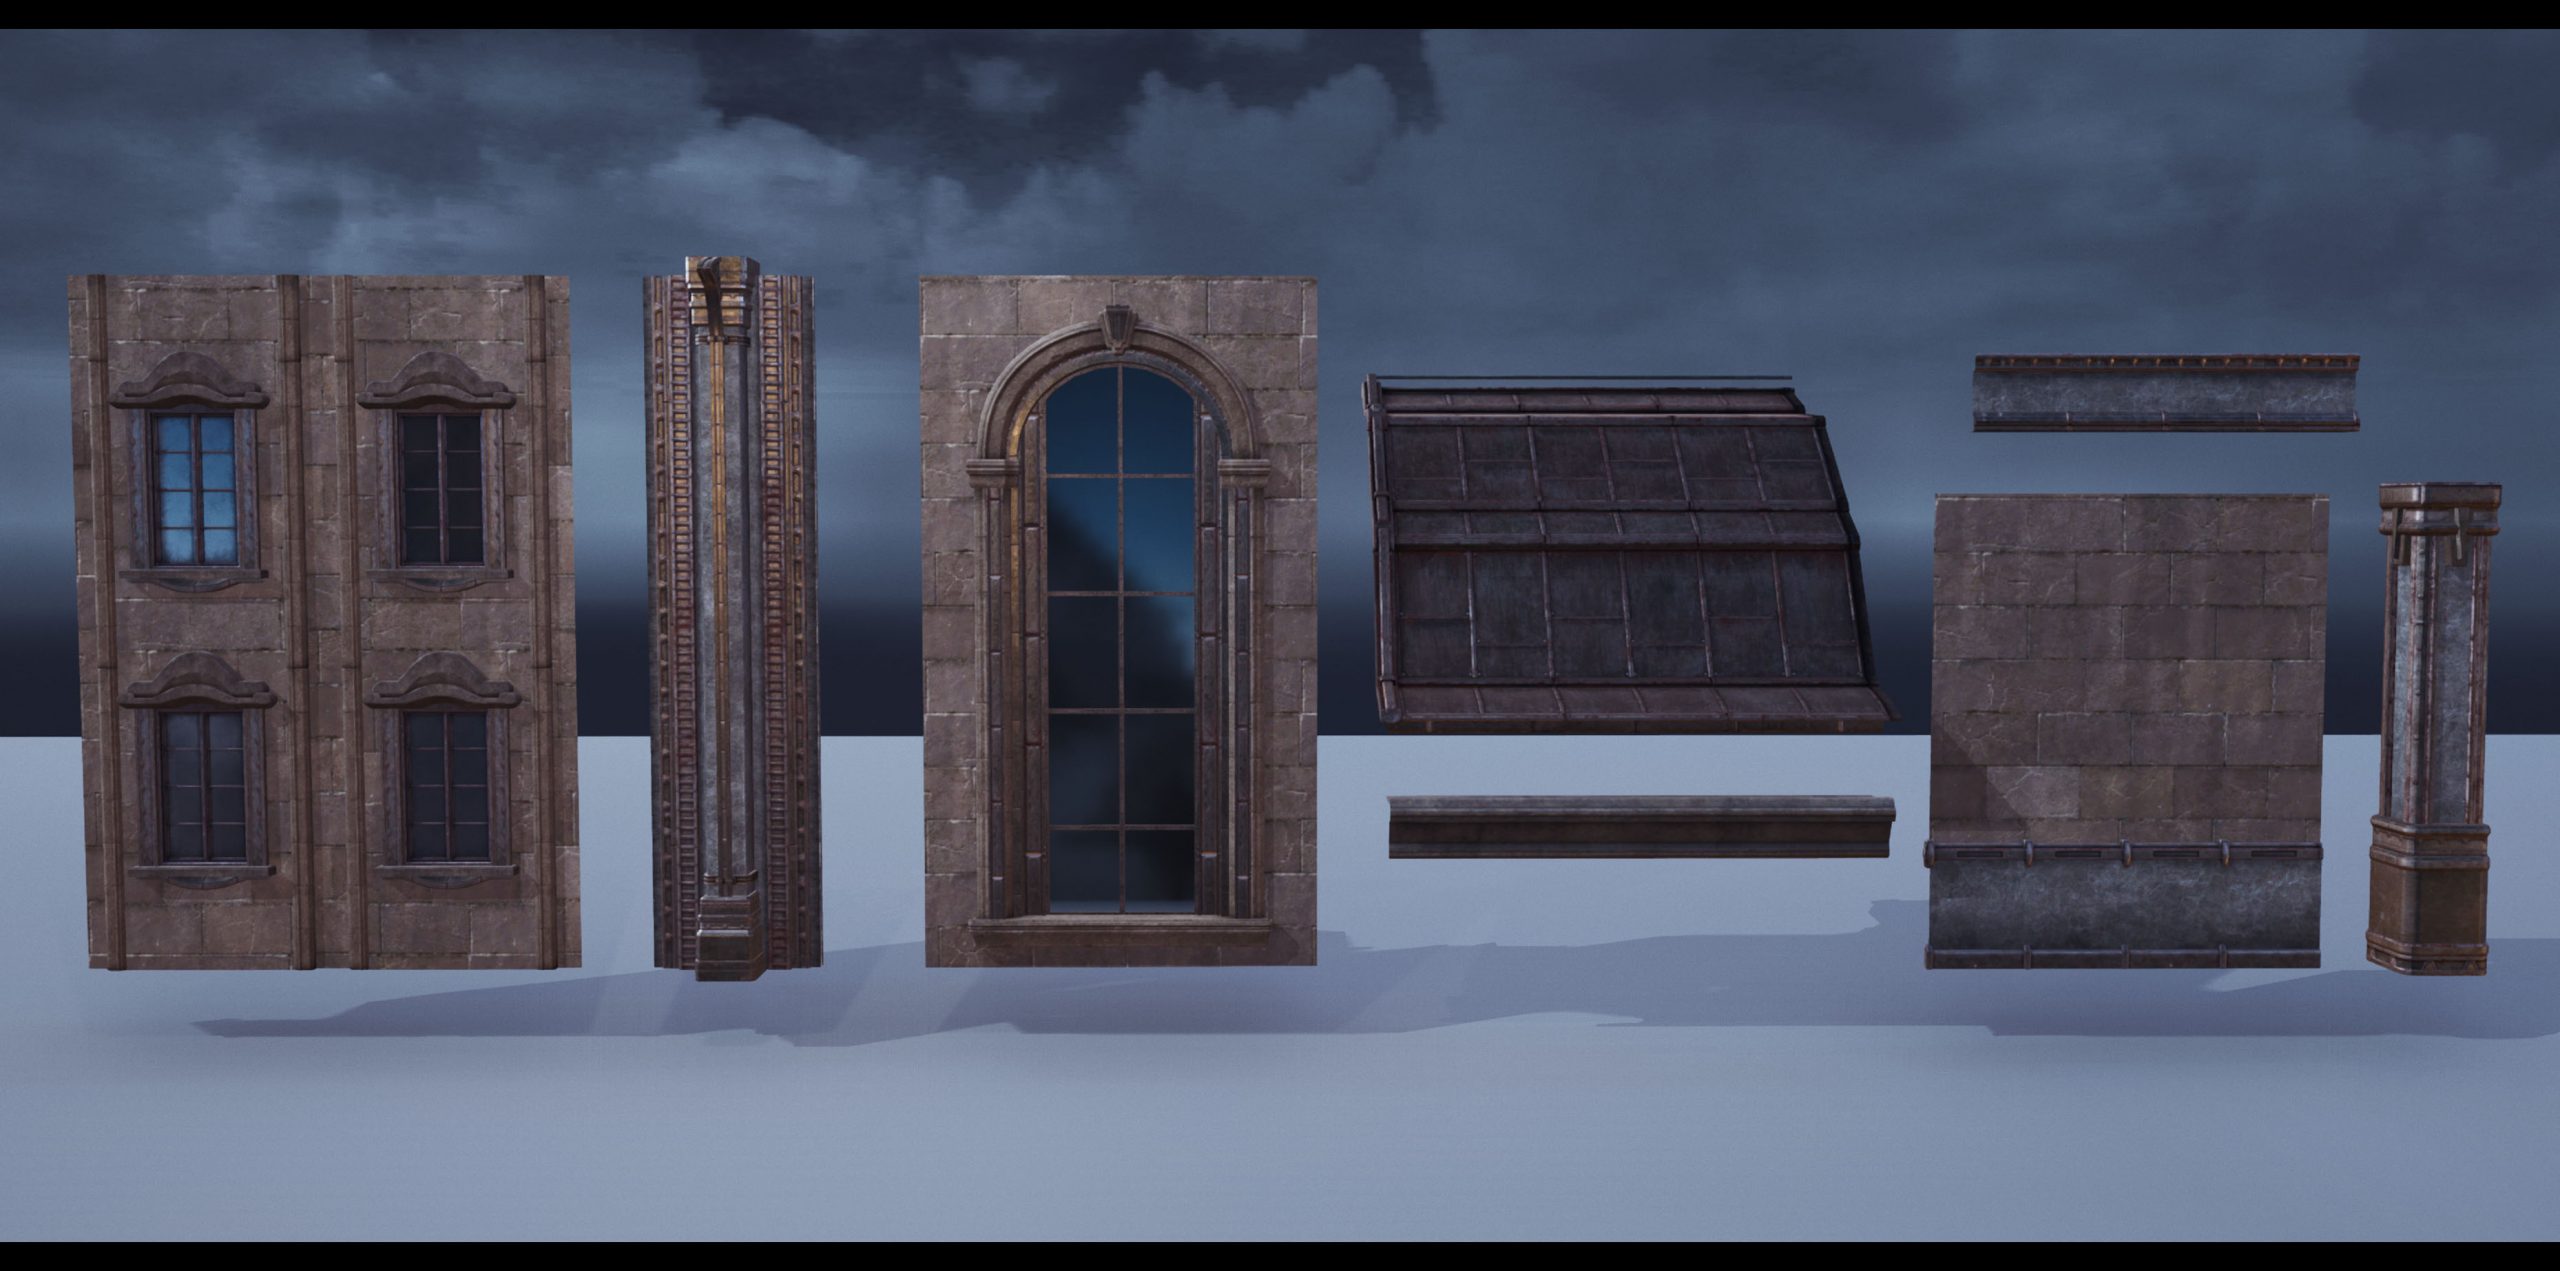
As you can see, the one in the background used pretty much the same shapes, where I just needed to add few ornaments to make a new modular piece and still have the consistency through my work.
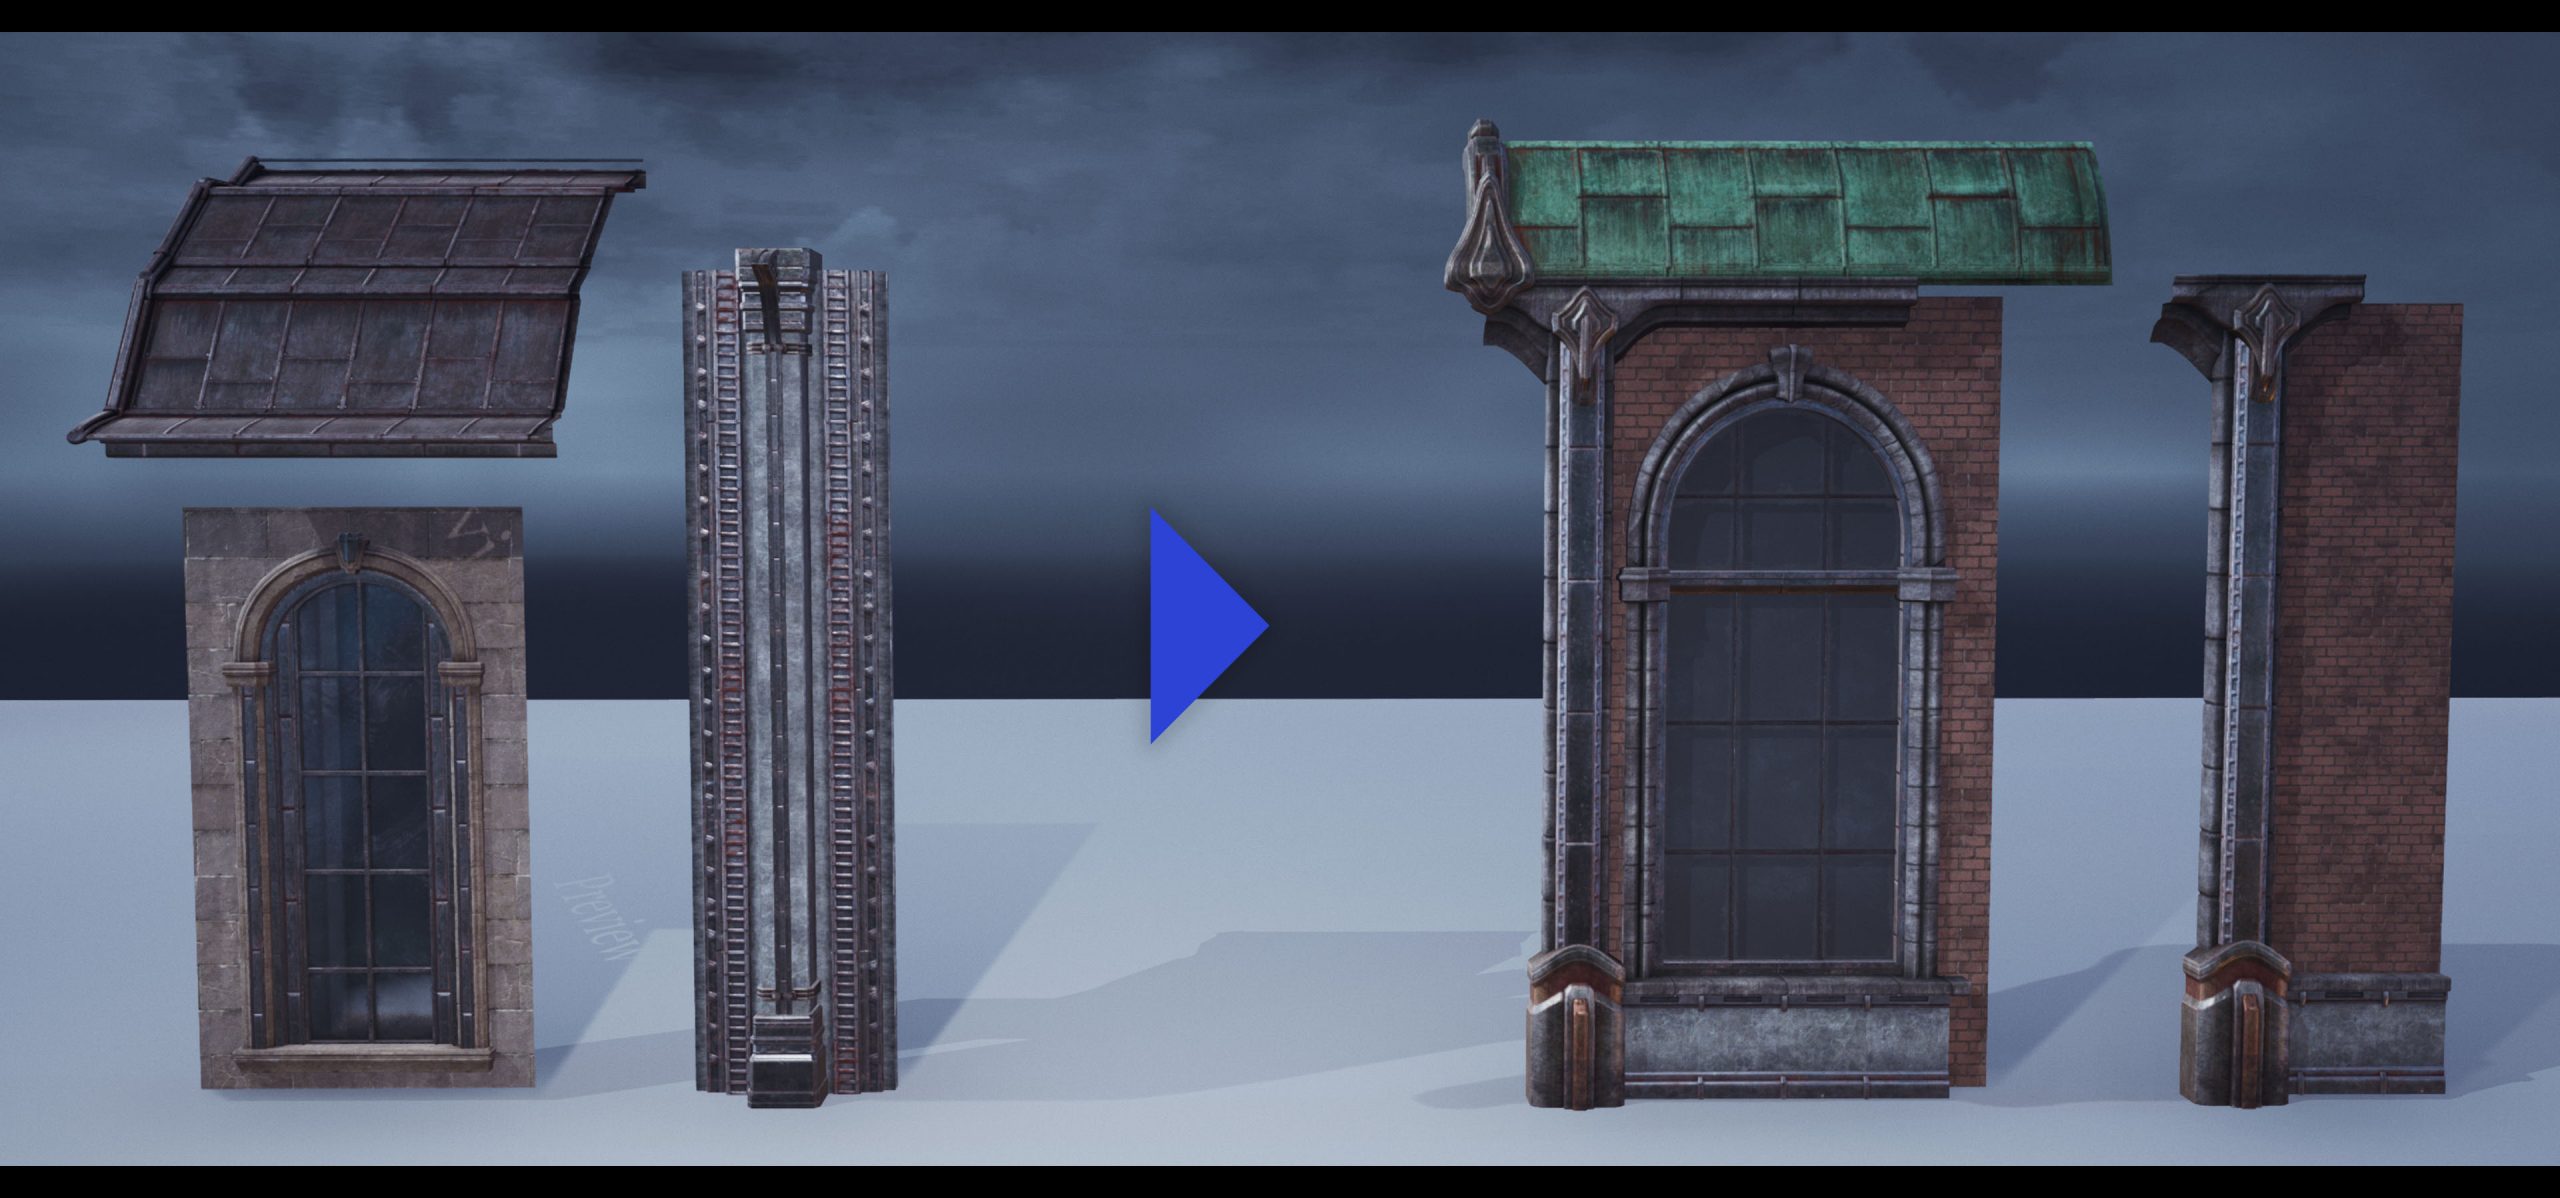
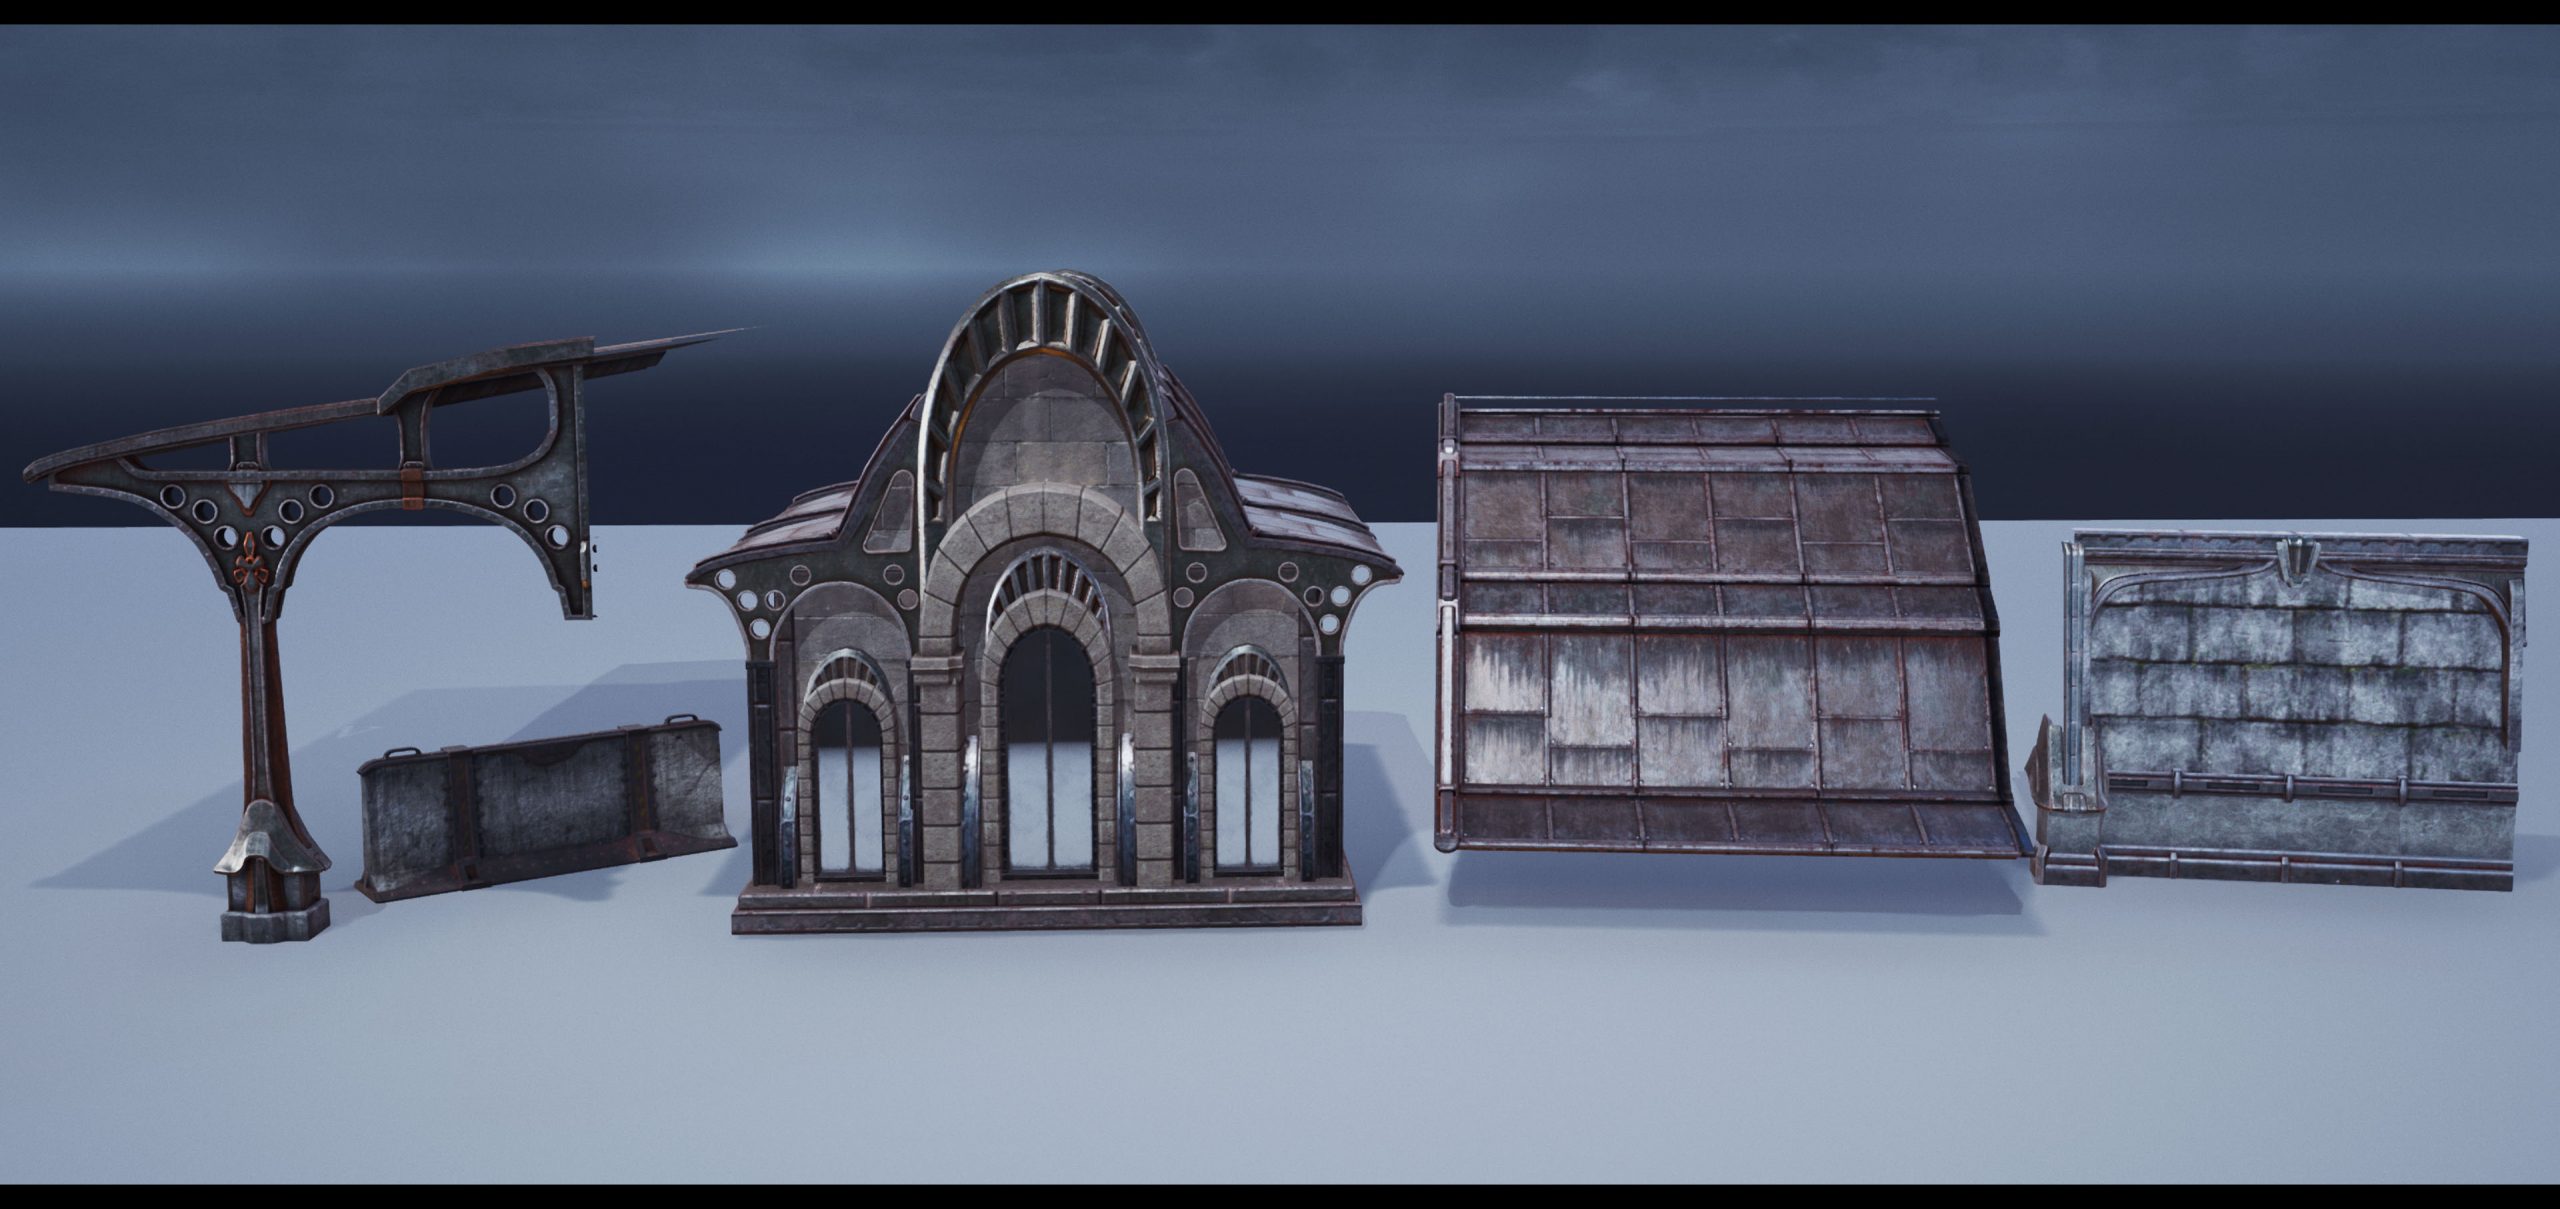
The parts on the left, used on the main building, and their variants on the right, used for the background building.
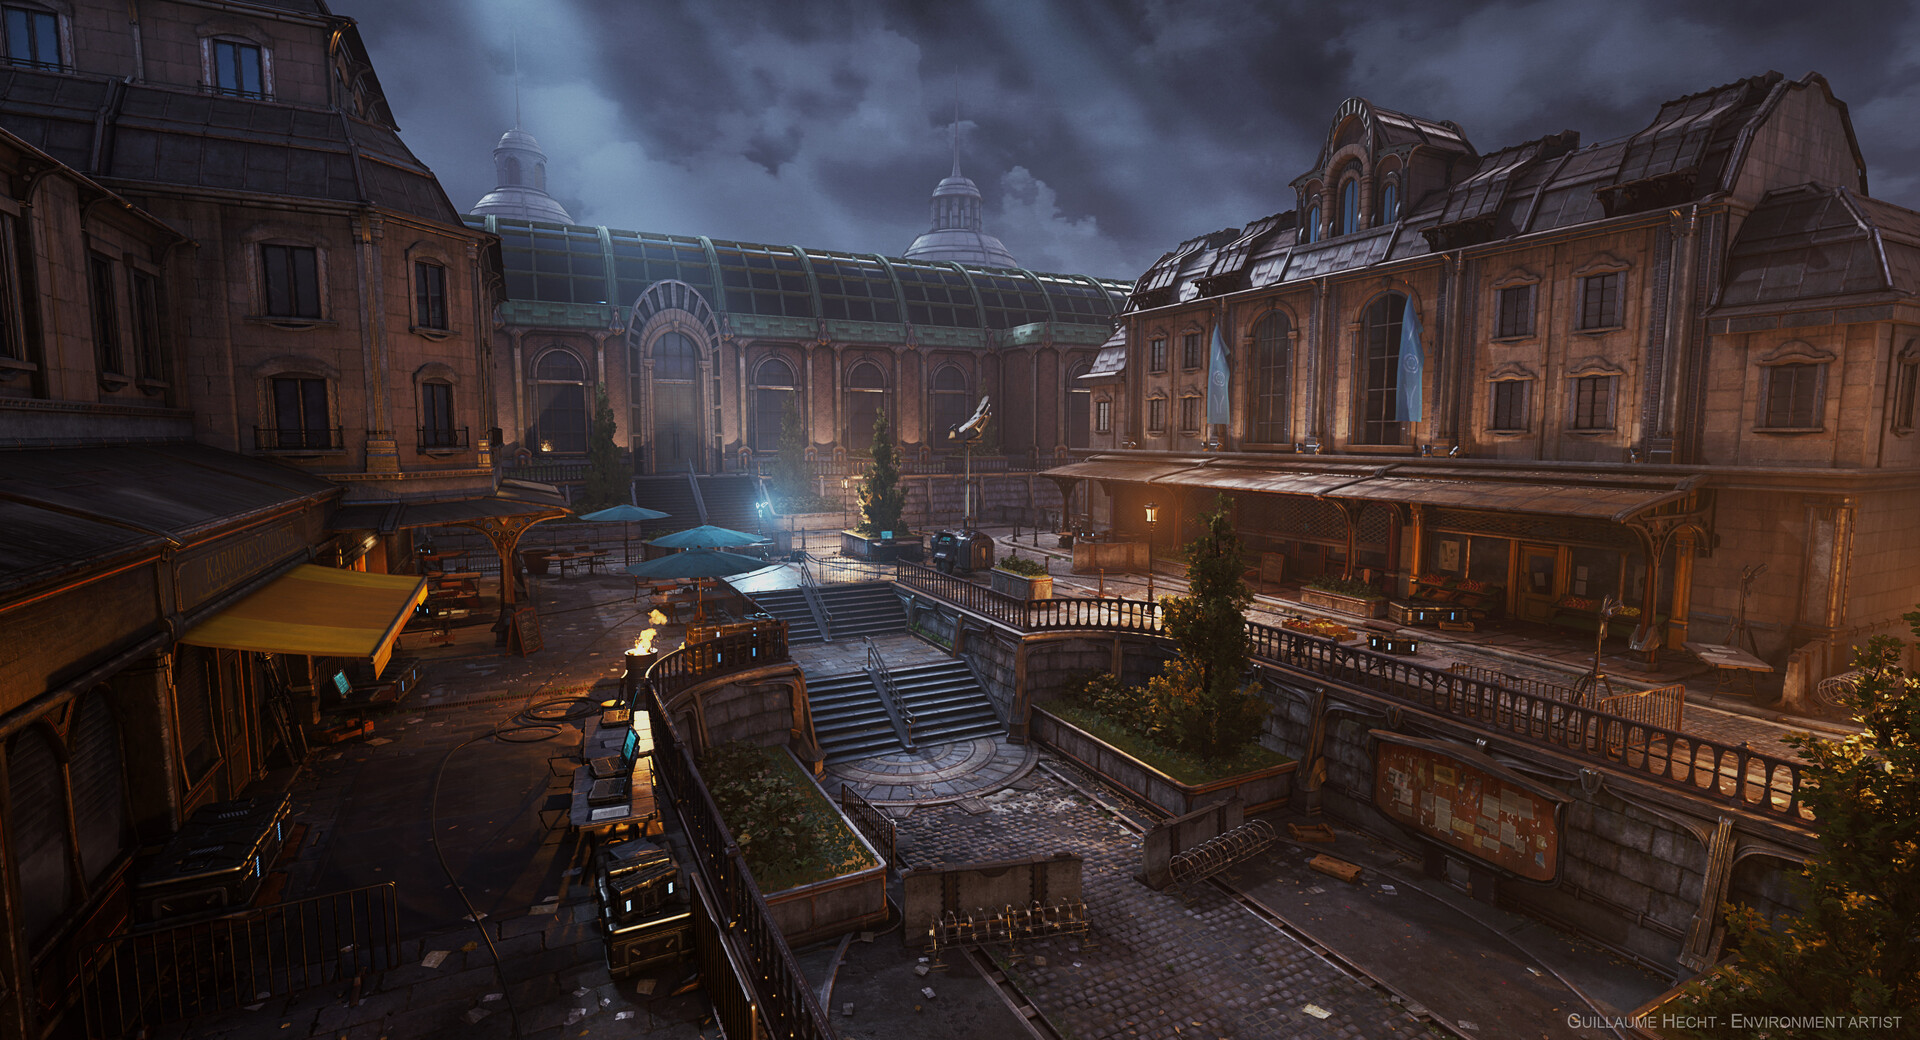
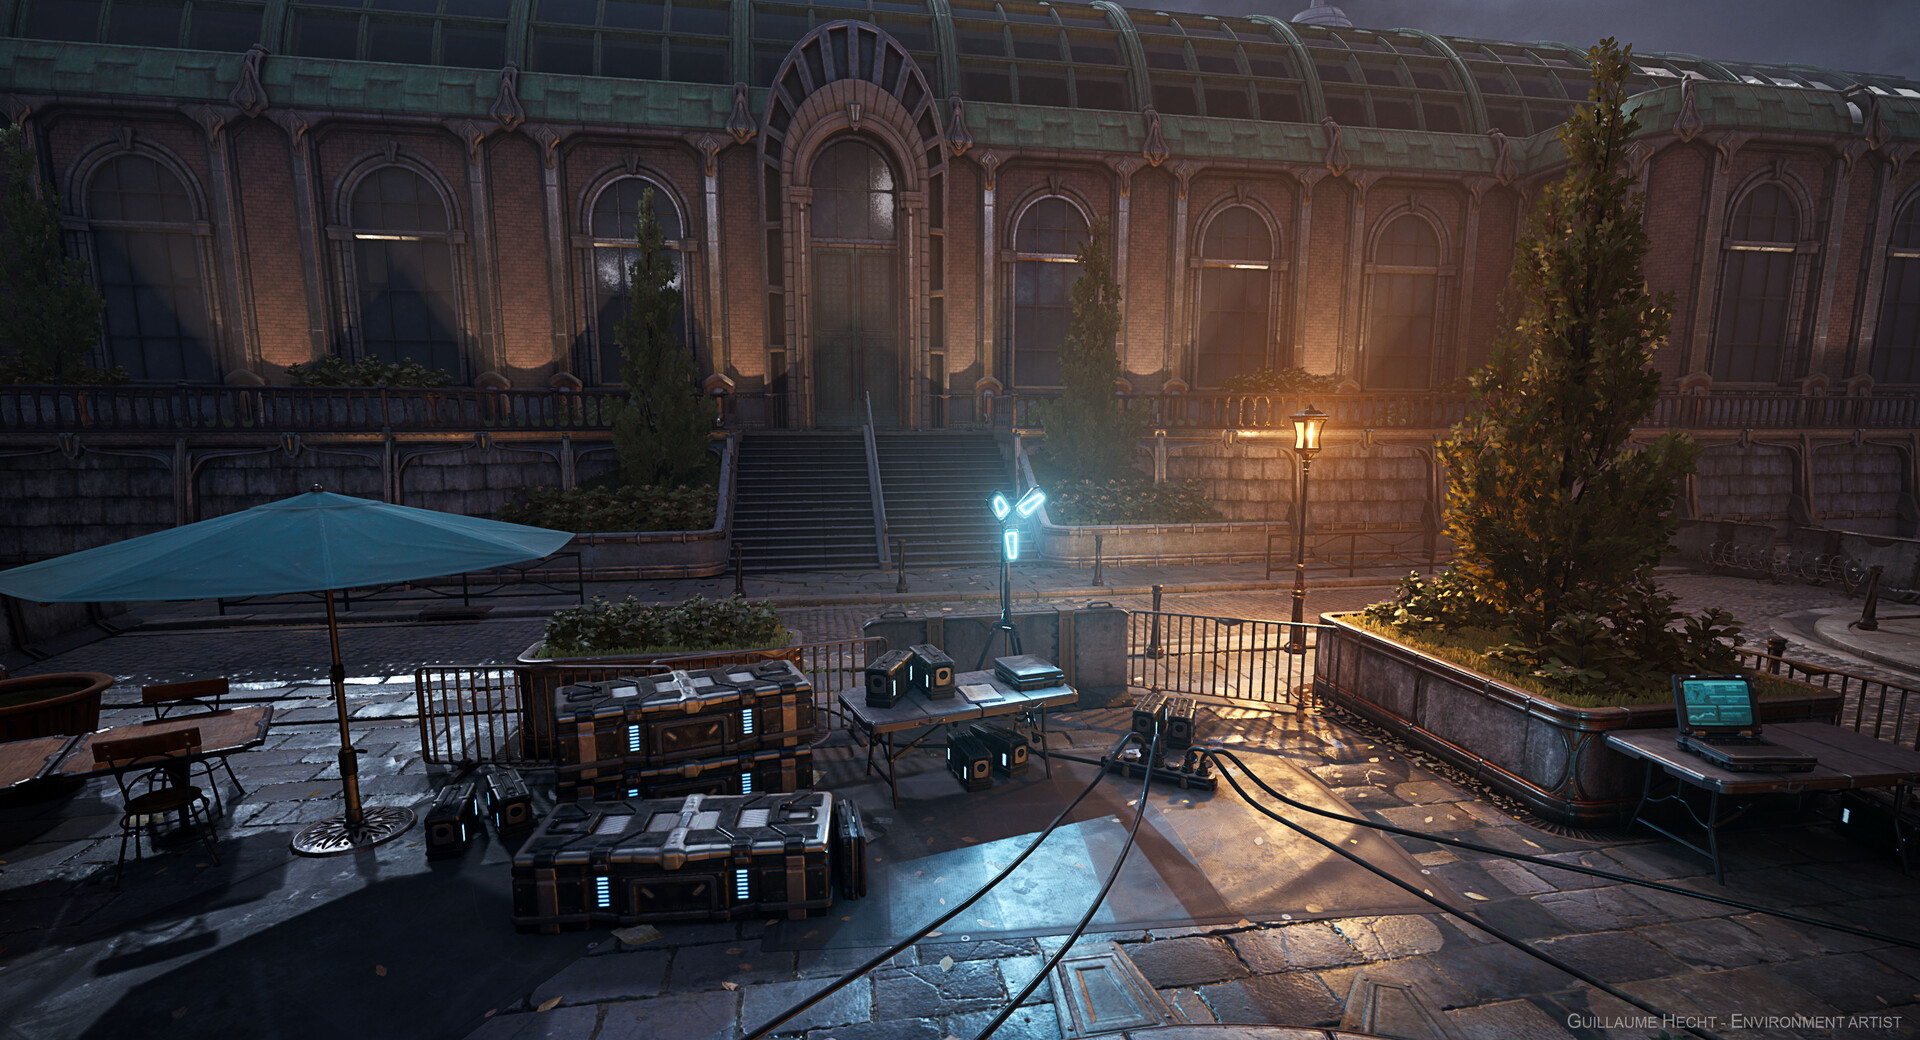
This monument works like a giant visual occluder. It helped me to fill a giant space in the scene, without having to produce a whole new part of the city. It would have taken too much time and made the focus point less clear.
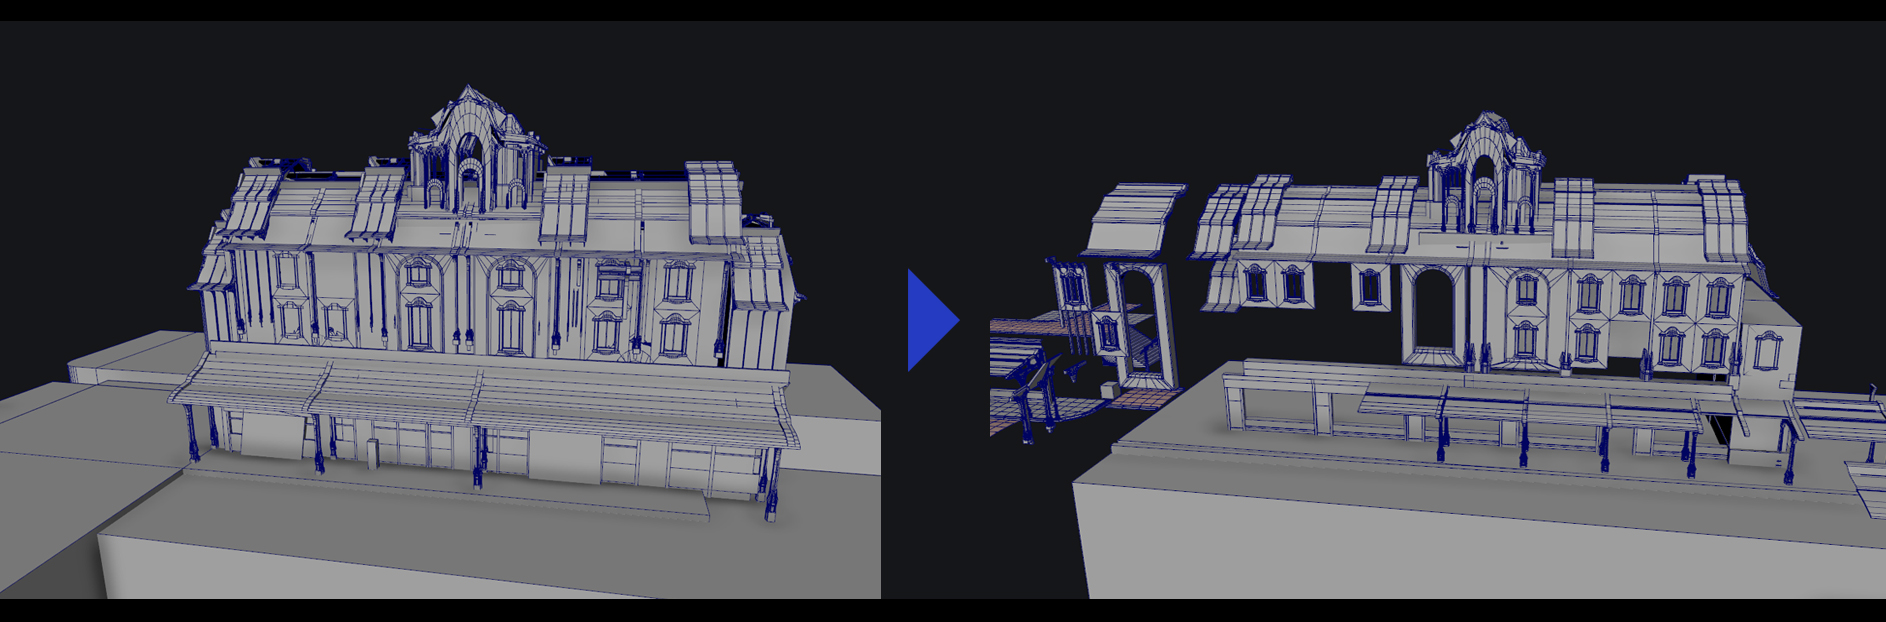
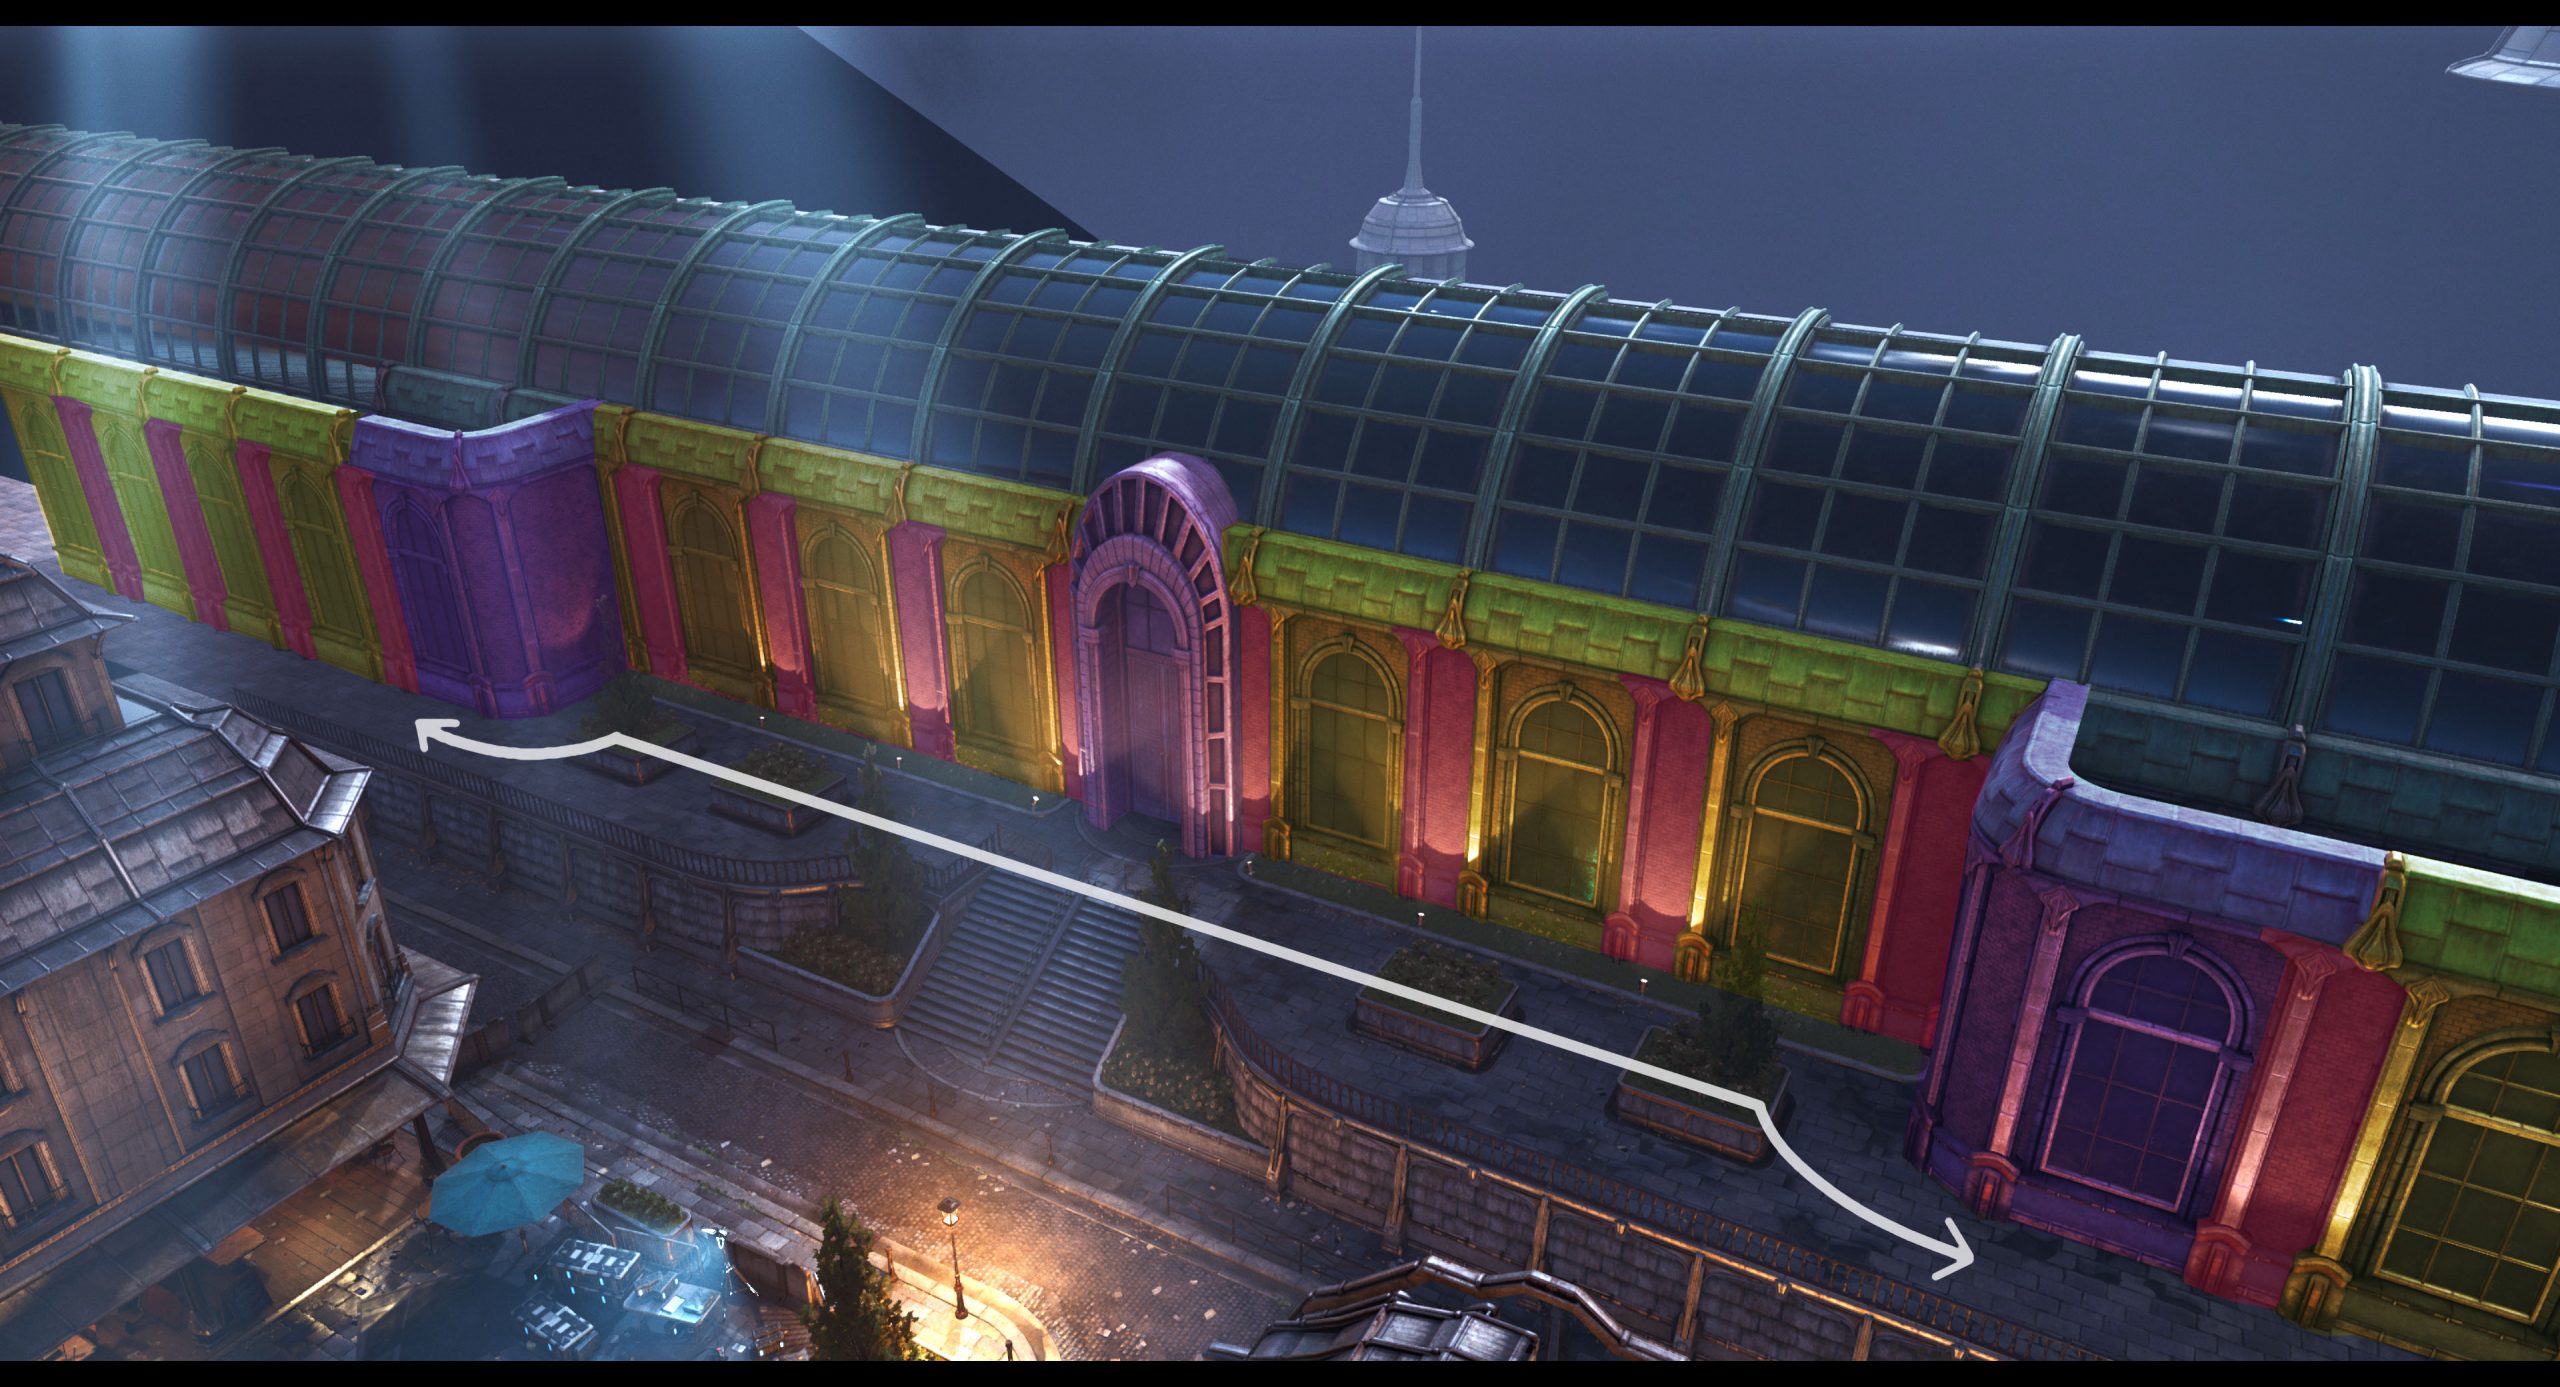
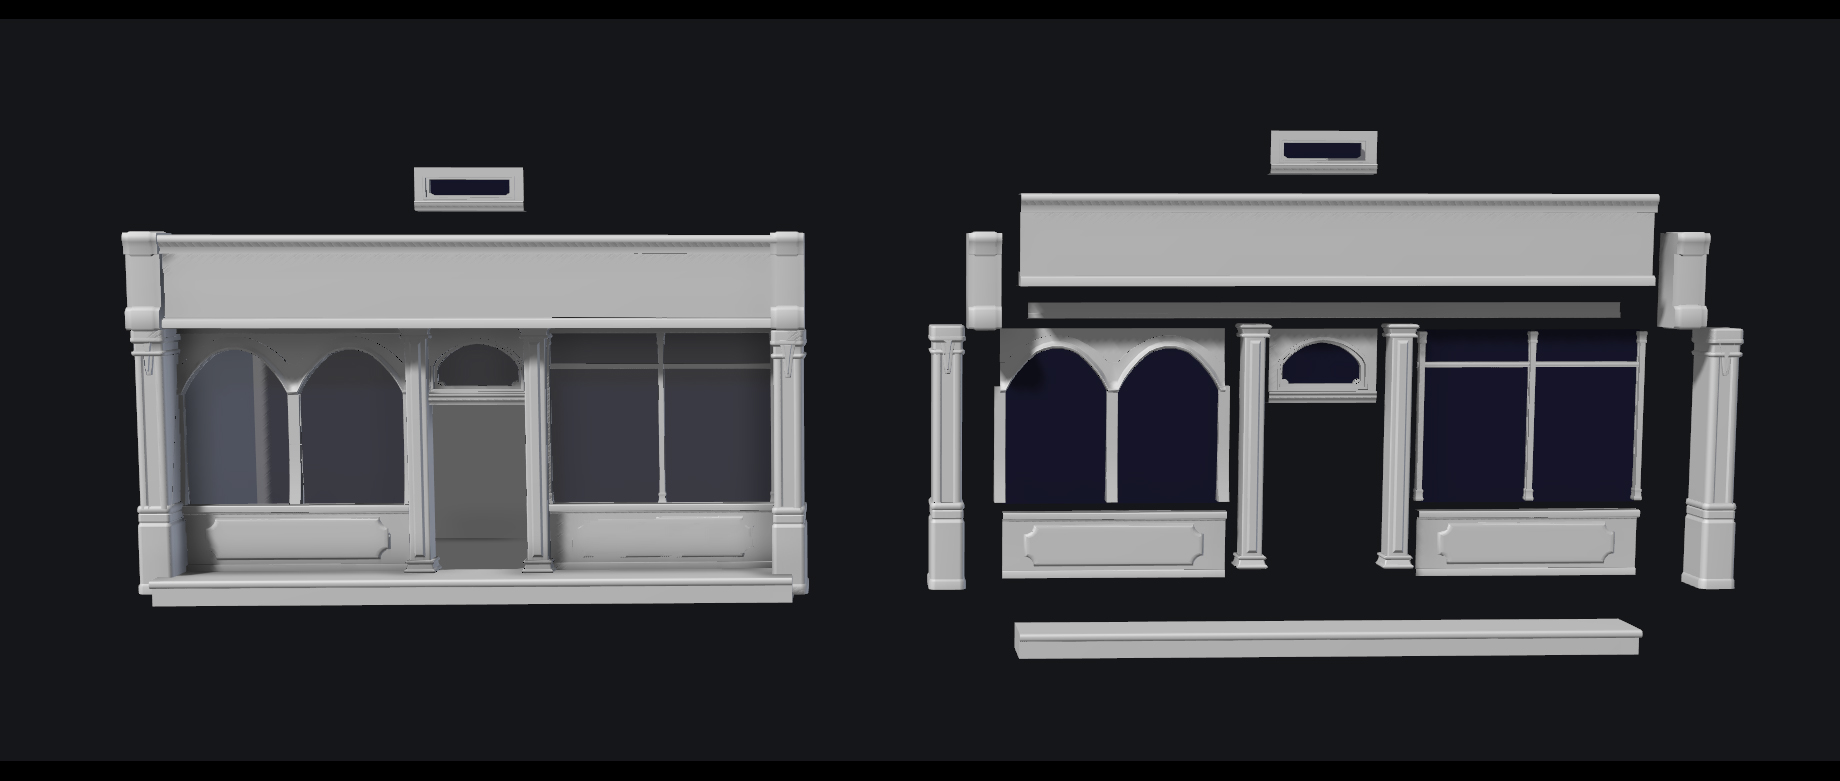
It is composed of three modular parts: a window section, a wall section, and the skylight. The unique parts are the central door along a corner section which help break the flatness of the building.
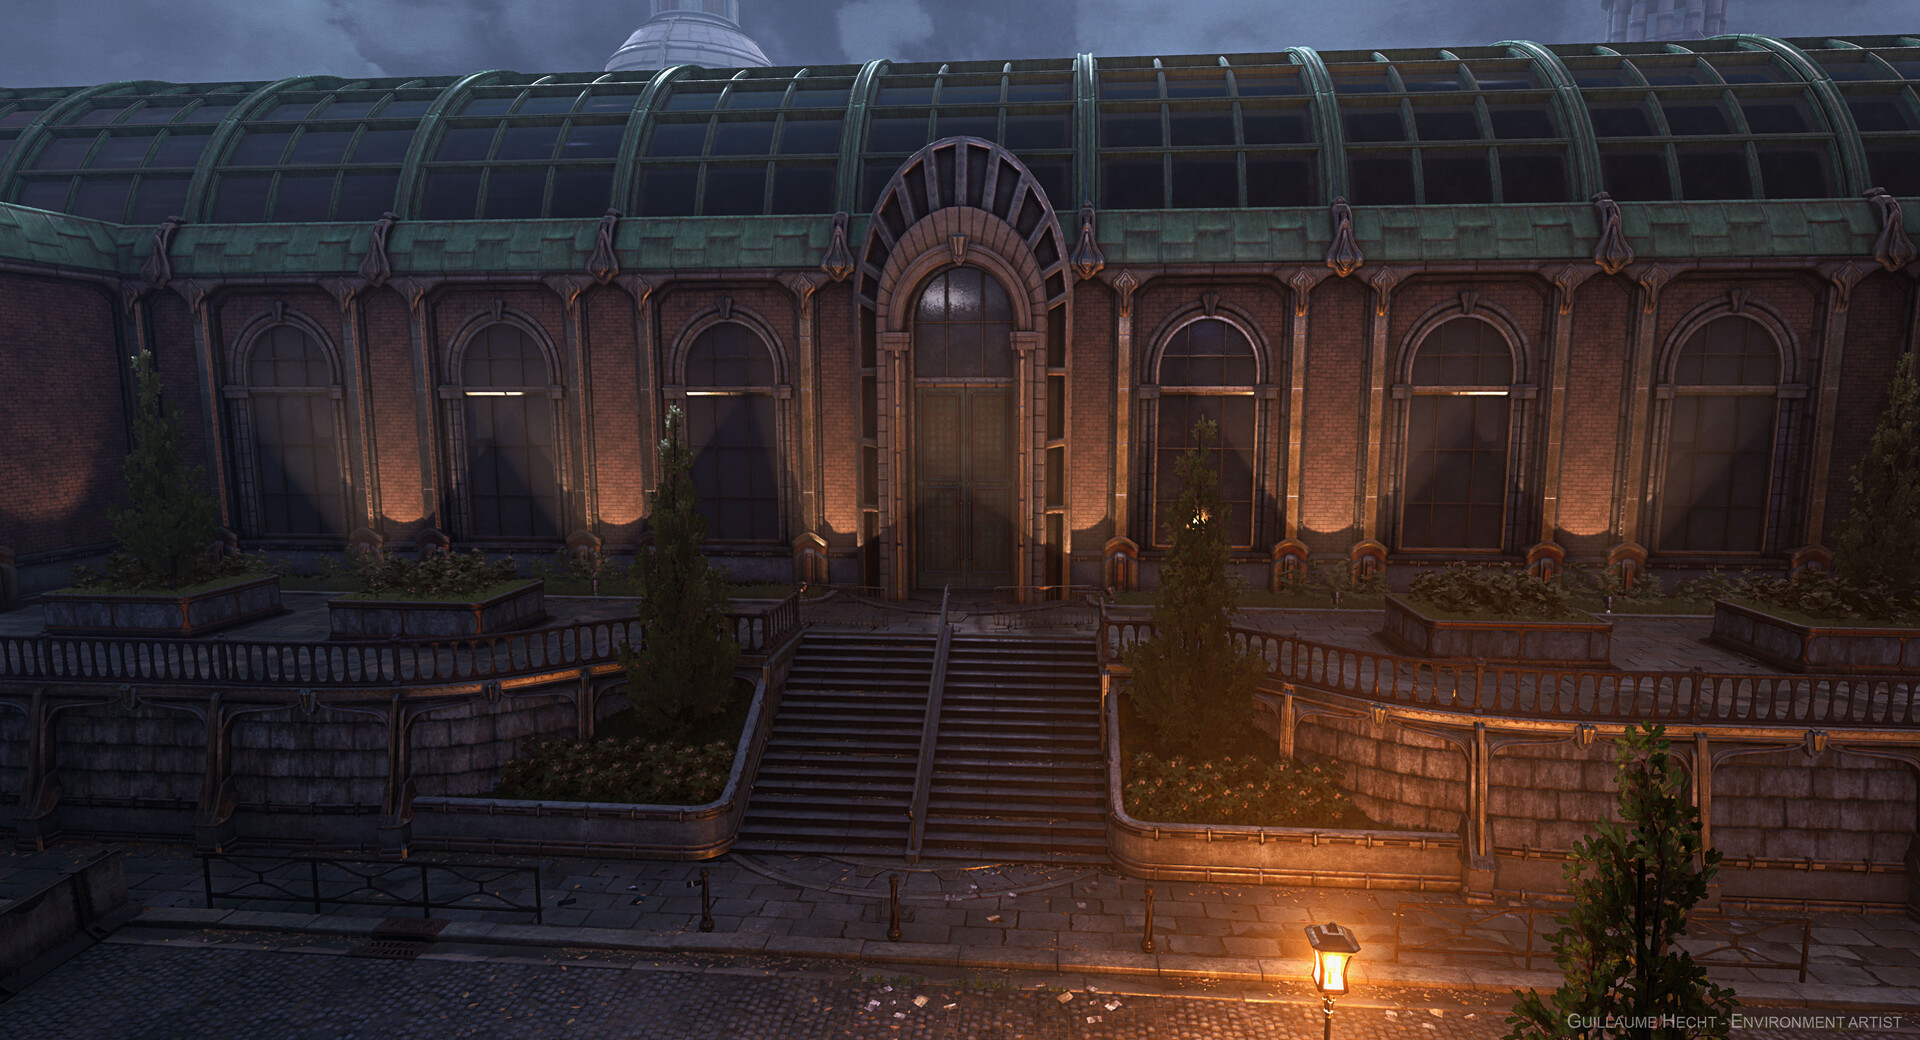
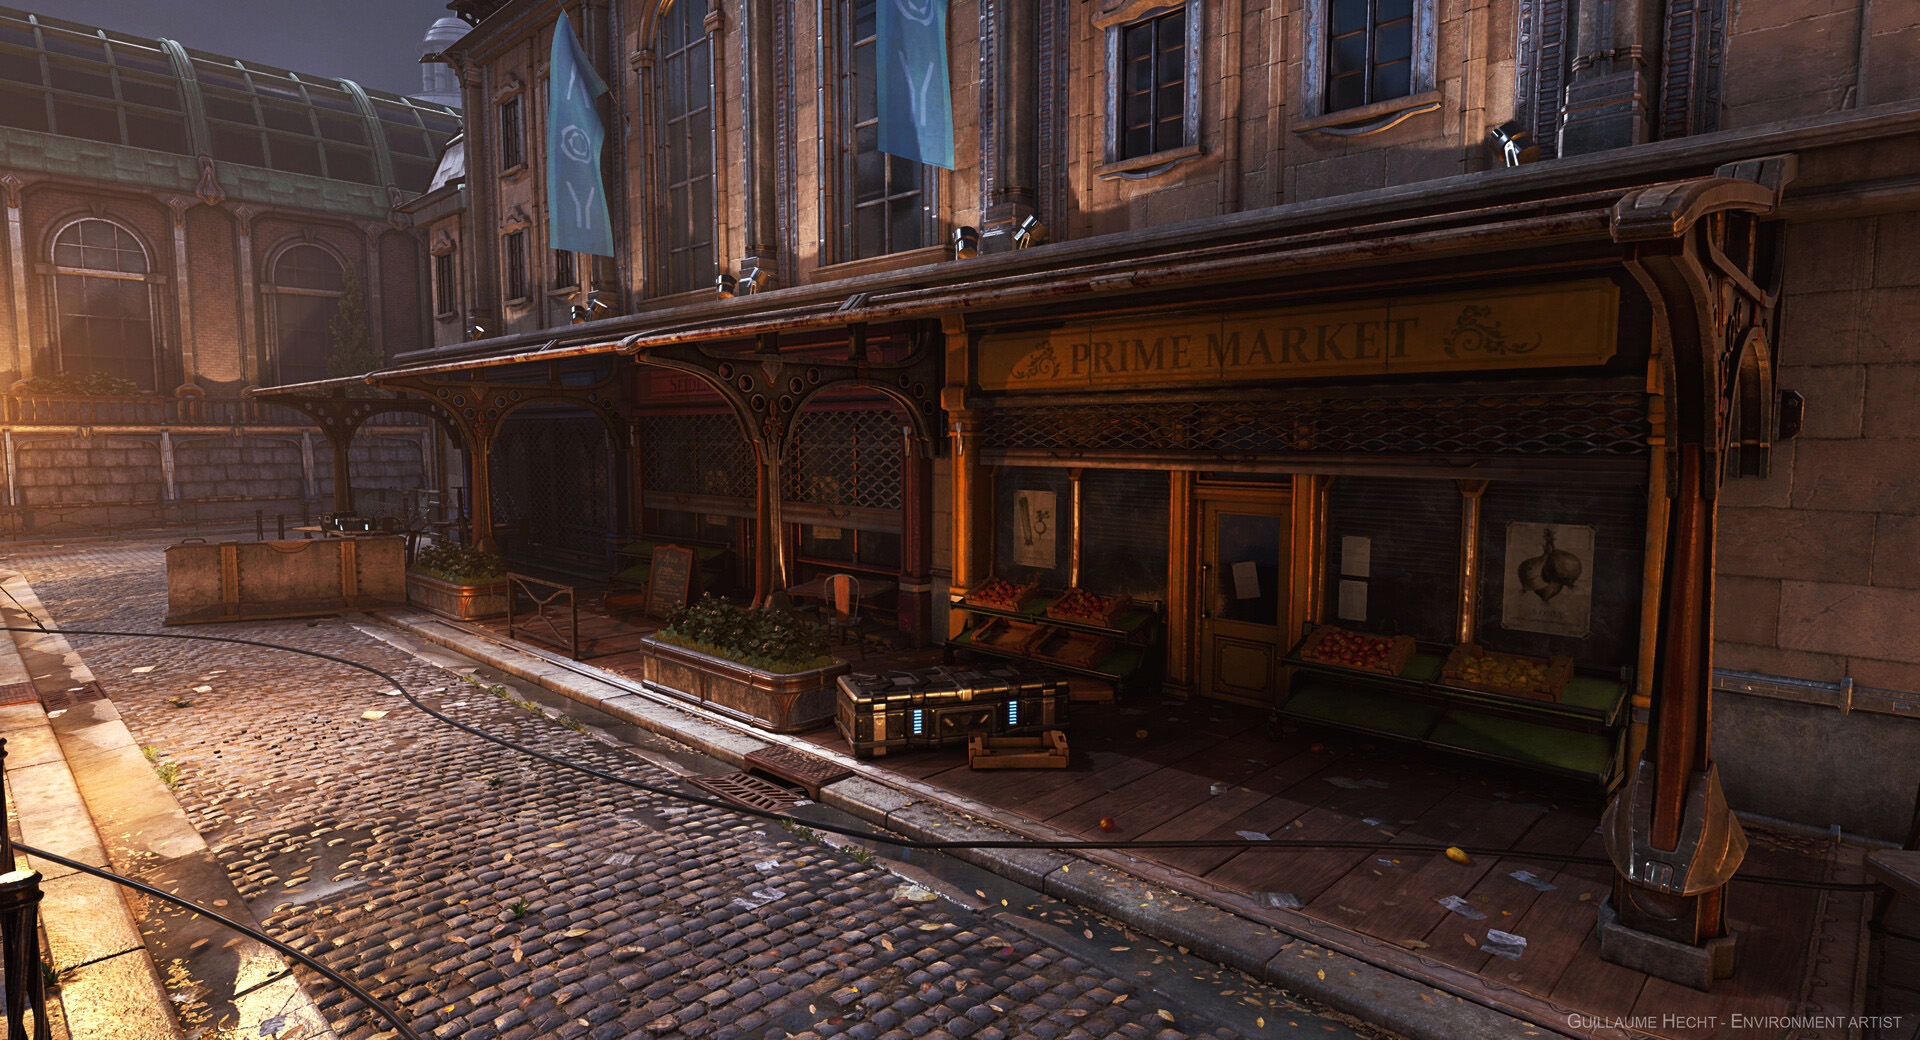
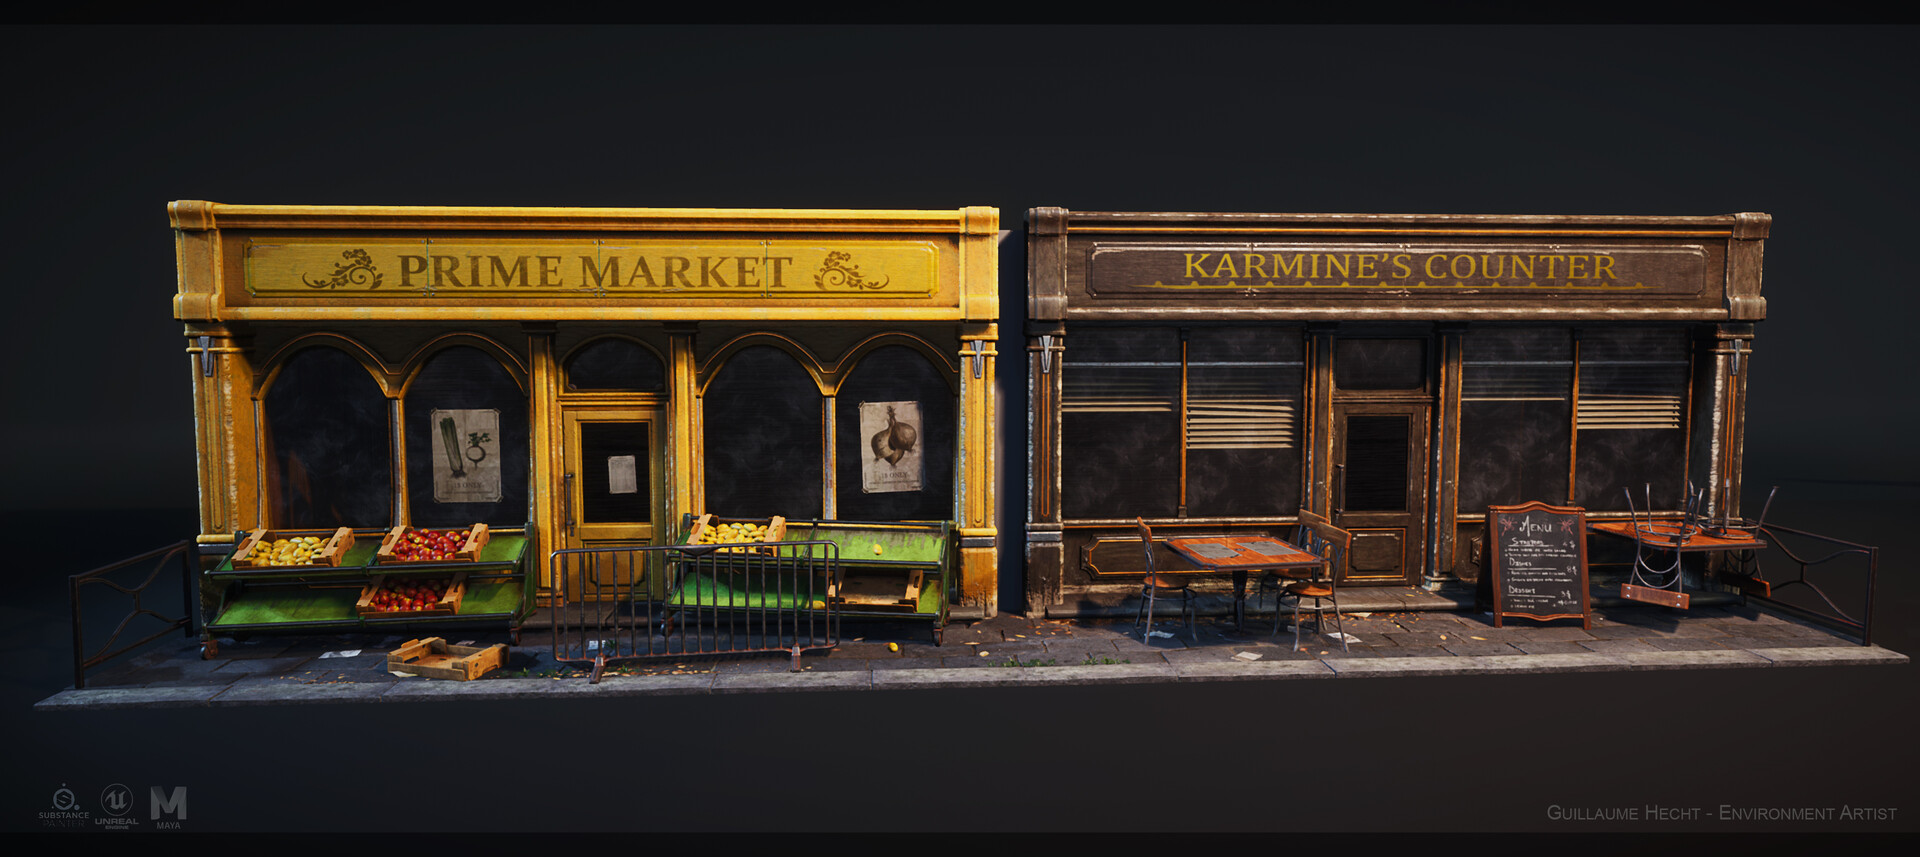
However, despite the architecture and the buildings being a huge part of the scene, I was still halfway through finishing it and I had to fill it with props and storytelling. What helped me here was the presence of shops at the bottom parts of structures. The place didn’t really fit residential stuff so this is why front shops were a good workaround.
Thanks to this, I could add more colors and micro details all while creating a natural focus for the viewer. The buildings are massive with stone and metal whereas shops are made of wood with plenty of colors and props.
Like the rest of the scene, they were designed to be used and reused to add variety. By modeling different elements (pillar, doors, window, top), I was able to make a lot of variants in Maya before sending it to Unreal, without the need to redo the UVs.
For asset creation, I followed a classic pattern. The first step is to list, or at least try to make a list of what would be needed in the scene. Despite the fact that I had some ideas about what would like to add, putting my thoughts on paper helped me to estimate what was left to produce, but also to avoid forgetting something.
To produce an asset, I start with a placeholder that I send to Unreal, to check its shape and size with the rest of the scene. Once I’m confident about the utility of the object, I push the placeholder to what I call a midpoly: its a model detailed enough to make a highpoly rather simply, but without any destructive bevel and unnecessary detail, to also make a low poly out of it.
Here is an example with the antenna. This was one of the most complex objects of the scene, and most of my assets are based on this workflow.
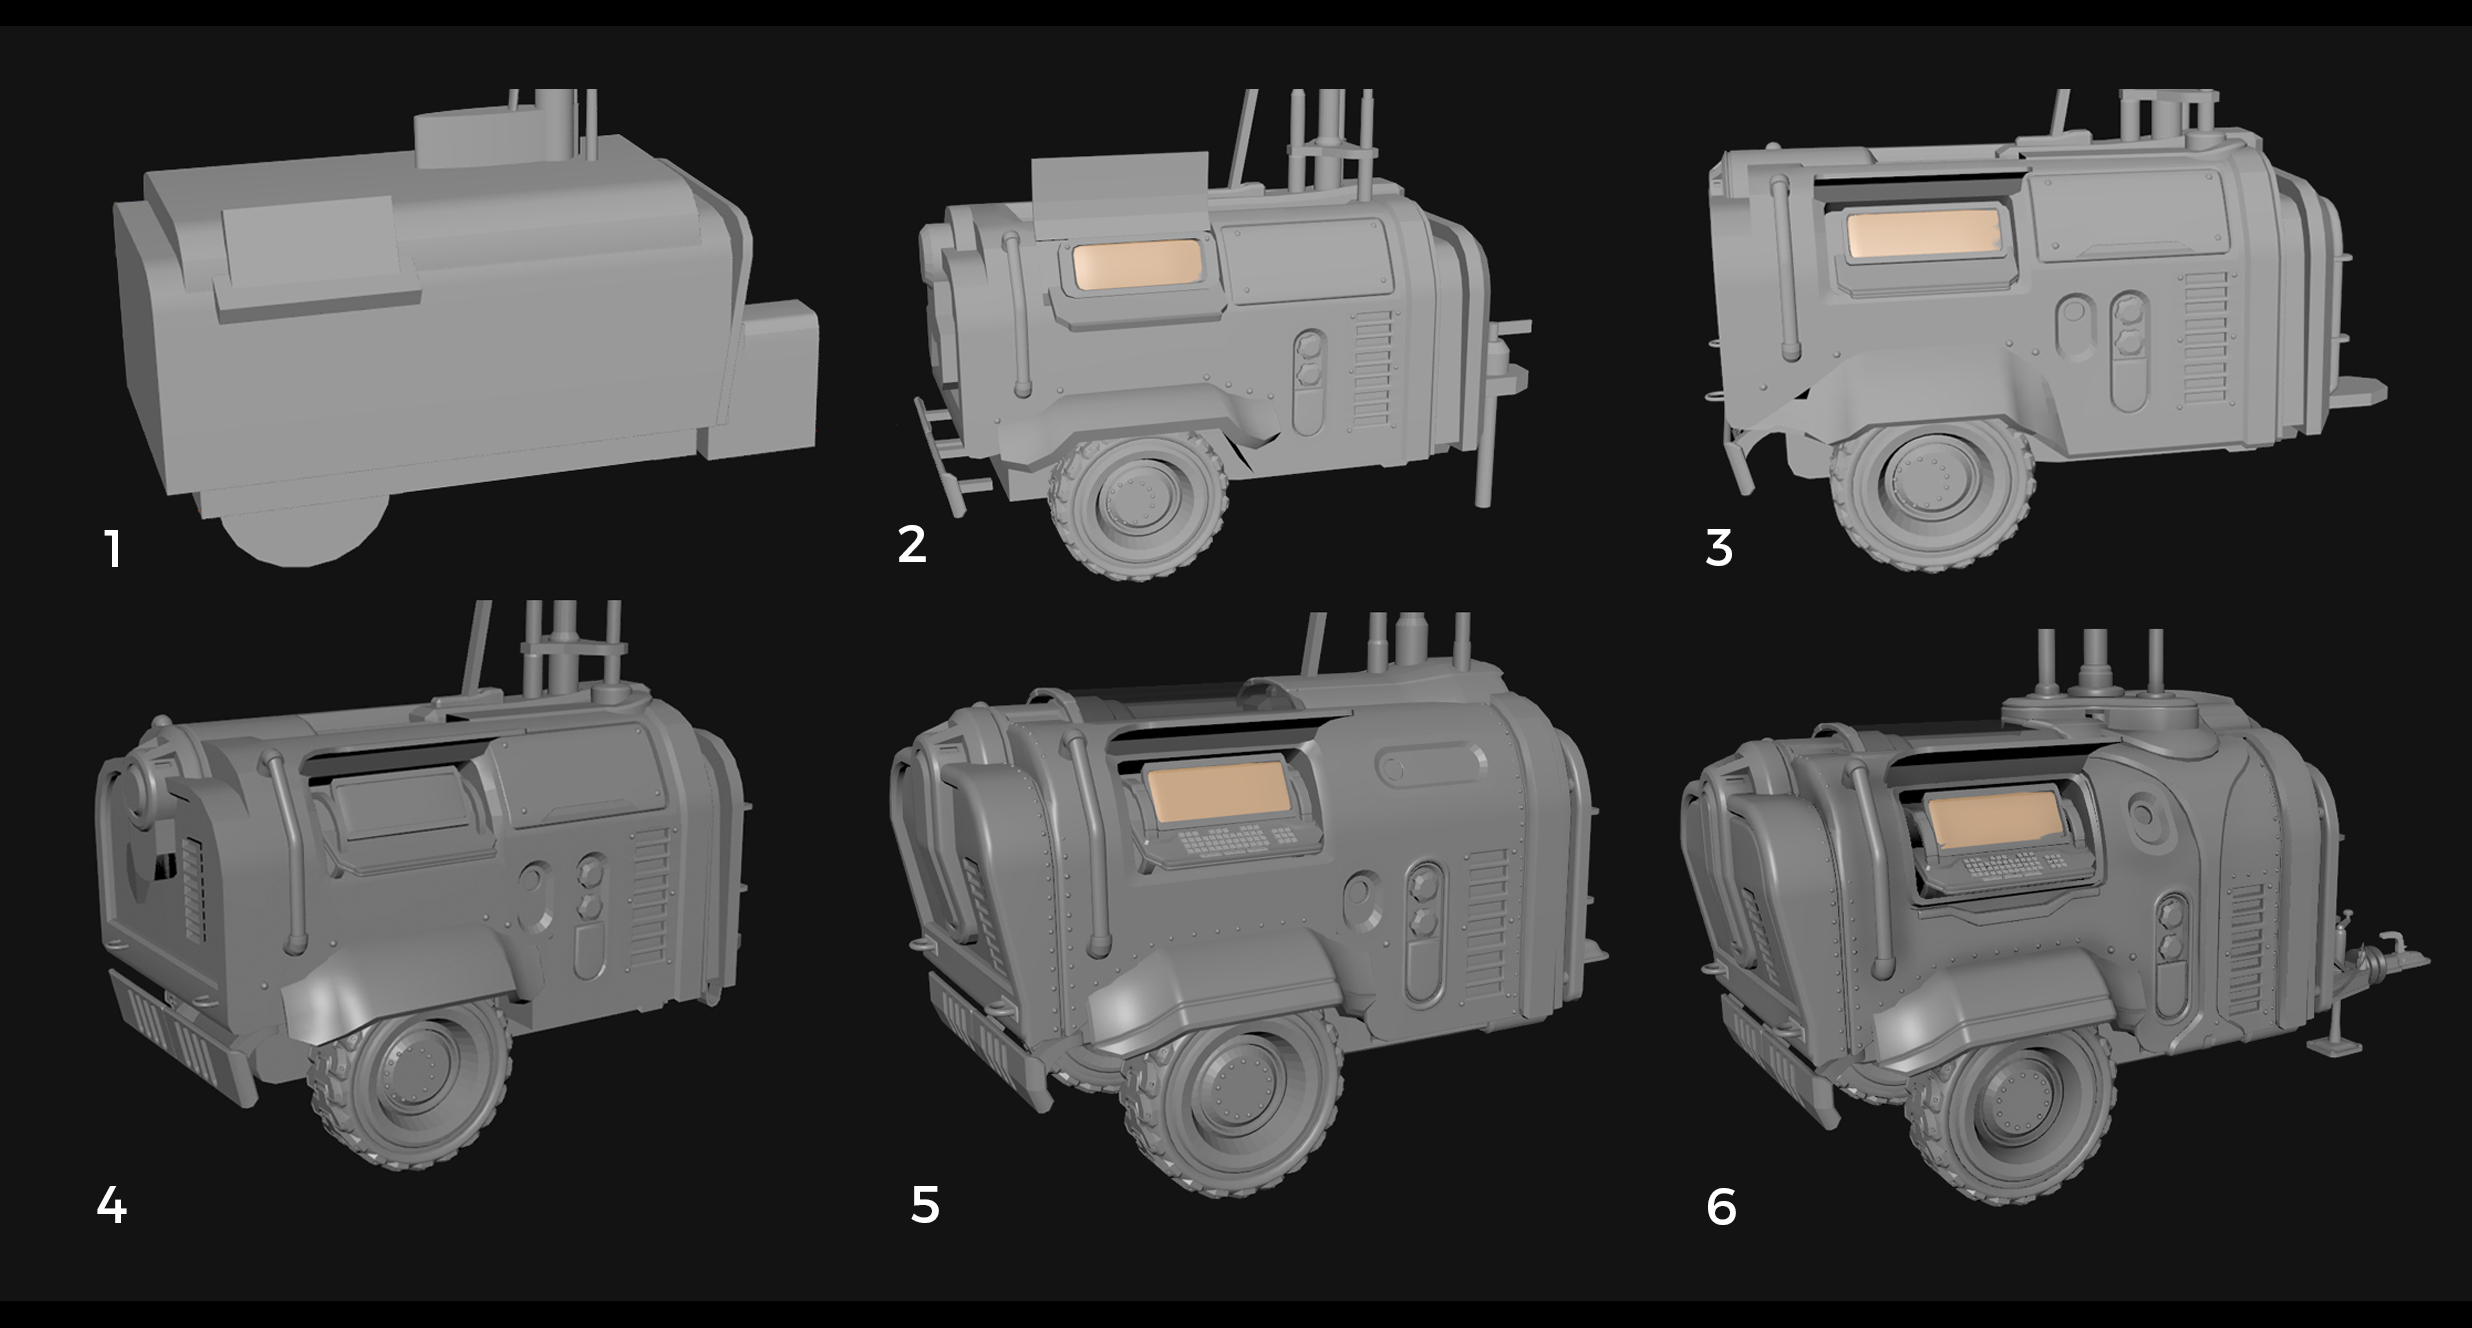
The design process from placeholder to mid poly.
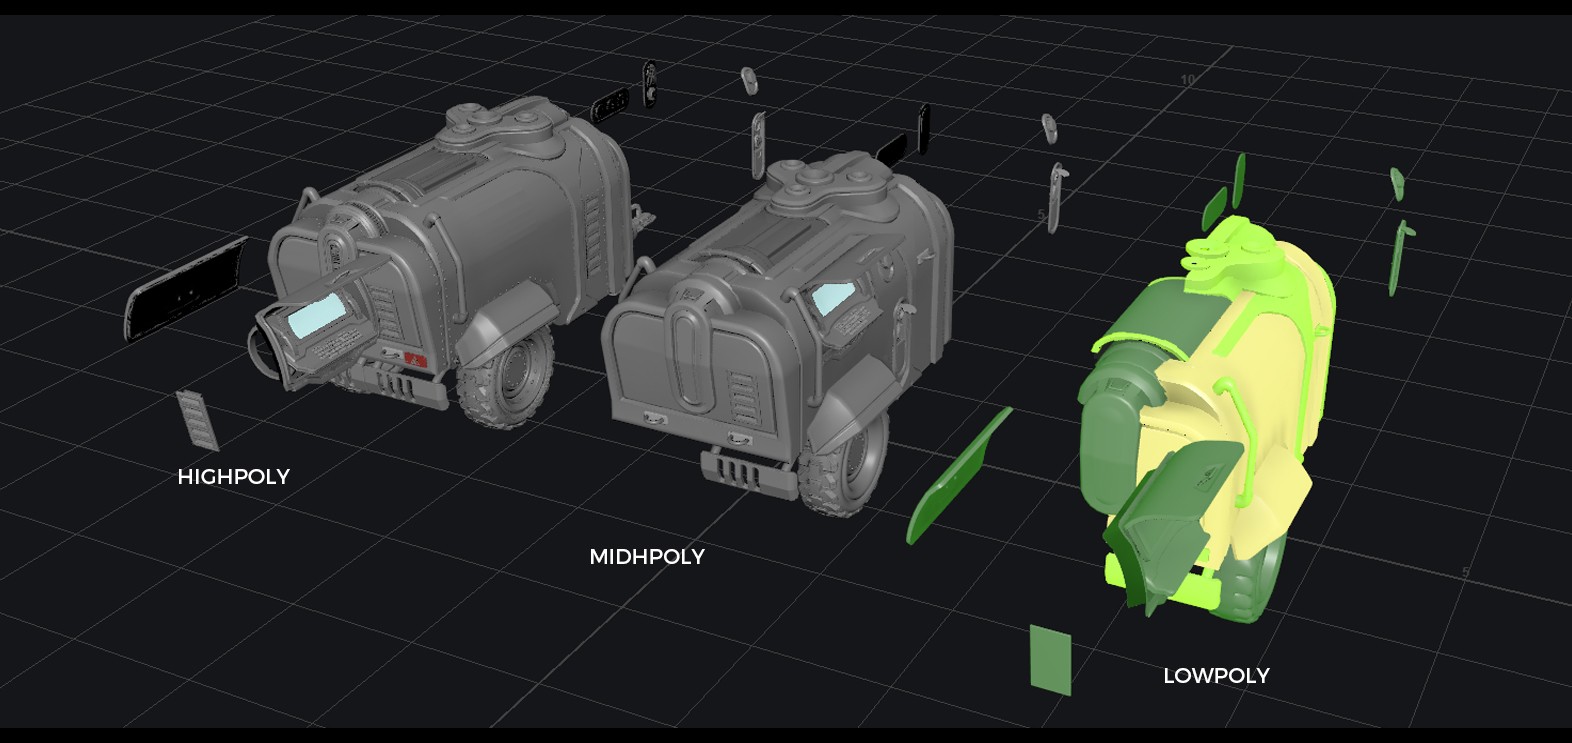
On the left the high poly, at the center the midpoly, and at the right the lowpoly. This one is split in half to reuse UVs on both sizes. Even if the final use of this item is a portfolio piece, I always optimize my models when it comes to UVs, polycounts and drawcalls, and check for baking/smoothing group issues. Good manners come with practice!
Concerning the texturing, Substance Painter is pretty efficient. By mixing base materials of Substance Painter with some grunge and dirt mask, I often end up close to the desired result where I just need to adjust a few things. What really helped me was the ability to create custom smart materials from what I already created on a model. 
The result on the antenna
A great example of the metal smart material, originally done for the ark, and then reapplied and tweaked on many other assets: roofs, guardrails, trims and so on:
How long did the piece take overall? How did you break down the time?
That is a good question. Like I said earlier, I started my sketchy layout in late 2017, during 2-3 months of various experiments. However, I quickly faced the lack of direction and references and I couldn’t focus properly on such a large project at this moment (for personal and professional reasons). I took a break from around December 2017 to October 2018.
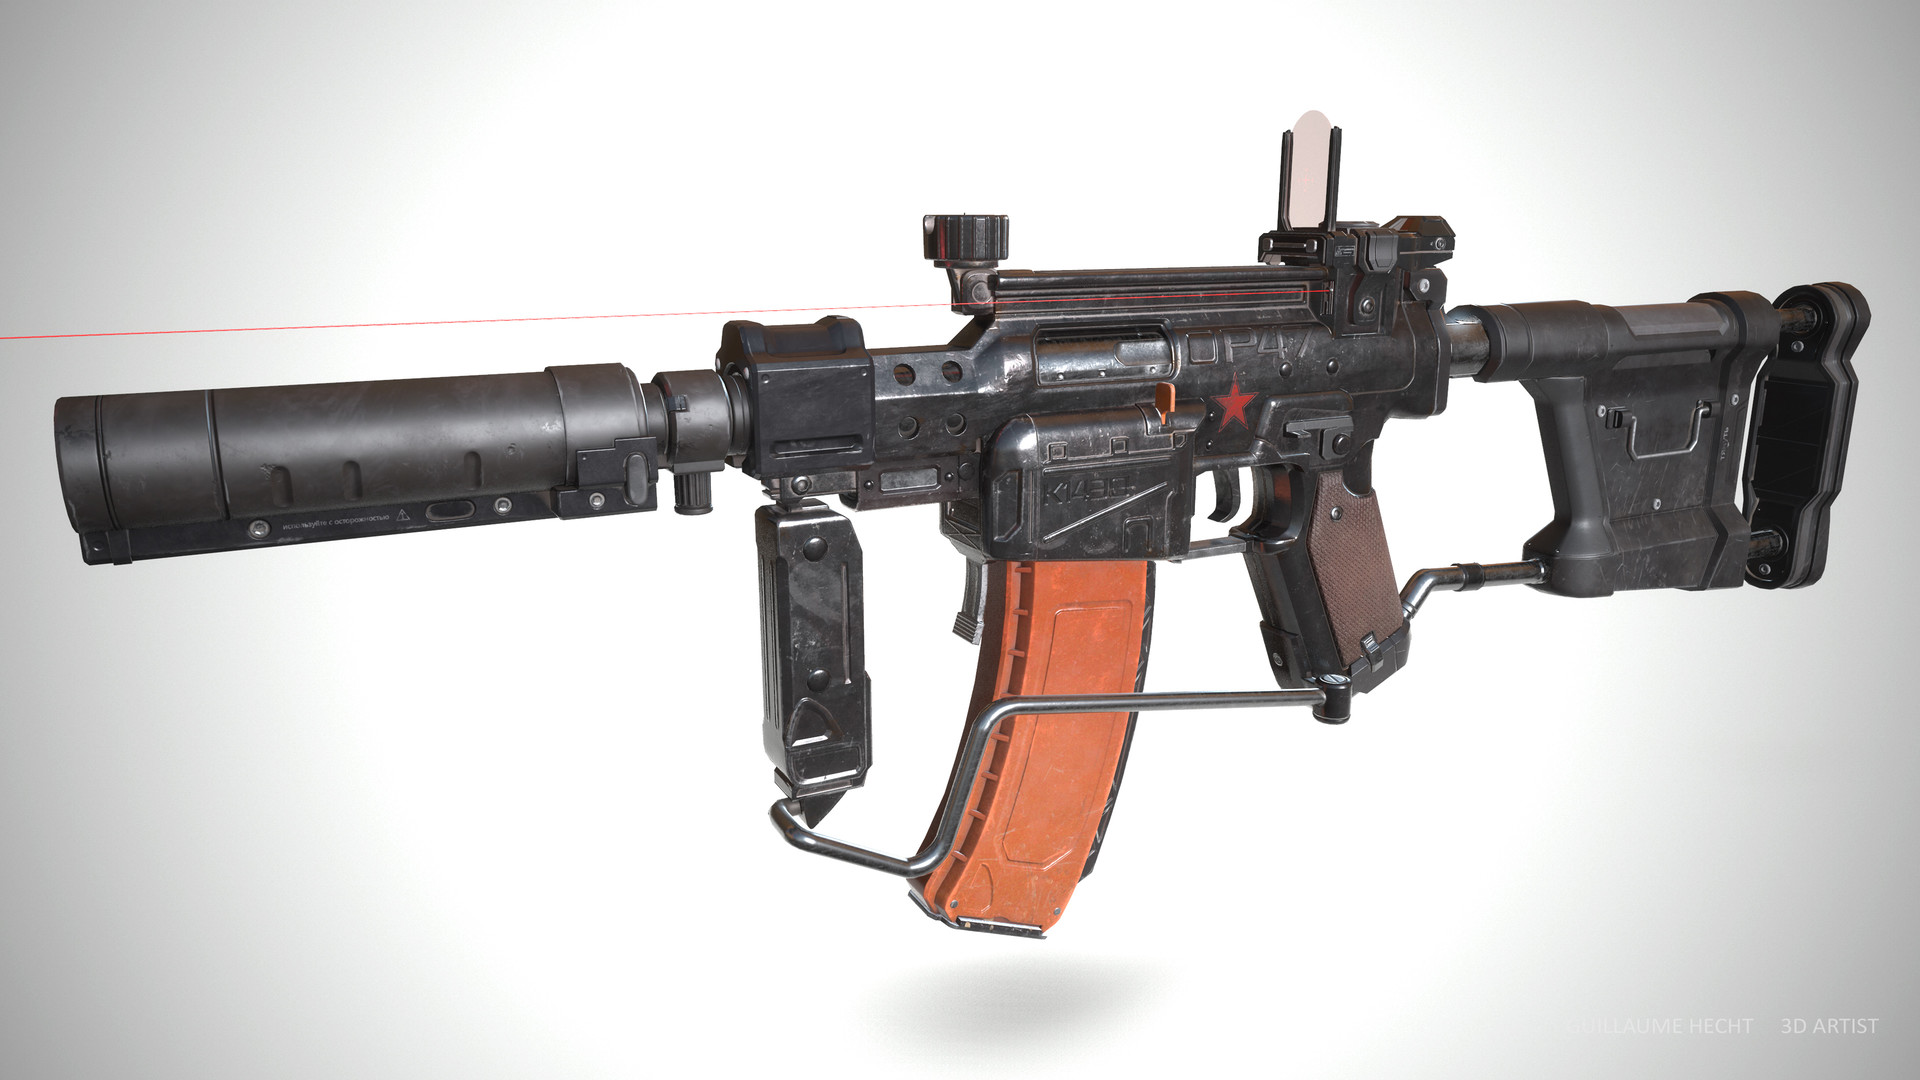
During that time, I took a step back and worked on smaller personal stuff like the P47: a hard surface exercise based on a concept from Longque Chen. The goal of this period was to strengthen my 3D skills about texturing, baking, and more importantly, get my 3D workflow efficient enough to be able to face bigger projects like the one I started.
When I came back to it in October 2018, I only worked on the lighting to get the mood right. I was still unsure if the scene would be daylight, foggy or by night. By gathering references, I was able to narrow my thoughts. After many tests in various compositions, I finally came up to a result on which I was able to tell myself “alright, I can make something out of it”.

Once these 2-3 weeks of lighting research were done, it was time to start the production. At first, I kept working on building and architectures as they were defining the boundaries of my composition. Around January 2019, I remodeled shops, roads and other “secondary” structures to have something cleaner and more defined.
All the while, I was still tweaking, testing and improving the overall composition and lighting in the scene. Once most of the environment was settled and I was pretty sure it wouldn’t really change anymore, I started working on props.
I created a Google sheet, listing all assets I was thinking of and gave each one a “work value”. This “work value” allowed me to ranks all objects from the most complex to the easiest to achieve. Despite it not being directly a time estimation, it helped me to manage my time. I asked myself: do I need a full weekend to work efficiently on these assets? Or could I split it through a week?
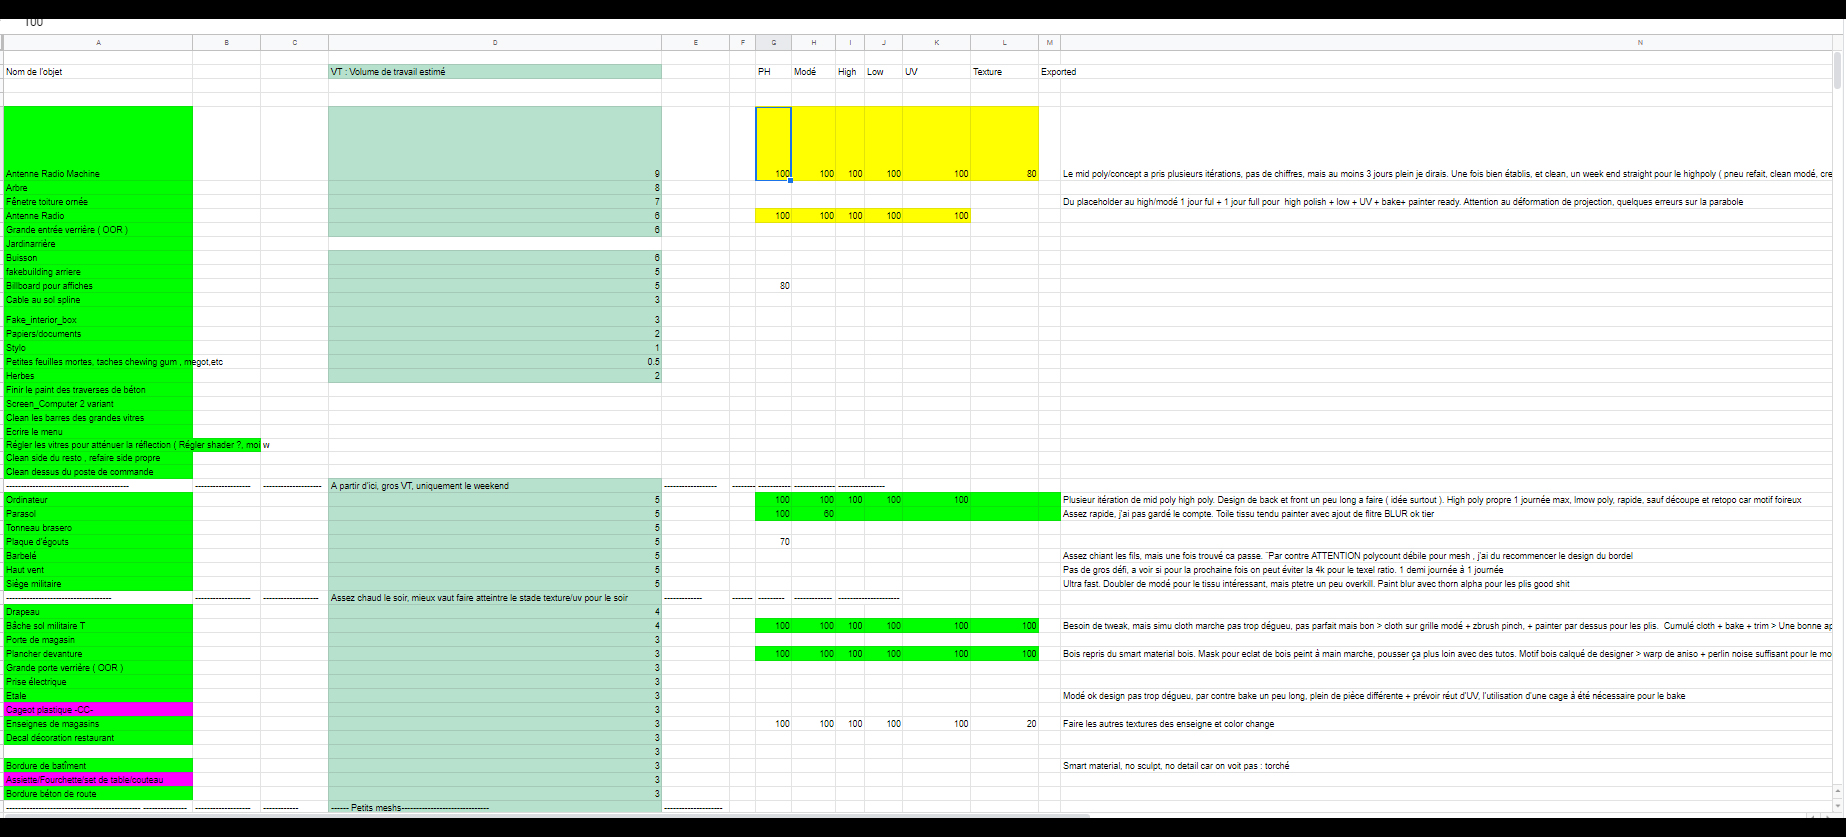
In addition to this, I took notes on my progression on assets to see where I was struggling, what I could improve, how long UVs or high poly took me, etc. The more I review my workflow and time estimate, the better I’ll be next time on a similar case.
For months, I produced all my assets and kept iterating on the overall environment, tweaking materials, lighting, and composition. To gain a bit of productivity, I placed my project on a cloud platform. This allowed me to work on it during my lunch break at Ubisoft.
Some weeks I was quite productive and sometimes less. Overall, I kept working on it regularly until October 2019. At this point, I was close to completion. All textures were done, the composition was good and my models were ready. However, I kept adjusting the lighting and contrast of the scene according to feedback from my friends and peers for a week, and this was the most decisive part of my project.
Because my screens were not calibrated perfectly, along with the fact I had worked on the same thing for an entire year, I was just blind and I couldn’t step back enough to clearly see that my scene was too dark, without enough contrast. I would really like to thank people who helped me at this stage. It was a “game-changer” step. You guys are awesome!
I kept working another month to screen everything, polish my shots, properly present my assets, check and double-check if I missed something. I really wanted to take the time to polish until the last thumbnail, as it represents more than a year of work – even more, if we consider the previous research. Everything was ready to go on Linkedin, Reddit, Artstation, and Facebook on November 18th.
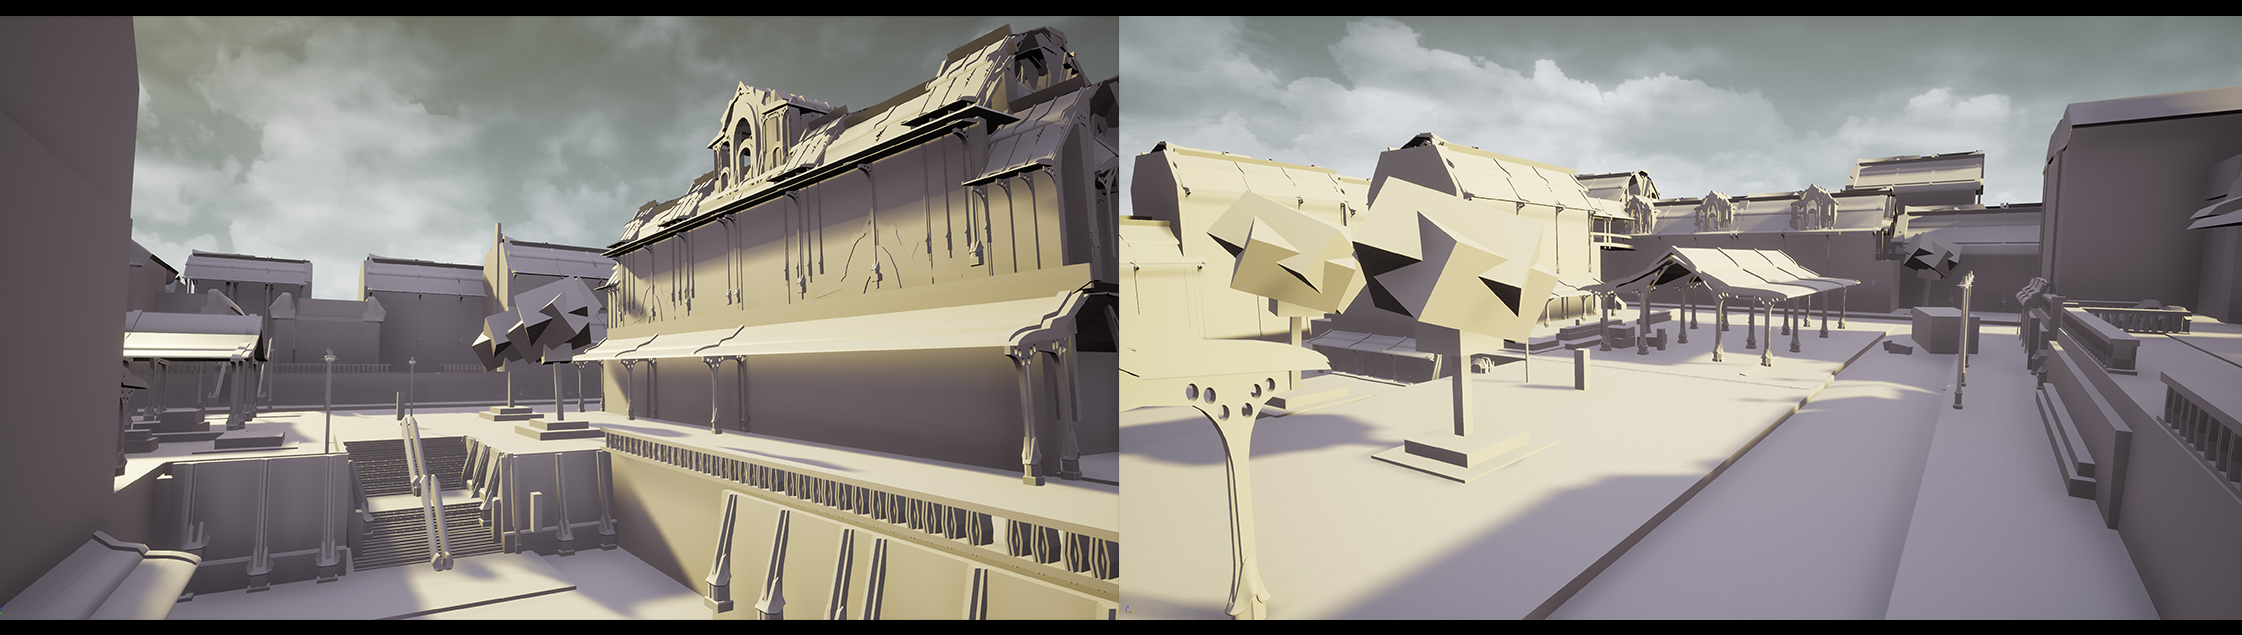
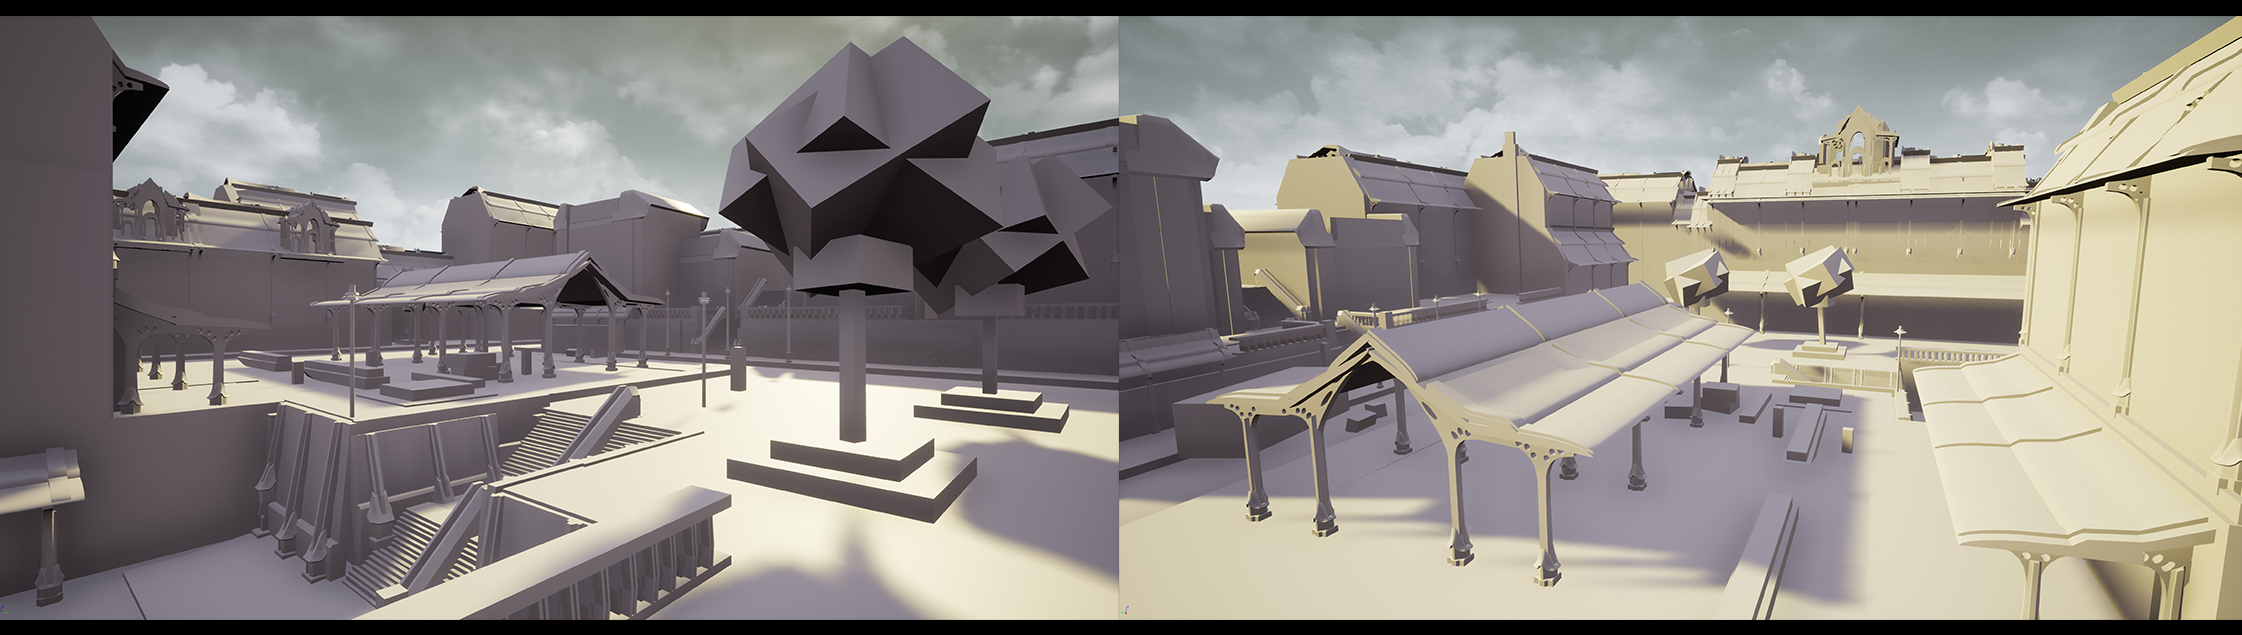
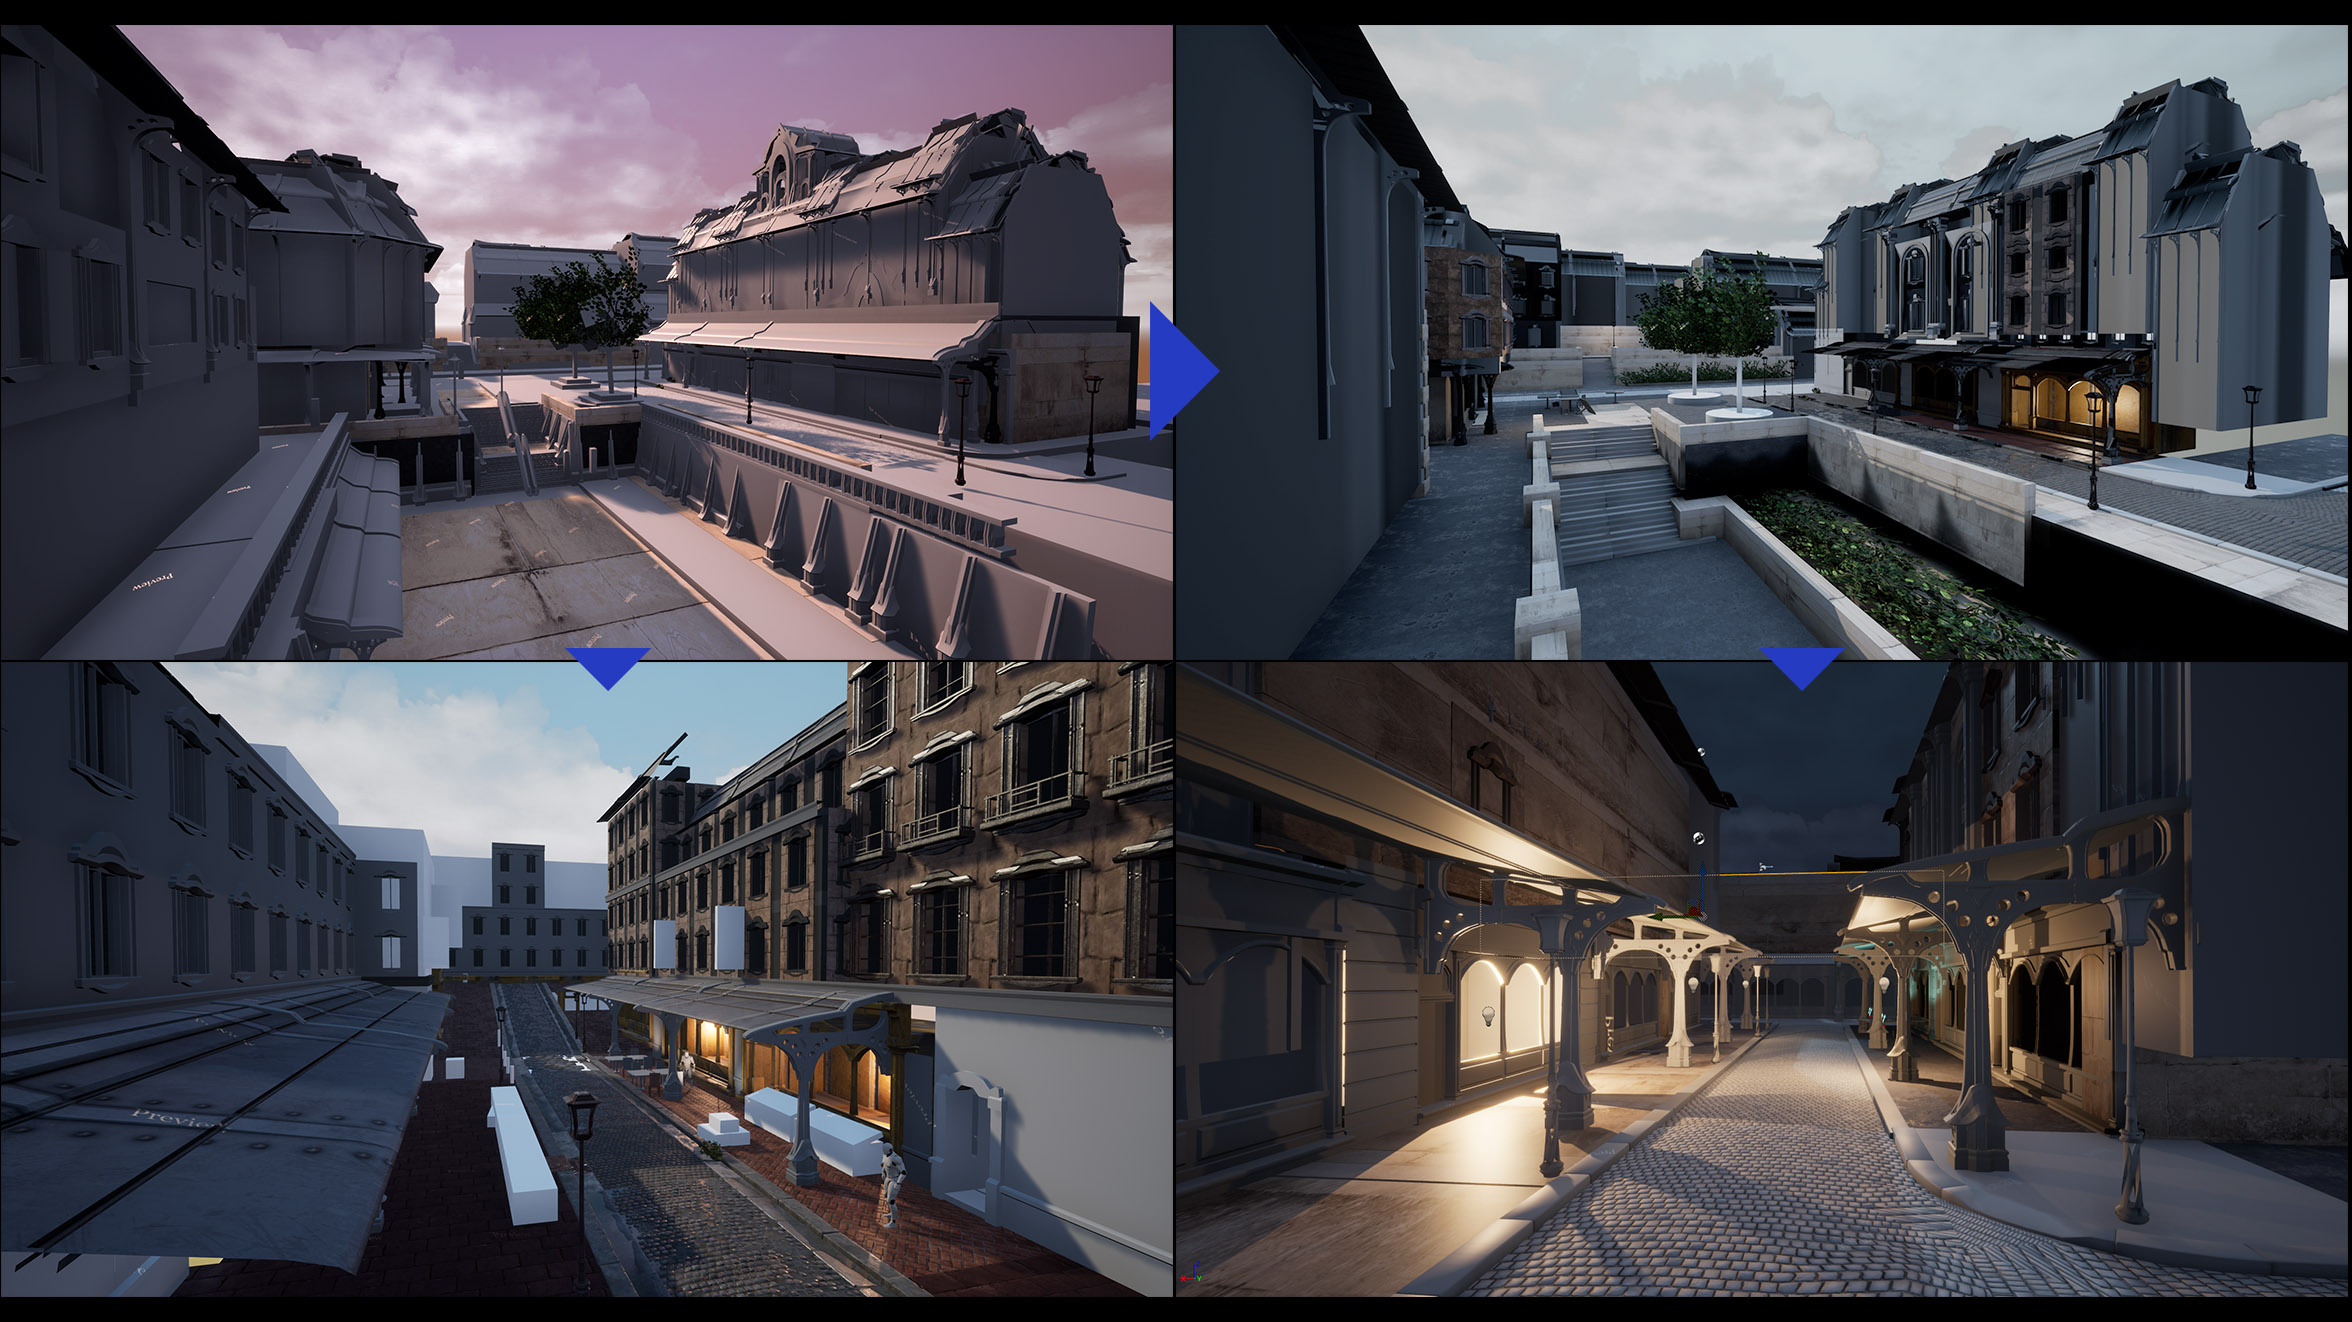
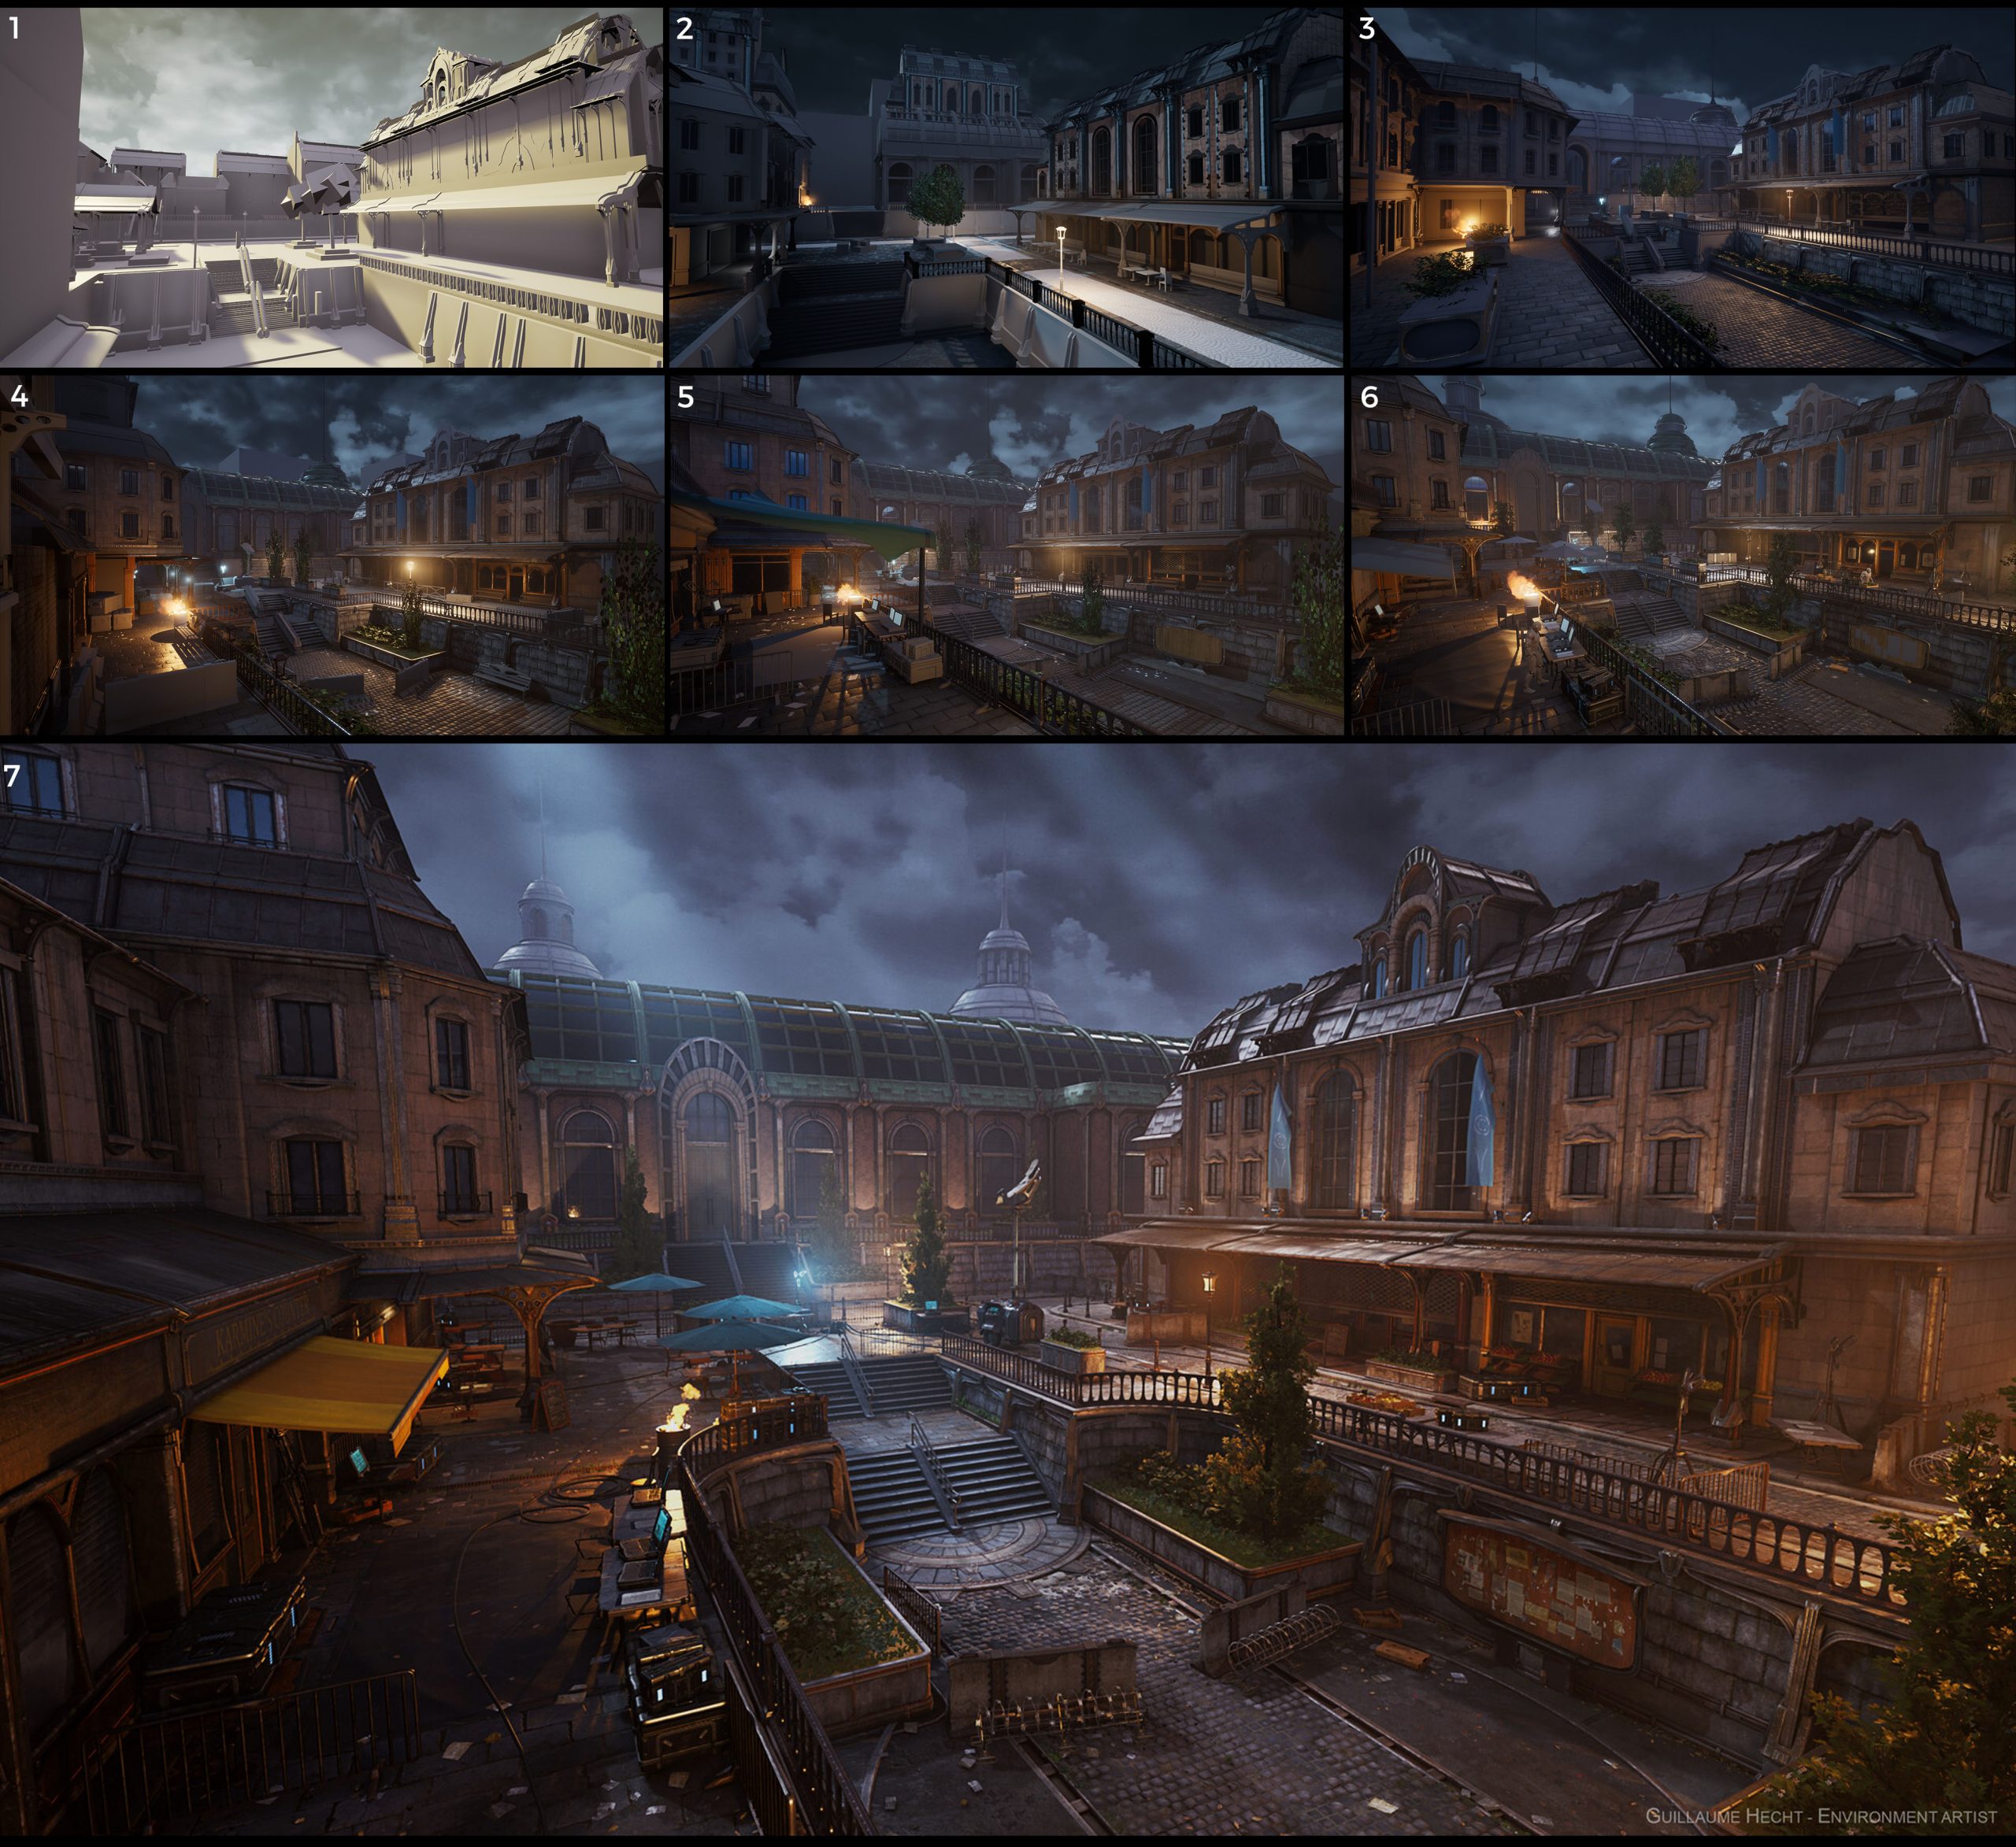 Progress of the scene
What did you learn and what tips do you have for other environment artists who aspire to work on a big personal project like this?
What I learned from this UE4 scene is nothing new: regularity along with a clear direction ( thanks to my experimentation AND references) are what kept me motivated this long. Keeping focus during all this time has been tough for me. It was the first time for me to stick to a personal work for so long.
I also had a lot of expectations for this project. It was more than a portfolio piece, I wanted it to be a major step up in my environment art skills and prove myself I could overcome it. Giving yourself challenges and expectations worked for me as a fuel. I know it depends on people, sometimes having too many expectations can block your creativity or worse, depress you.
Take breaks, ask for feedback and give yourself time. This would be the greatest advice I would give after this project. Give yourself time to develop your skills, learn, fail, and redo. If you regularly do so, you’ll eventually overcome challenges. The thing is to set your goals high enough to make it hard to reach, but not impossible. Otherwise, it’s counterproductive. If you think to take a step back from a project, even for a few months, it can help you do so. Do not hesitate to ask for feedback. Especially if you have been working on something so long you can’t see your own mistakes anymore. Try to not sacrifice your sleep over work. It might be productive for a few days or weeks, but it’s often an infernal circle. Take care of yourself!
See more of Guillaume’s work here.