KitBash3d: The Future Slums Kit
Sava Zivkovic is a Director and CG artist based in Belgrade, Serbia. He has a strong belief in devoting time to personal projects, has received several awards and recognitions from the CG industry and has also given back to the industry by publishing some of his personal tutorials. In this Breakdown, Sava takes us through his process of creating the hero image for KitBash3d’s Future Slums Kit, modeled by Mihailo Radosevic.
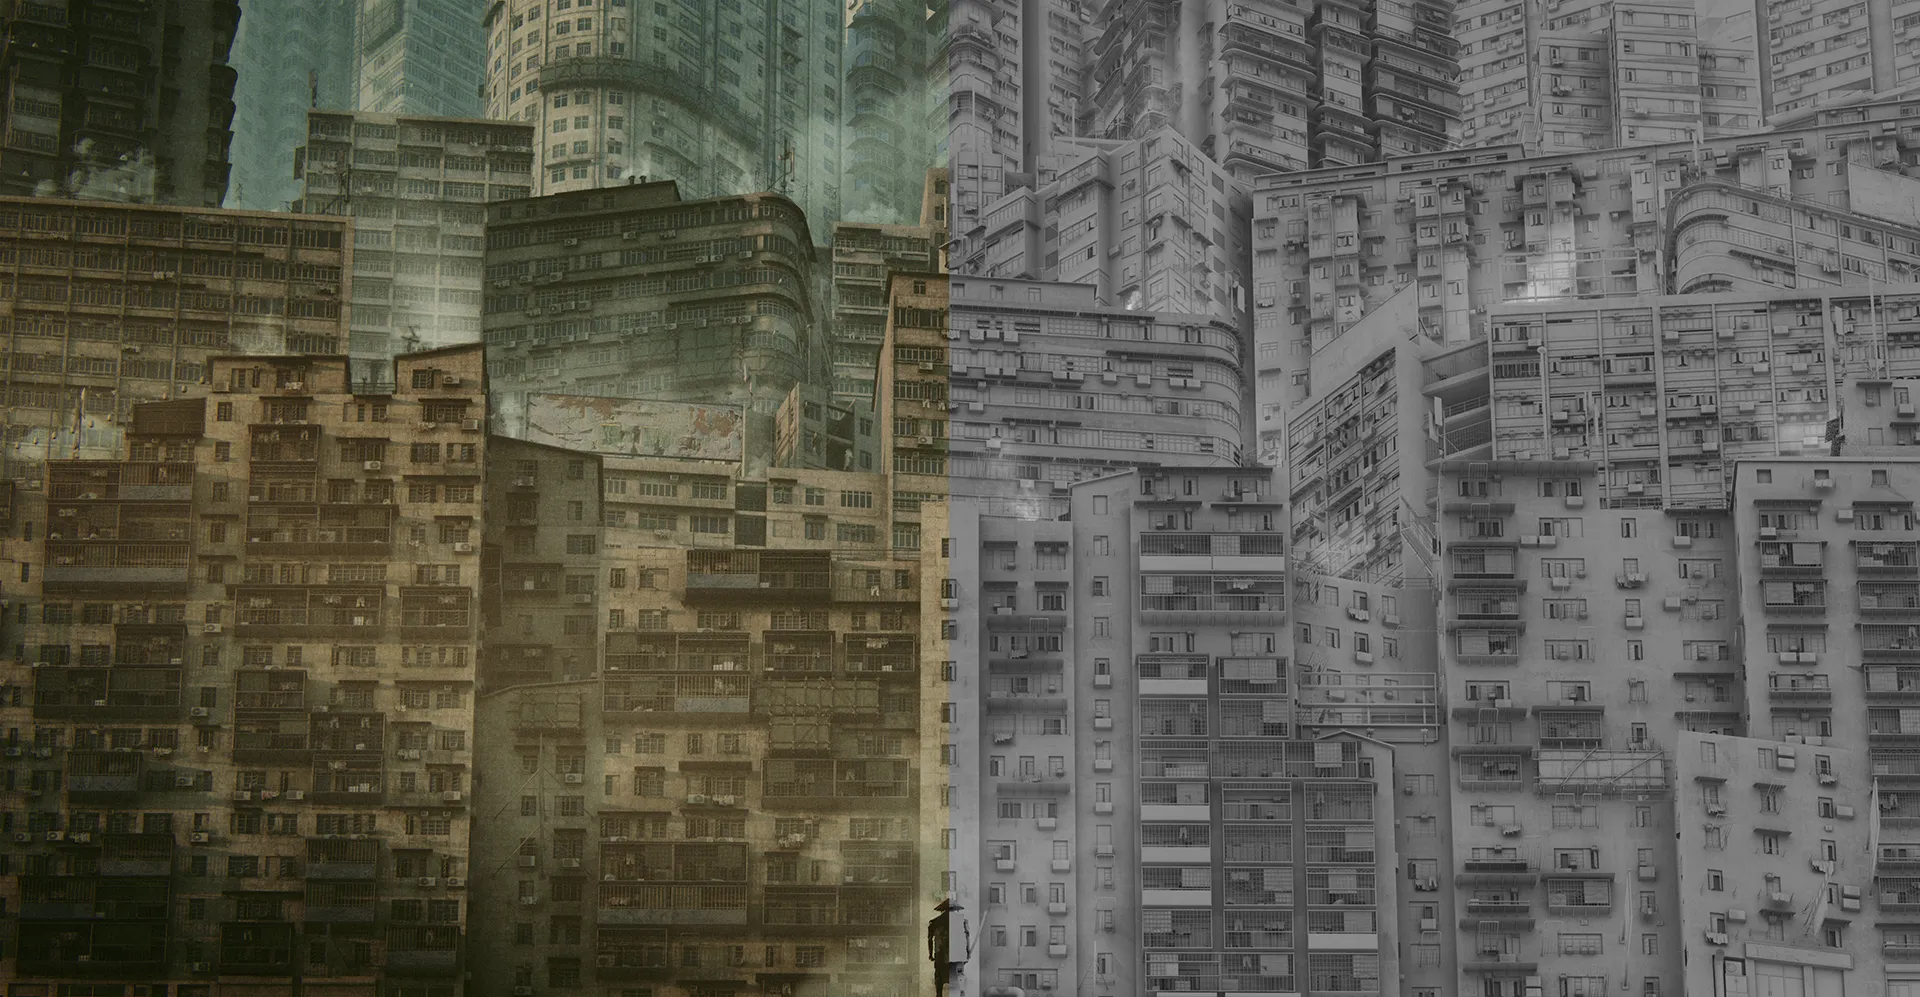
The Kit
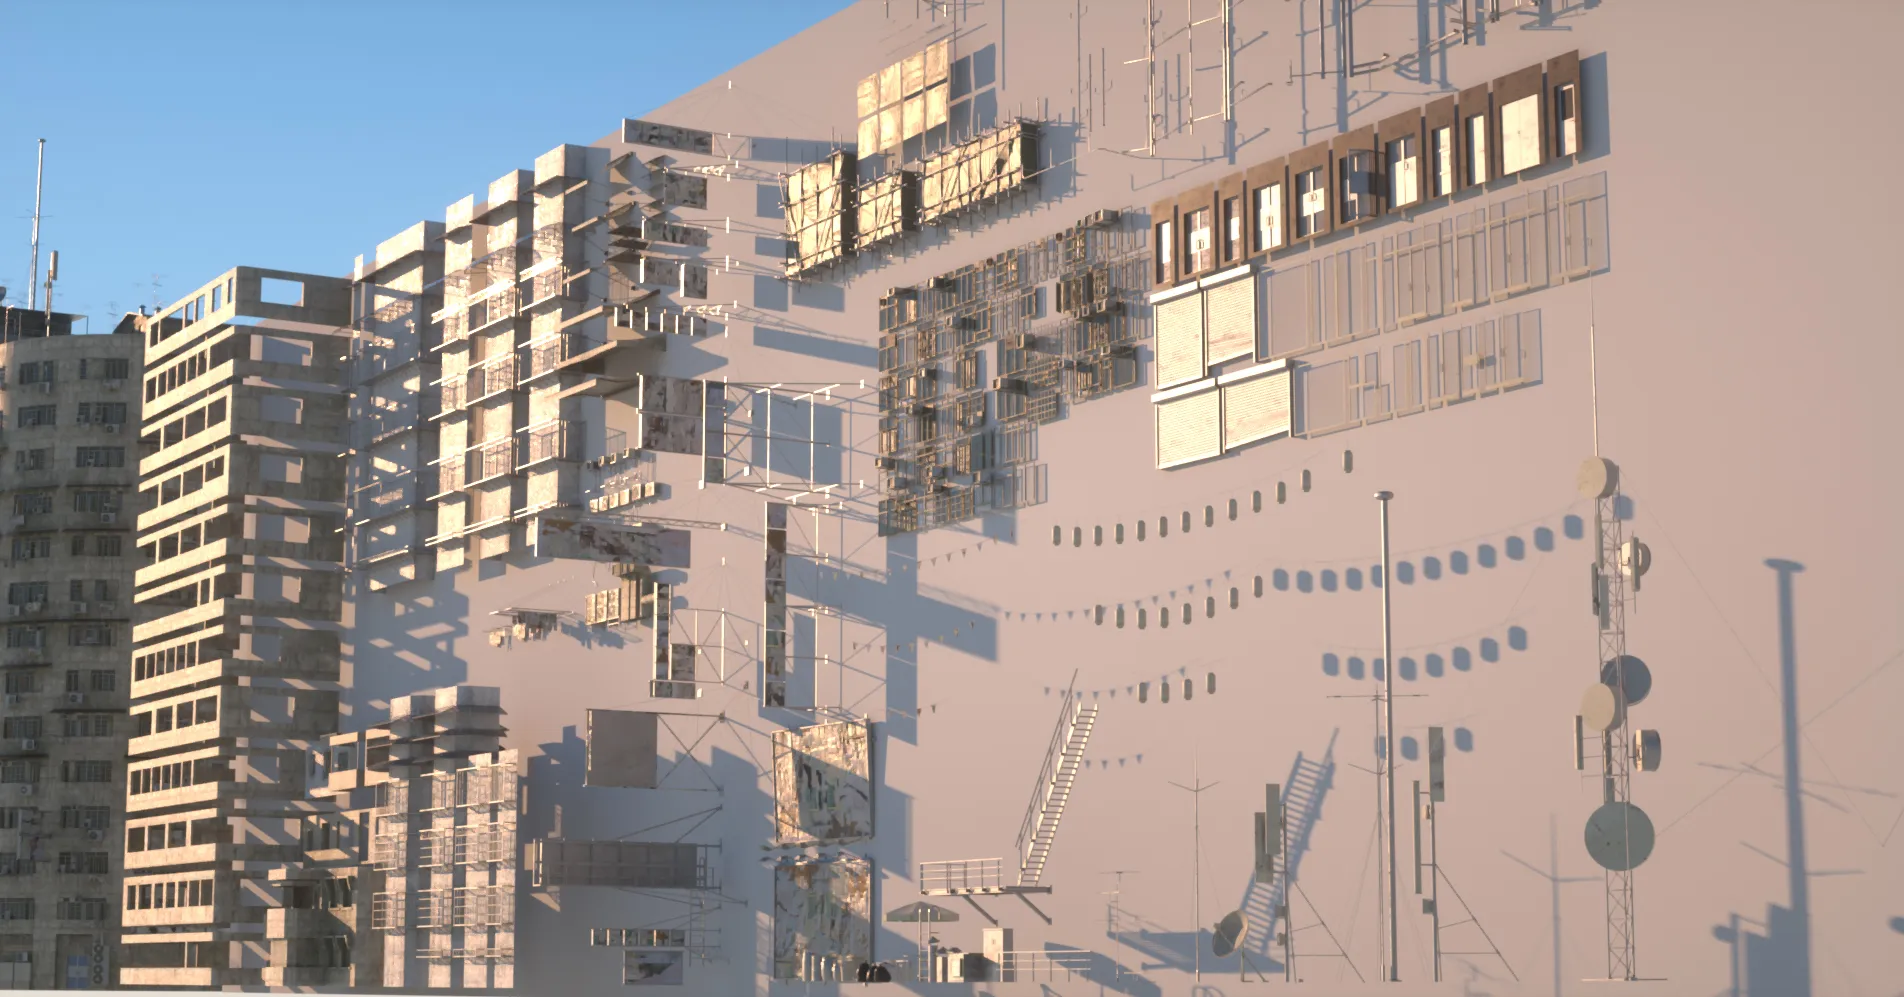
The Future Slums kit comes with 16 incredibly detailed building models inspired by Kowloon Walled City. The models range from densely packed building blocks to towers, accompanied by incredible small-scale sub-details, such as AC units, scaffolding, roof furniture, antennas, billboard signs, and even laundry hanging from the windows and bundles of trash on the balconies.
All of the smaller details come in an isolated group, making it easier for kitbashing.
 This kit comes fully textured and includes some nice variation in the textures and materials, allowing you to quickly change things around to fit your needs. For the cover image, all the materials were converted into Octane materials since that’s my renderer of choice.
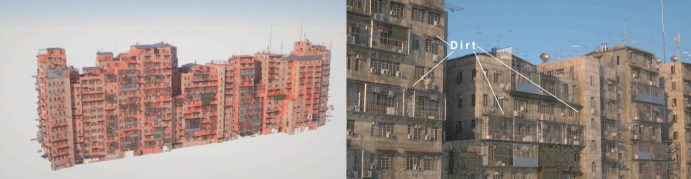
 I kept most of the materials pretty basic since I knew I was going to be far away from the models; the only materials that got extra attention were the grey and beige wall materials. Since these cover most of the surfaces, they needed an extra layer of dirt to break things up a bit. This was achieved by using the Octane blend material and mixing in two textures with a dirt map in Octane.
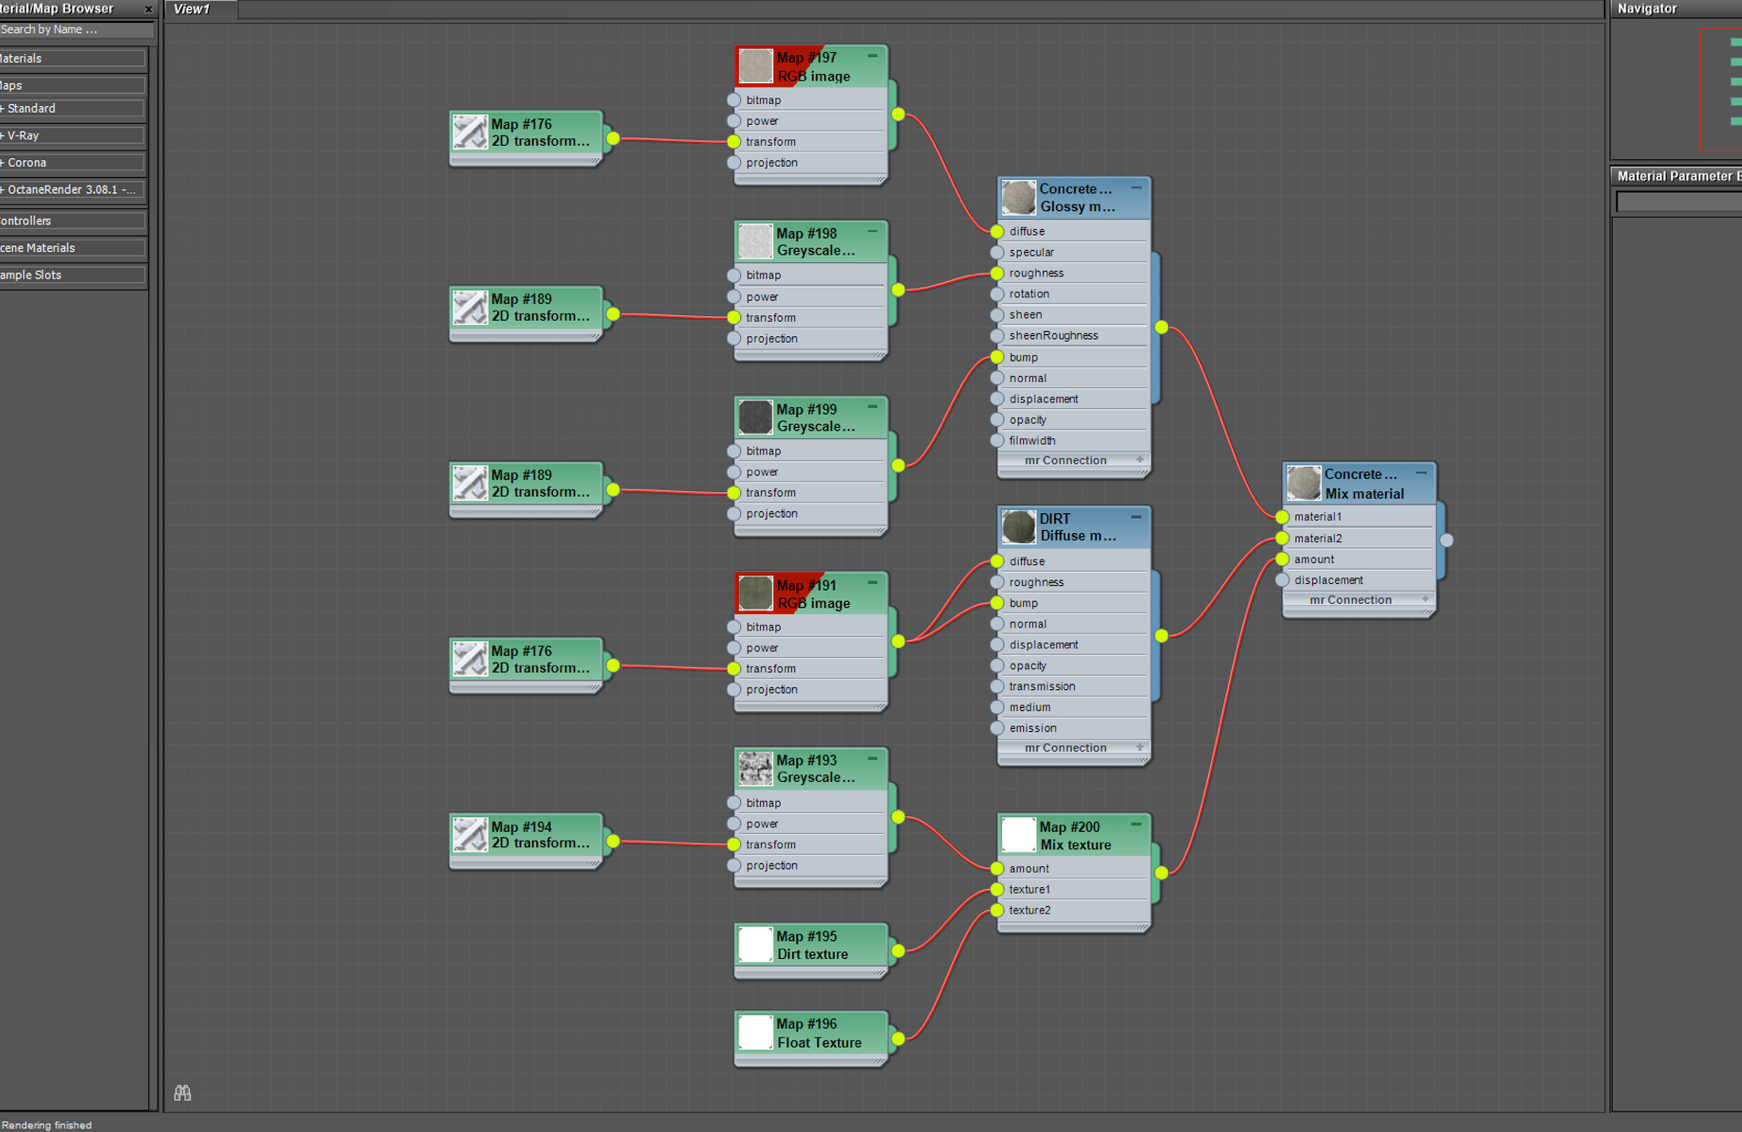
You can see what the blend material is doing if the dirt material is set to red color. Now you just need to replace the red
color with any dirt texture and you’re done.
Composition
Figuring out the composition for this cover was by far the most fun aspect of the project. This is why I like using Octane render and its interactive render view, because it gives you the ability to compose the shots to light and shadow, and instantly see the near final result. Most render engines have this capability now and it’s just about finding which one works best for your needs.
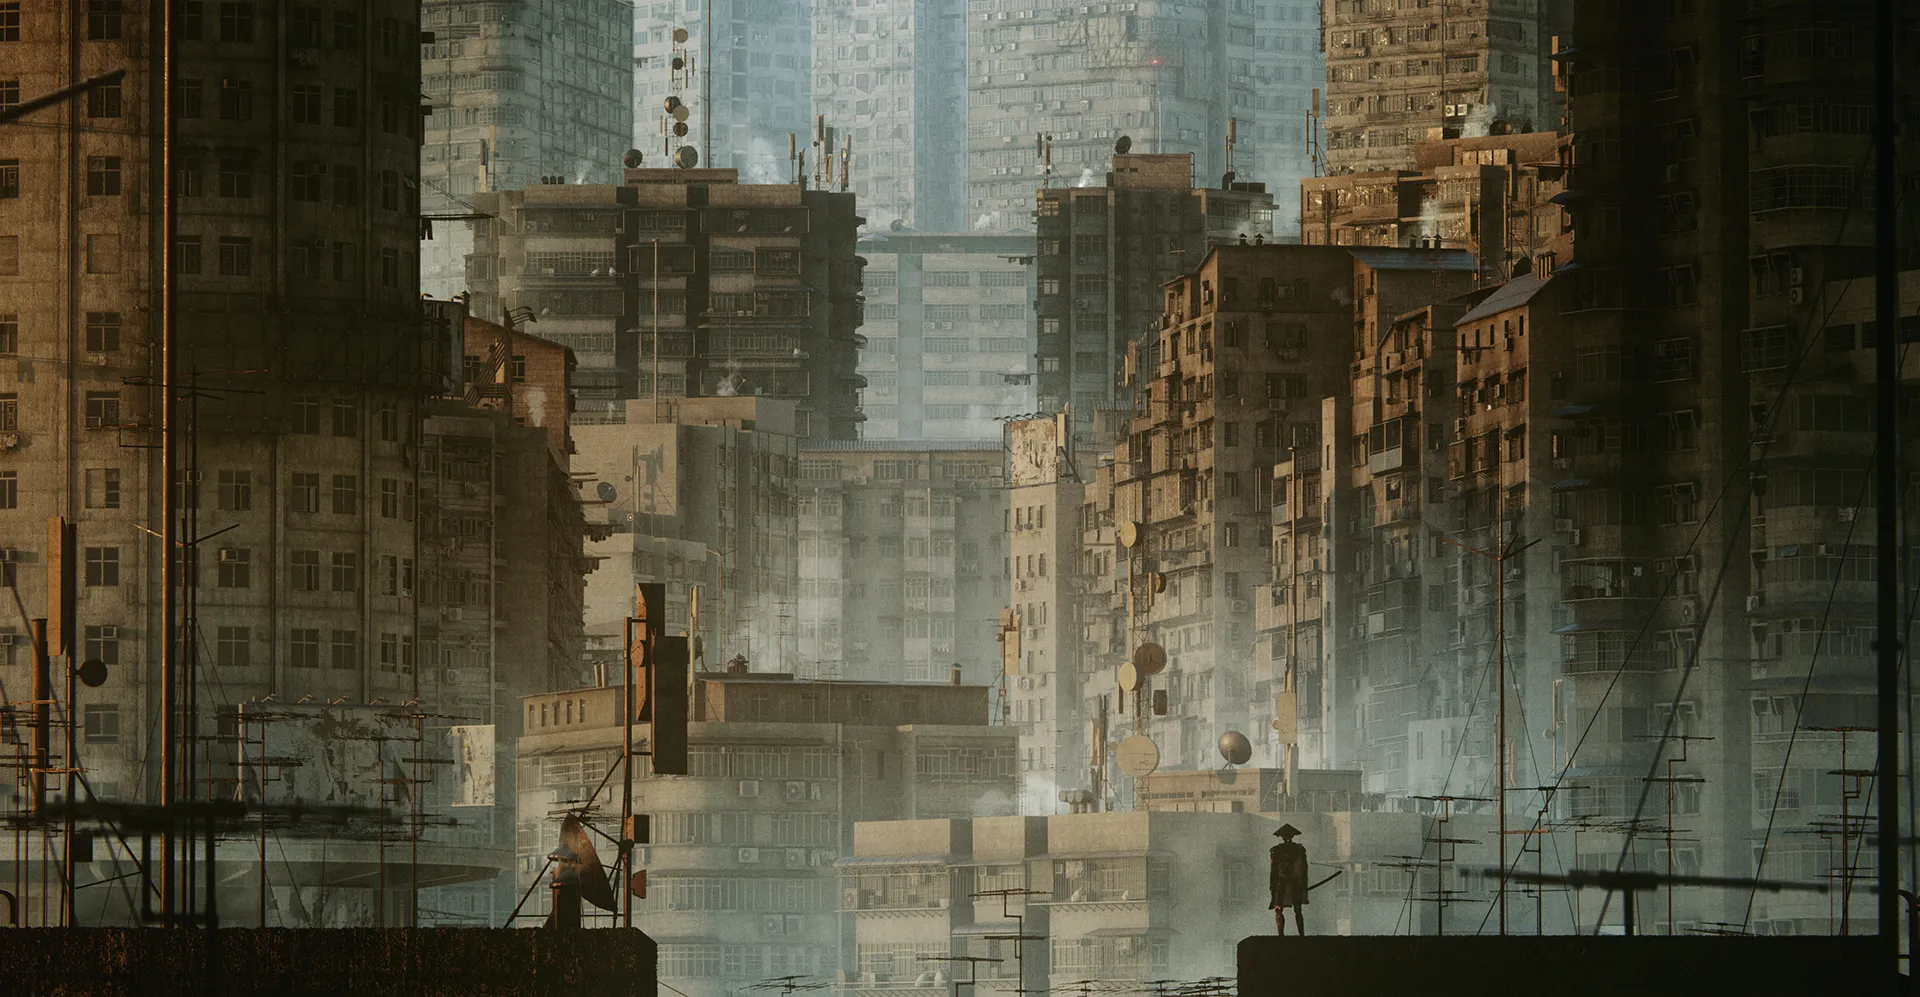
I wanted to portray a densely packed cityscape where the buildings seem to tower off infinitely into the distance with no sky in sight whatsoever. To convey this densely packed city feeling, I opted for a 200mm lens, flattening everything down and introducing a large sense of scale. To further support this sense of scale, I’ve included a character as the only foreground element, in the very lower center frame, and used the existing architecture elements as a framing device to draw attention to the character.
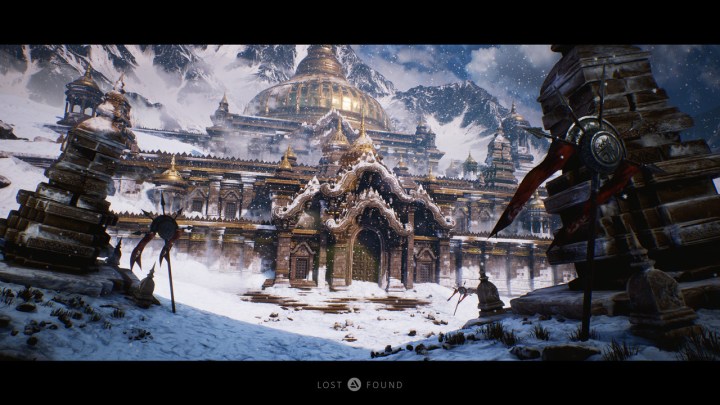
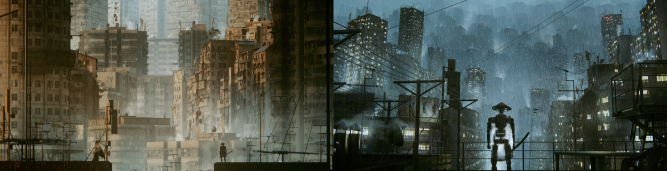 While searching for the right tone and composition for the cover, I’ve made a couple more images, and while these
aren’t necessarily showcasing the models in the best light you can get an idea of what could be achieved with this kit in just a couple of hours.
Compositing
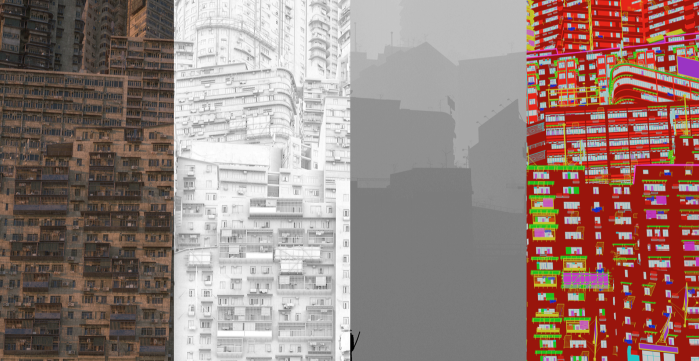
Given the simplicity of the image, I could have used Photoshop for my compositing work but after years of working in animation, I’ve grown used to using After Effects as my main compositing software. I don’t render out many different render passes. The main ones I use are Zdepth and Material ID for all of my compositing and masking needs. An ambient occlusion pass was used here as well just to bring out all those small scale details a bit better.
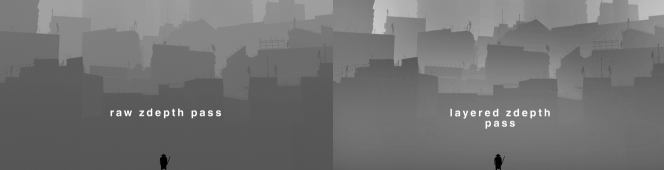
 The main aspect of compositing for me is to get the atmosphere to work correctly. I rarely render atmosphere out of 3d as I like having all the control in post. The common mistake with compositing atmosphere with Zdepth is just using the pass as it comes and setting it to screen blending mode. Doing so overexposes your image and provides for an unrealistic result.
What you should do instead is use a solid layer set to normal blending mode and then use the Zdepth pass as a luma matte. This way you’ll get a more realistic distance falloff. To take things a bit further I always like to layer my Zdepth passes and create areas of interest with thicker atmosphere pockets in certain locations. This is achieved by precompositing the Zdepth pass, making a couple of copies and adjusting and masking each individual copy to get a better depth separation.
 The rest of the compositing consists of adding numerous smoke elements of varying sizes to bring more realism to the scene.
And lastly finishing up with color grading – this is the process that I always seem to lose myself in. I used Red Giant’s Magic Bullet Looks as my primary grading tool, and just like anything else, layering is key here. I’d usually start off with bringing in more contrast with curves and spot exposure, followed by lens effects such as very minimal chromatic aberration, diffusion, vignetting and lastly a three-way color correction.
As a very last step I’ll apply a Film Convert effect that will add the real scanned film grain and a film stock LUT, bringing all the previous compositing work together and gelling all the elements nicely. You can see all of the steps in the breakdown below and if you subscribe to KitBash3d newsletter, you can get a PSD with separated layers.
Thank you for reading through this short insight into my workflow, I hope you got something out of the process.
Get the Future Slums Kit and other more on the KitBash3d website.