Game Prop Tutorial: Necronomicon Unveiled
Bernhard Van Der Horst shares a detailed breakdown of his Necronomicon project, a complex game prop design he created for Darkside Media.
How did you go about connecting with Darkside Media? How do you feel the collaboration helped you to develop your portfolio?
Darkside contacted me via email around April 2016 after viewing my portfolio on ArtStation, asking if I’d be interested in doing some sculpts for them. I have a reality complex, which some mistake for an inferiority complex, and at first thought it was some strange scam. I was wrong.
The ongoing work for Darkside Media has made me branch out in 3D art, having to make things I wouldn’t previously have thought of making. I was purely interested in organic sculpting, but quickly embraced the gamut of entities due to necessity, which grew into appreciation for all forms.
You have created a few props related to H.P. Lovecraft’s universe. How does Lovecraft inspire and inform your work?
It’s an odd situation with Lovecraft – fear of the unknown is the greatest fear of all – and yet we visualise parts of his universe, lessening the power of this mystique. I love the mythology. Us humans are but ants who sometimes mildly irritate but are never a problem, the other beings inhabiting the spaces in-between dimensions, but not in any dimension! The blind arch god Azathoth, kept asleep by the atonal piping of his children dancing around him in perpetuity, lest he awakes and erase existence – all of this has a subconscious hand influencing the state of the art.
I’m sorry for the vague answer, but I find Lovecraft’s world to be more than words can convey. I love how humans are seen as nothing.
3D Origins
Doing oddjobs, realising I was going nowhere, and then tried my hand at 3D art prompted by a friend, which I initially loathed due to not grasping the tools completely, but now I love.
Were there any particular tutorials that you found useful as you began to learn?
I first started learning via one of those official “Learning Autodesk Maya” books, and it was slow going. I then found Digital Tutors’ (now called Pluralsight) lessons to be a great kickstart. Subscribing was and is fairly cheap for an enormous amount of content. Nowadays whenever I need to learn something I just go to YouTube though.
Modeling the Necronomicon
I started in Maya, blocking out the basic shapes – the spine, the book proper, and the trimmings using cube primitives. I should have concepted in 2D, but I didn’t! Behold some iterations – here is the first version blocked in Maya. The straps were based on a real tome I saw online, but the corner clasps were designed by me, prompted by Dave Kann who wanted compass markings, using a lot of Maya’s Bridge (blend mode) functionality.
Bridging + right-clicking Divisions is one of my favourite operations. The patterns on the straps are helix shapes with adjustments to the history parameters in the channel box. The rest is all good old box modeling – extrusion and vertex dragging.
No one should follow this method of concepting, as it was hours of wasted time, as the design changed quite a bit after this. Digitally painting designs would’ve been far quicker to reach a final result to model.

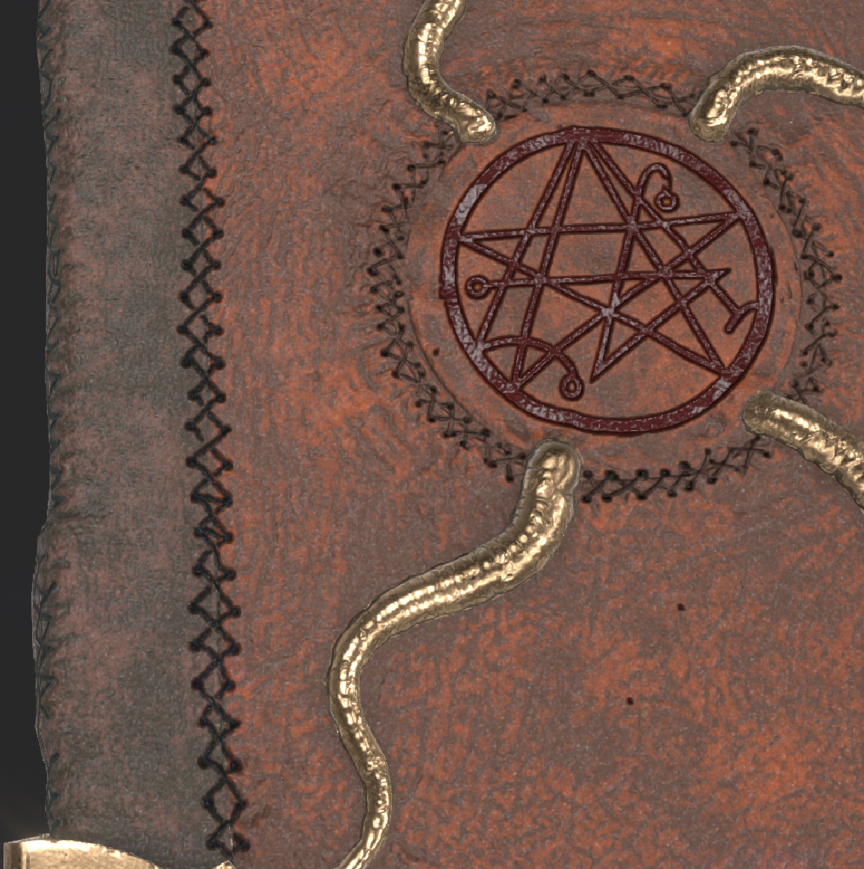
I export the OBJ to Zbrush. I do not bother with fencing or creating sharp edgeloops as ZBrush can Dynamesh. Normally you’d add extra edgeloops near the sharp edges of your Maya model to retain the form when subdividing in Zbrush. With Dynamesh you do not have to worry about that at all – assuming you are going to retopologise and the base resolution is the shape you want – change the blur to zero, and click Dynamesh. Undo and increase the Dynamesh resolution until the mesh is satisfactory for sculpting. Below I stamped an Eldrith symbol using the standard brush, drag rectangle mode, and an imported alpha. I also sculpted some rough detail on the spine and cover and used the Move brush to break up the shape of the book.

The stitching was done in a few steps – first I plotted some holes, DamStandard brush I think, then I used the CurveTubeSnap brush to zigzag in and out of these holes. Then I went over it again using the Standard brush to sculpt bulges and recesses. I also started to spray some leather alphas in various sizes over the cover, standard brush set to Zsub. But what are those worm-like beings doing around the Elder Sign? Dave told me to remove them, and he was right.
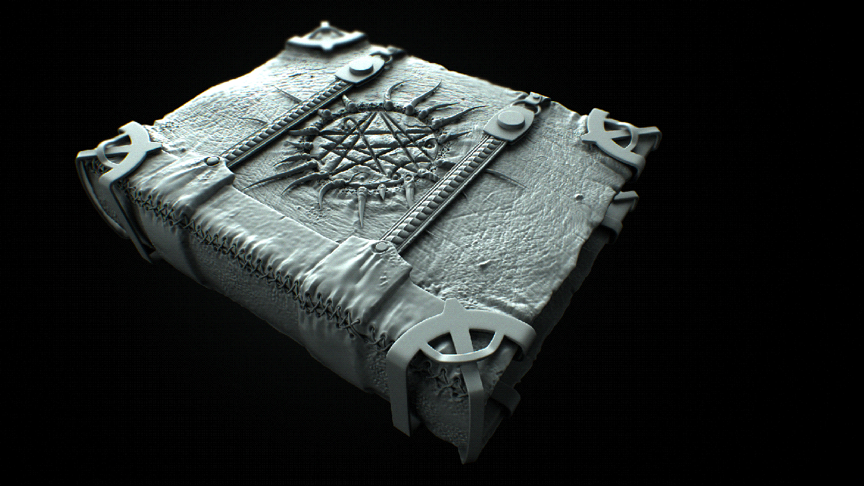
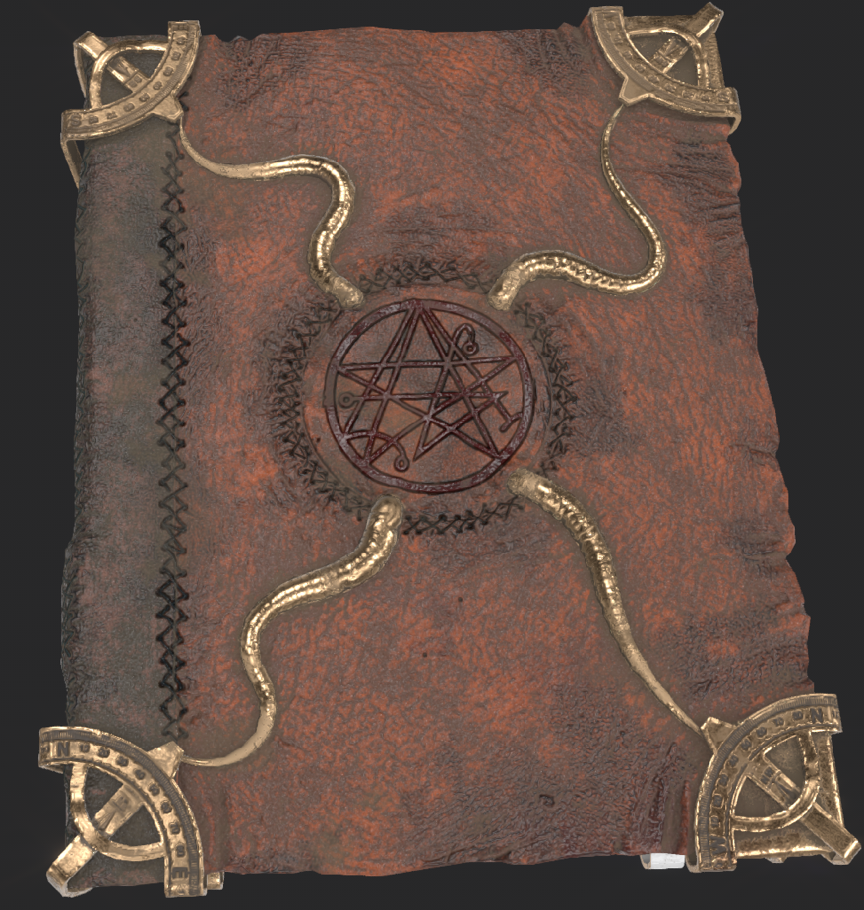
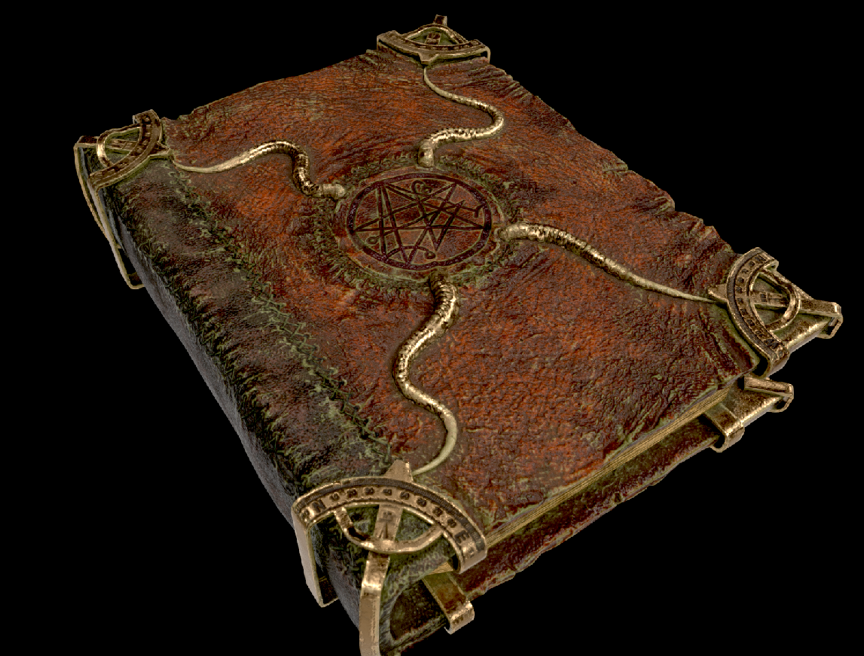
We end up with this design:
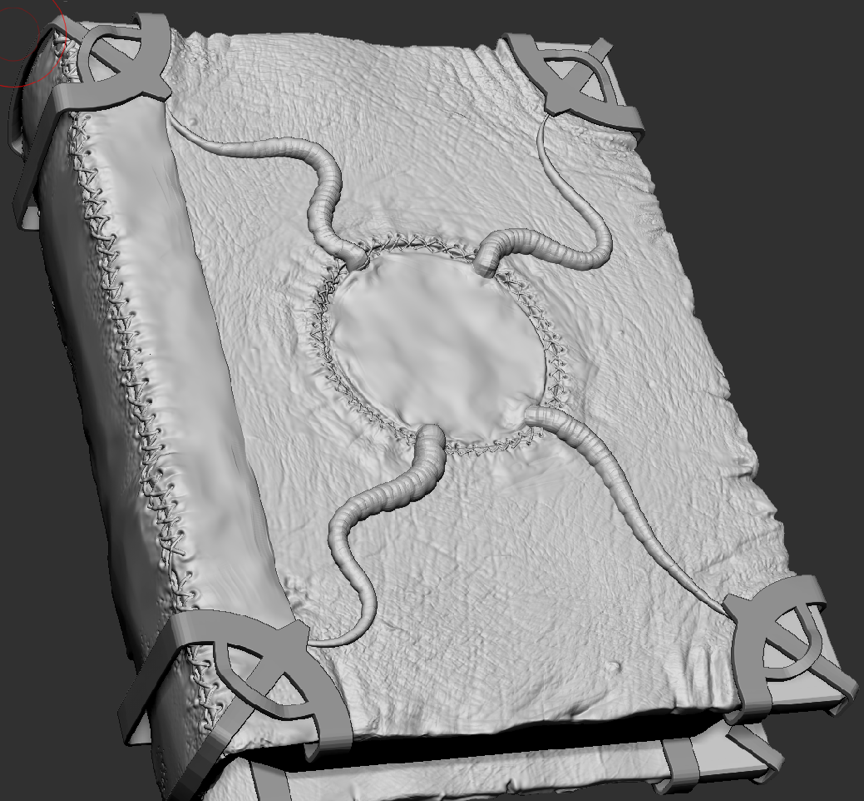
Dagon (this specific Necronomicon is Innsmouth-based) reaching from beyond. The base of those tentacles were made using the CurveTubeSnap brush. Note also how there is no stitching on the right-hand side of the spine yet, and that I also did not add the Eldritch sign again…I learned the hard way how to emulate the “sculpting” of that in Substance Painter via height channels.
I retopologised in Maya, using Quad Draw. The corner clasps did not need doing as I did not sculpt on them at all, and only needed to remove some edge loops to make them more efficient. UV mapping was pretty standard. I like using Maya’s Bonus Tools – Auto UV Unwrap tool – select your edgeloop borders and hit Create.
Sometimes it causes further issues, but mostly it works great ,with minimal user adjustment needed afterwards. I’m still avoiding Maya 2017 (update 4) and its new UV editor as it’s too buggy at this time of writing. I have not used May 2018 yet, maybe it’s all amazing now. The low poly mesh is around 10k triangles. The spine has more edgeloops as this book will need to open and close.
Did you use custom substance painter materials or grab something from an external source/library?
A mixture of standard substance materials and custom fill layers. I very rarely work with non-fill layers. The main cover’s base was one of the human skin smart materials, with the base colour and the masks adjusted to taste. I think the spine was a copy of that layer, with the colour and masks adjusted. I group each layer with a black mask, and then use my favourite way of assigning materials, using Polygon Fill (press 4 on your keyboard).

I usually choose between fill entire mesh or fill polygon. “X” will switch between black and white masking. Great way to quickly assign materials to parts of the object. You can refine these masks by adding a paint layer. Next I added another standard smart material – “Bronze Armor”, with some tweaks to the tentacles and the corner clasps. After that I added a plain Fill layer with a deep red colour and some gloss, added a black mask as usual, and stamped the eldritch sign using an alpha.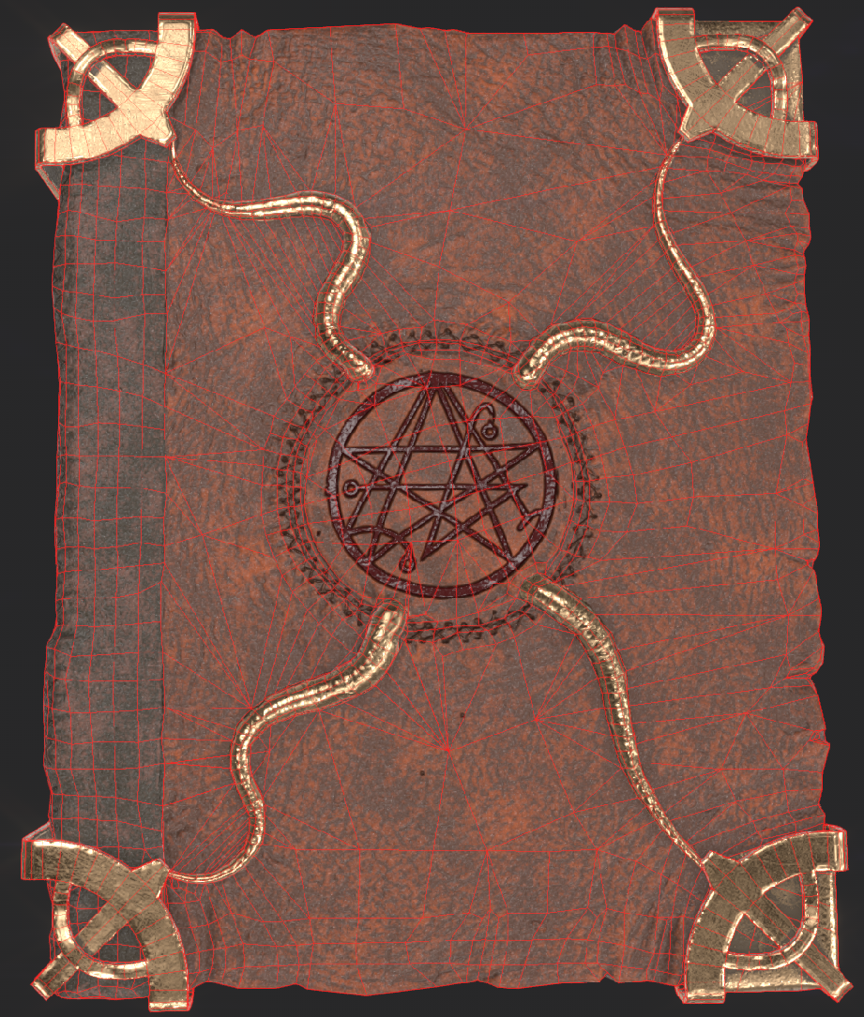
The inner spine stitching, the eldritch sign and the some of the stitching surrounding that was actually missing from the high poly sculpt which I baked my curvature and normal maps from. So I added them in Painter itself using a few height fill layers and “sculpting” the missing details via mask painting. I added the missing holes to the spine and accentuated the central part’s holes as well.
I then added the thread on another fill layer.
Then I added the notches using a complete compass alpha I found online, with a quarter of it stenciled on each clasp. If you press F6 you go to orthographic view mode, and to then view something at a 90 degree angle, tumble in the viewport as usual (ALT+left mouse drag) and then press SHIFT. This will snap the view to either, top, bottom, left, right, front or rear, depending on your current position. Very useful to stamp details at a proper angle. Pressing F5 goes back to normal perspective mode.

The problem I now had was that smart masks and materials did not interact with the new normal/height information. This was prior to Substance’s new filter which solves this issue. So I did the ‘ol exporting of this new normal map, and re-importing it into the project as a texture, and dragging it into the Textureset’s Normal map slot. Now all smart materials etc interact with my newly created stitching, compass etchings and Eldritch stamp. In the pics above I already had the new normal map imported though.
Next I added three layers – some grime, some more grime, and dust on top of that, with standard plain fill layers and various smart masks, adjusted to taste.
Finally, I added a layer to make it look more worn. Another simple fill layer with one of the standard smart masks, cannot remember which one, probably one of the edge-wear ones, and then manually painted it to my liking by adding a paint layer to the mask. It doesn’t make any sense for the dust layer to be beneath this wear layer, but I simply preferred how it looked. so left it as is.
For the pages, it’s just a simple mesh with a material I downloaded from Substance Source – Parchment. I added some wear as usual. Once the book is rigged, we’ll need these pages to flip, so I’ll have to approach them completely differently, but for now it acts as more of a placeholder.

I press F10 to view it via Substance’s I-Ray built-in renderer, and add some colour correction. I can either then add a filter with colour correction to the whole project as a layer, or adjust at render time, but the former is probably a good idea, as you don’t want to have to increase the contrast etc within a scene and then everything else is imbalanced.
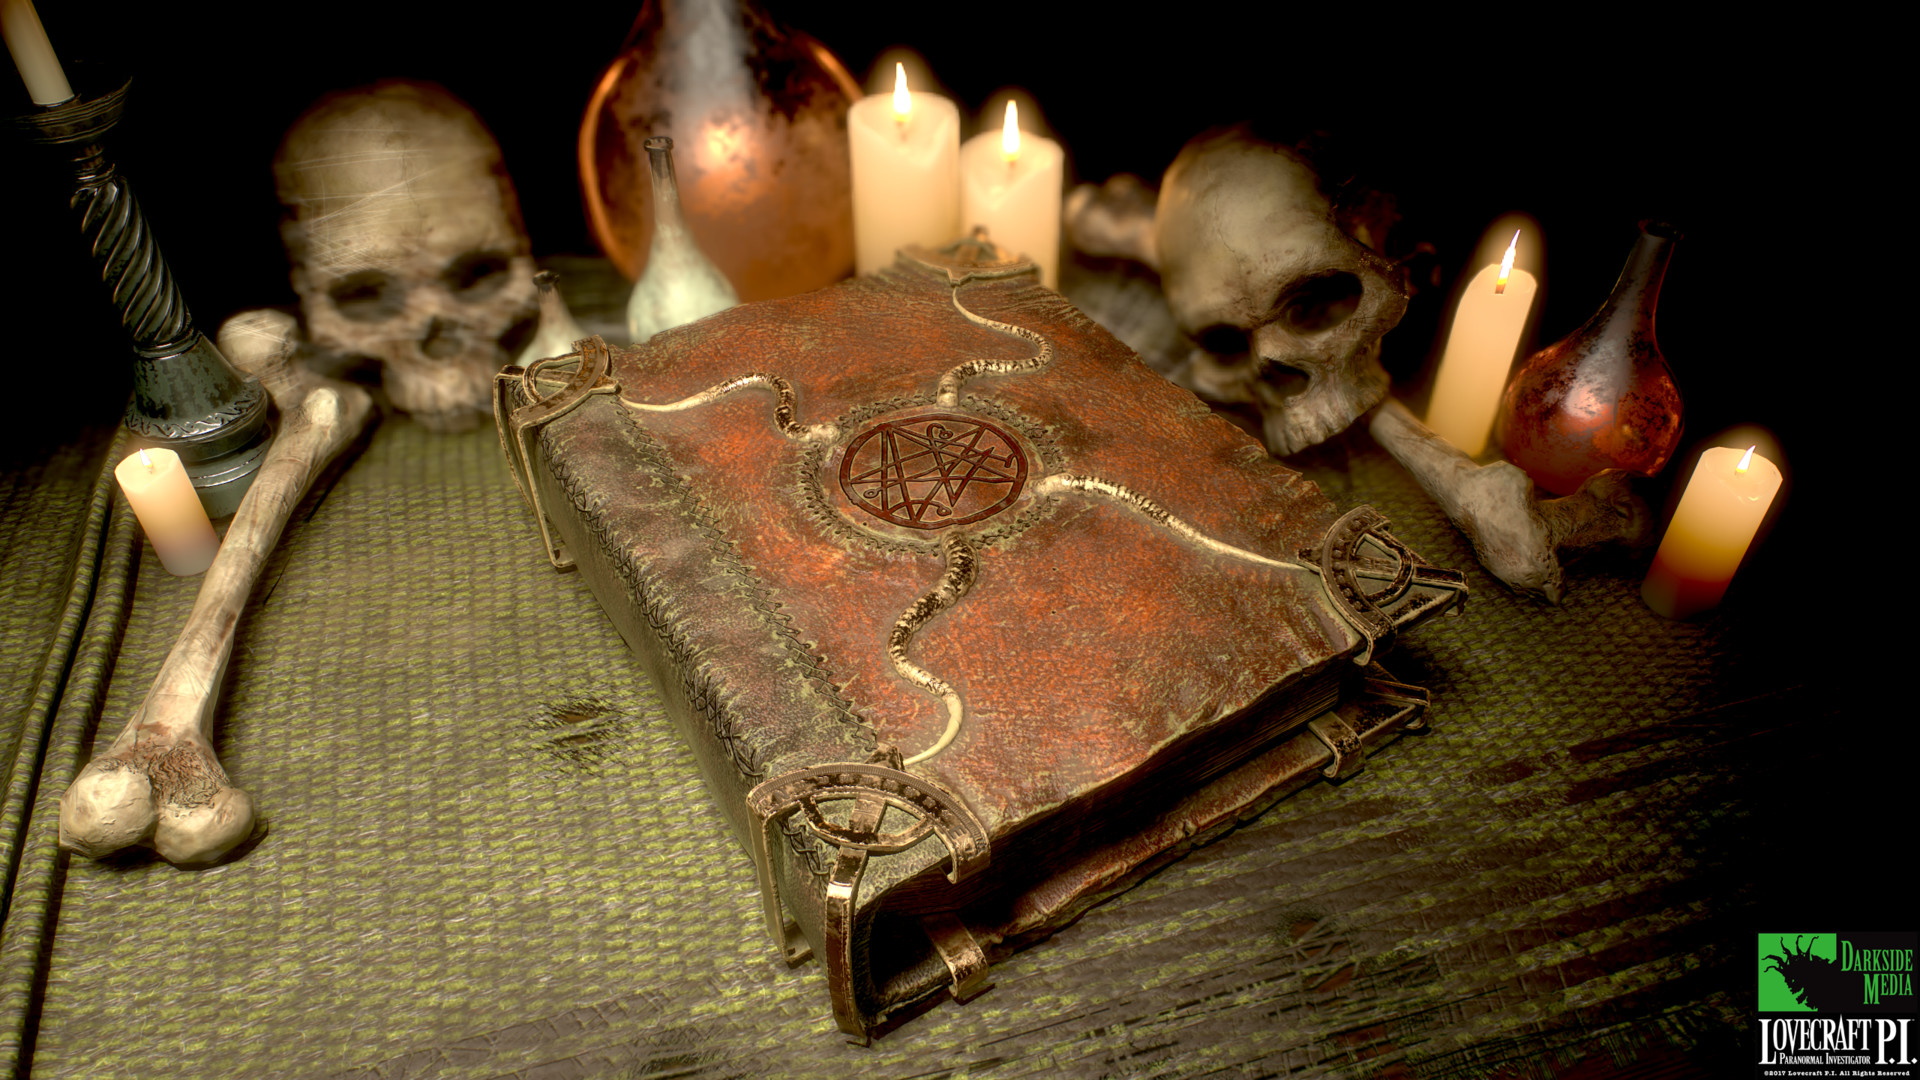
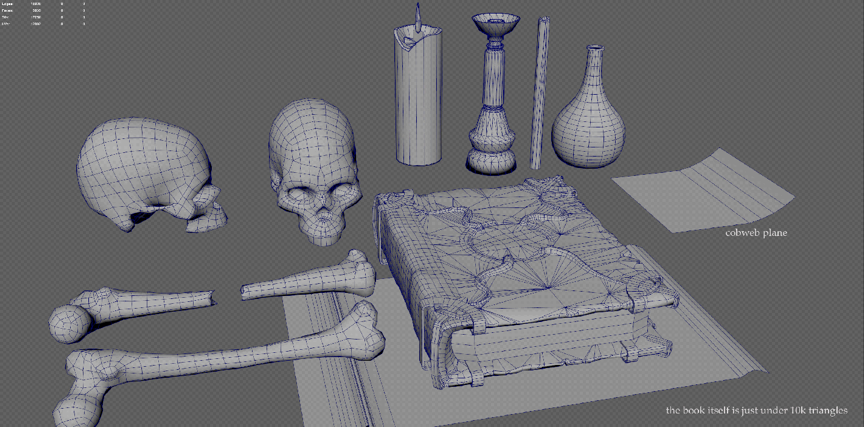
I export my maps for use in Marmoset Toolbag (CTRL+SHIFT+E) at 4k resolution, and place it within a scene I already had set up to display all the assets for this project.
Here are the scene elements, excluding the table it all rests on. All the other objects were textured in Substance painter as well.
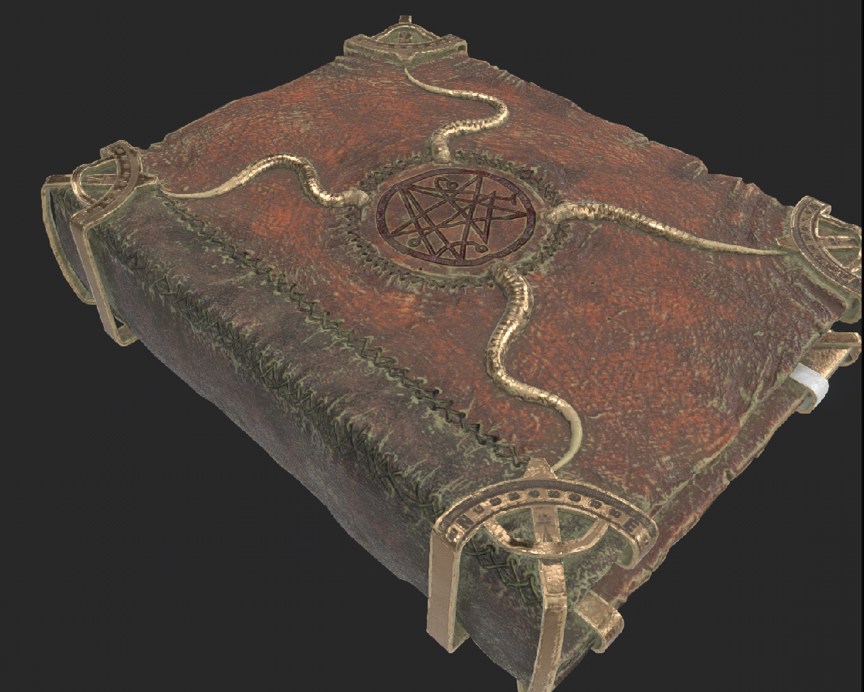
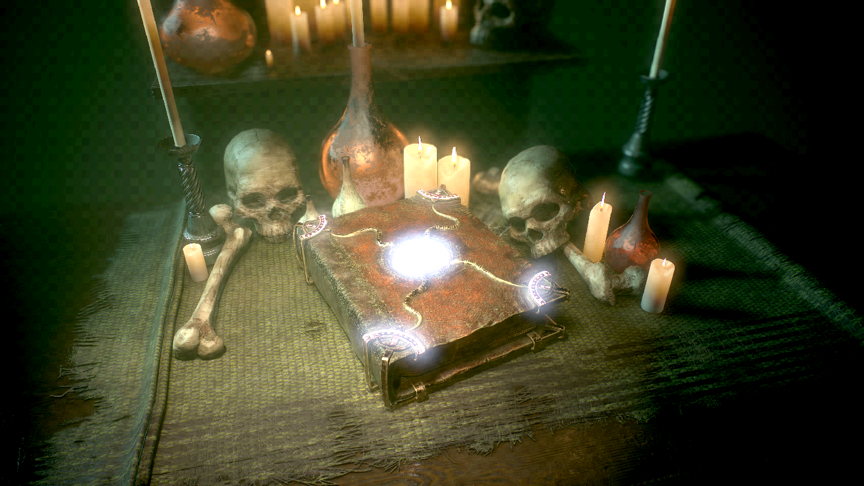
Final Result:
Color Scheme
This was mainly influenced by viewing old books and tomes online, which all had very similar earthy tones.
Creating the Glow Effect
That was simply using Substance Painter’s Emissive channel (which you need to manually add in Painter), masked to the Eldritch symbol and the corner compass etchings. When you export your maps it will also export an Emissive map. In Marmoset you can animate the intensity and temperature of this map.
Challenges
Mainly the design – making a book look interesting. It is a Necronomicon, which should be easy to make visually appealing, but we still went through a few iterations before we were happy.
References
Dave sent me a bunch of images of very cool-looking ancient tomes and such. The initial design took some elements of those, but the final design was pretty much made up by us.
When you began to work on the model, did you start with the most detailed section first?
I usually begin by blocking out all the forms as basic shapes, and refine from there.
Marmoset or Keyshot?
Marmoset is aimed at slightly exaggerated beauty shots for real-time assets, whereas Keyshot specialises in extremely realistic lighting and rendering of the same assets, but does not represent real-time visuals. I use Marmoset mostly because I like the workflow, but I do enjoy using Keyshot too.