Utopia KitBash3d Tutorial with Leon Tukker

Leon Tukker is a concept artist and illustrator from Utrecht, the Netherlands who often works in the sci-fi genre in the board game, RPG and most recently, movie industry. In this tutorial, he guides us through the creation of his sci-fi environment below using the new Utopia KitBash3d kit.
In my day to day workflow, I typically use Maxon’s Cinema 4D in combination with Otoy’s Octane render plugin for Cinema 4D to create a 3D base. After that, I would proceed to paint over the 3D render in Photoshop, using a combinations of photos, brushes and my personal favorite: The mixer brush!
As a big fan of modern architecture and futurism, the Utopia kit gave me a lot of inspiration to work with. I have never used a KitBash3d set before and was used to creating my own models for my projects. Since I am not a 3D modeler, those models I created often lacked proper topology and details so I was happy to give this kit a try!
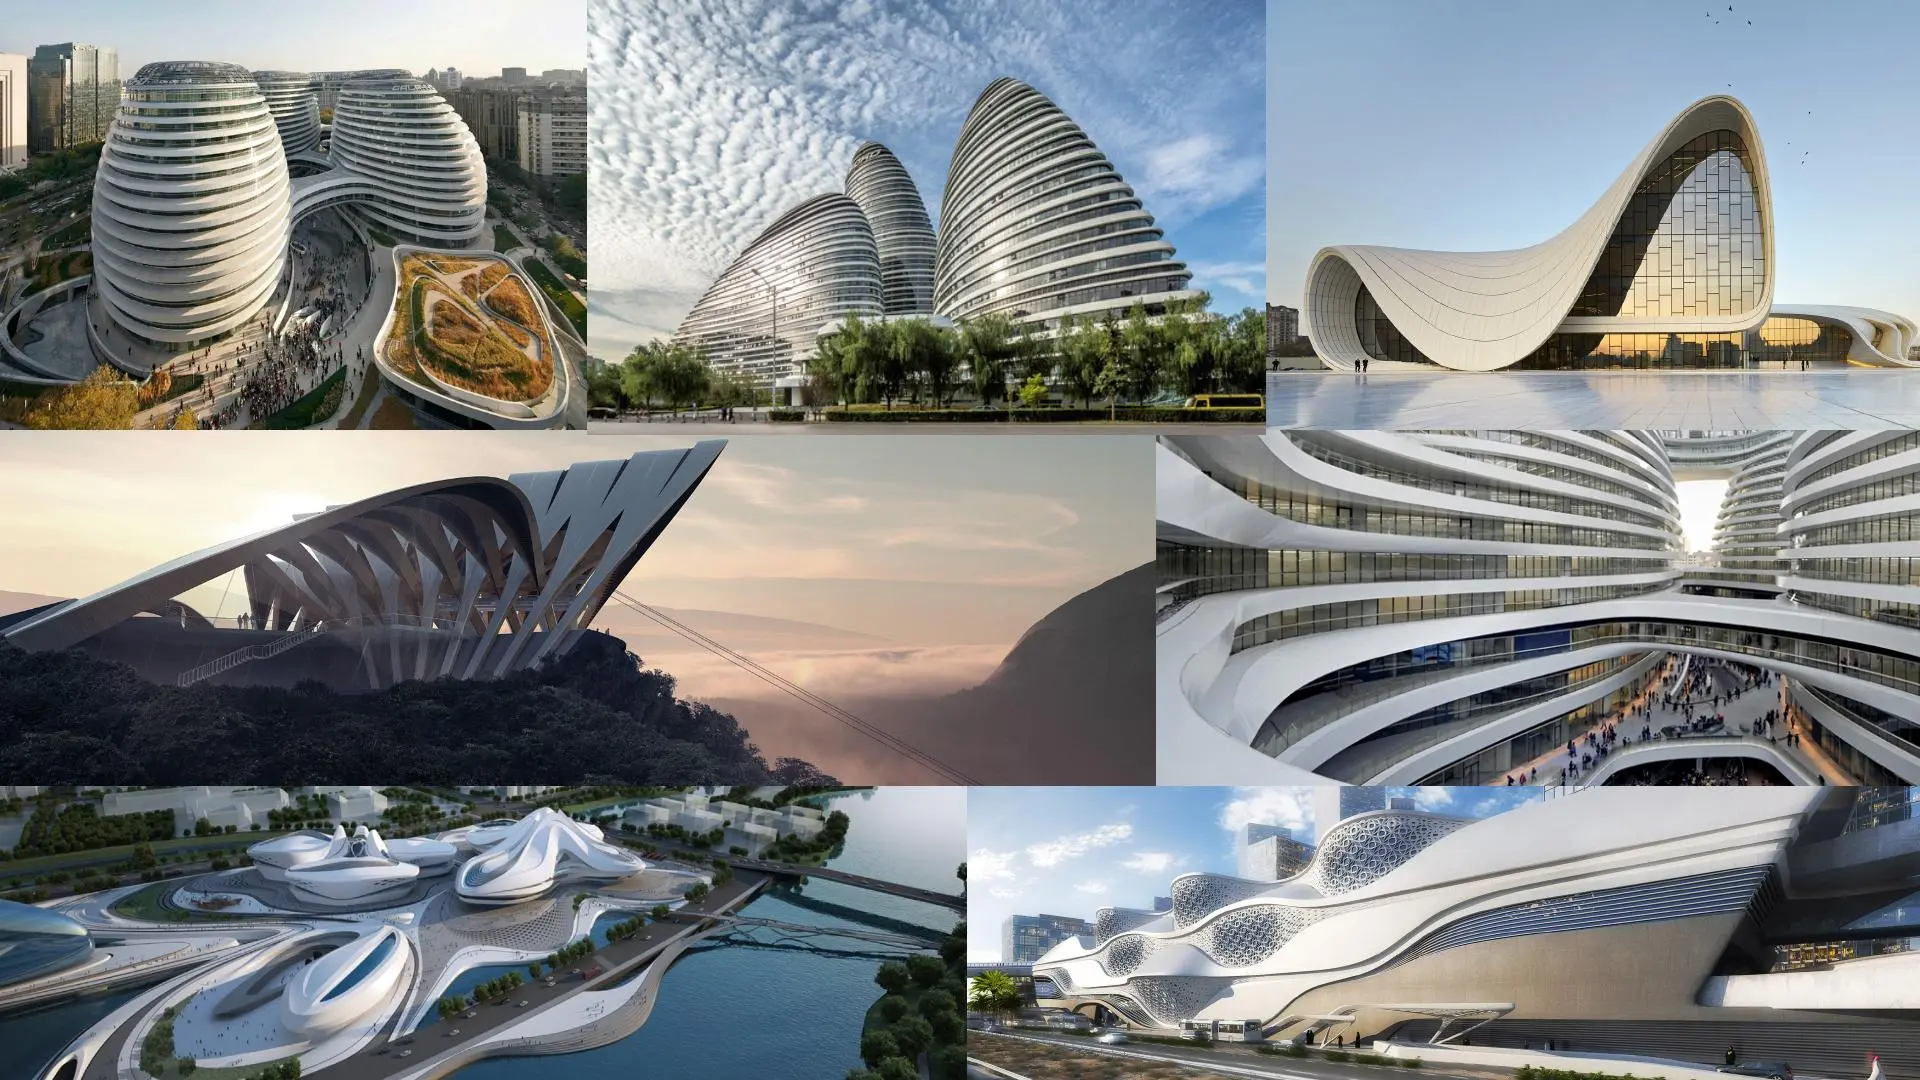
For anyone interested in modern architecture, these reference images won’t come as a surprise. Zaha Hadid was a visionary in her field and still defines modern architecture today.
As a big fan of Hadid’s work, I wanted to show a bit of her shape language in this cover. Flowy and organic shapes often define modern architecture so it would be a good fit for this Utopia image.
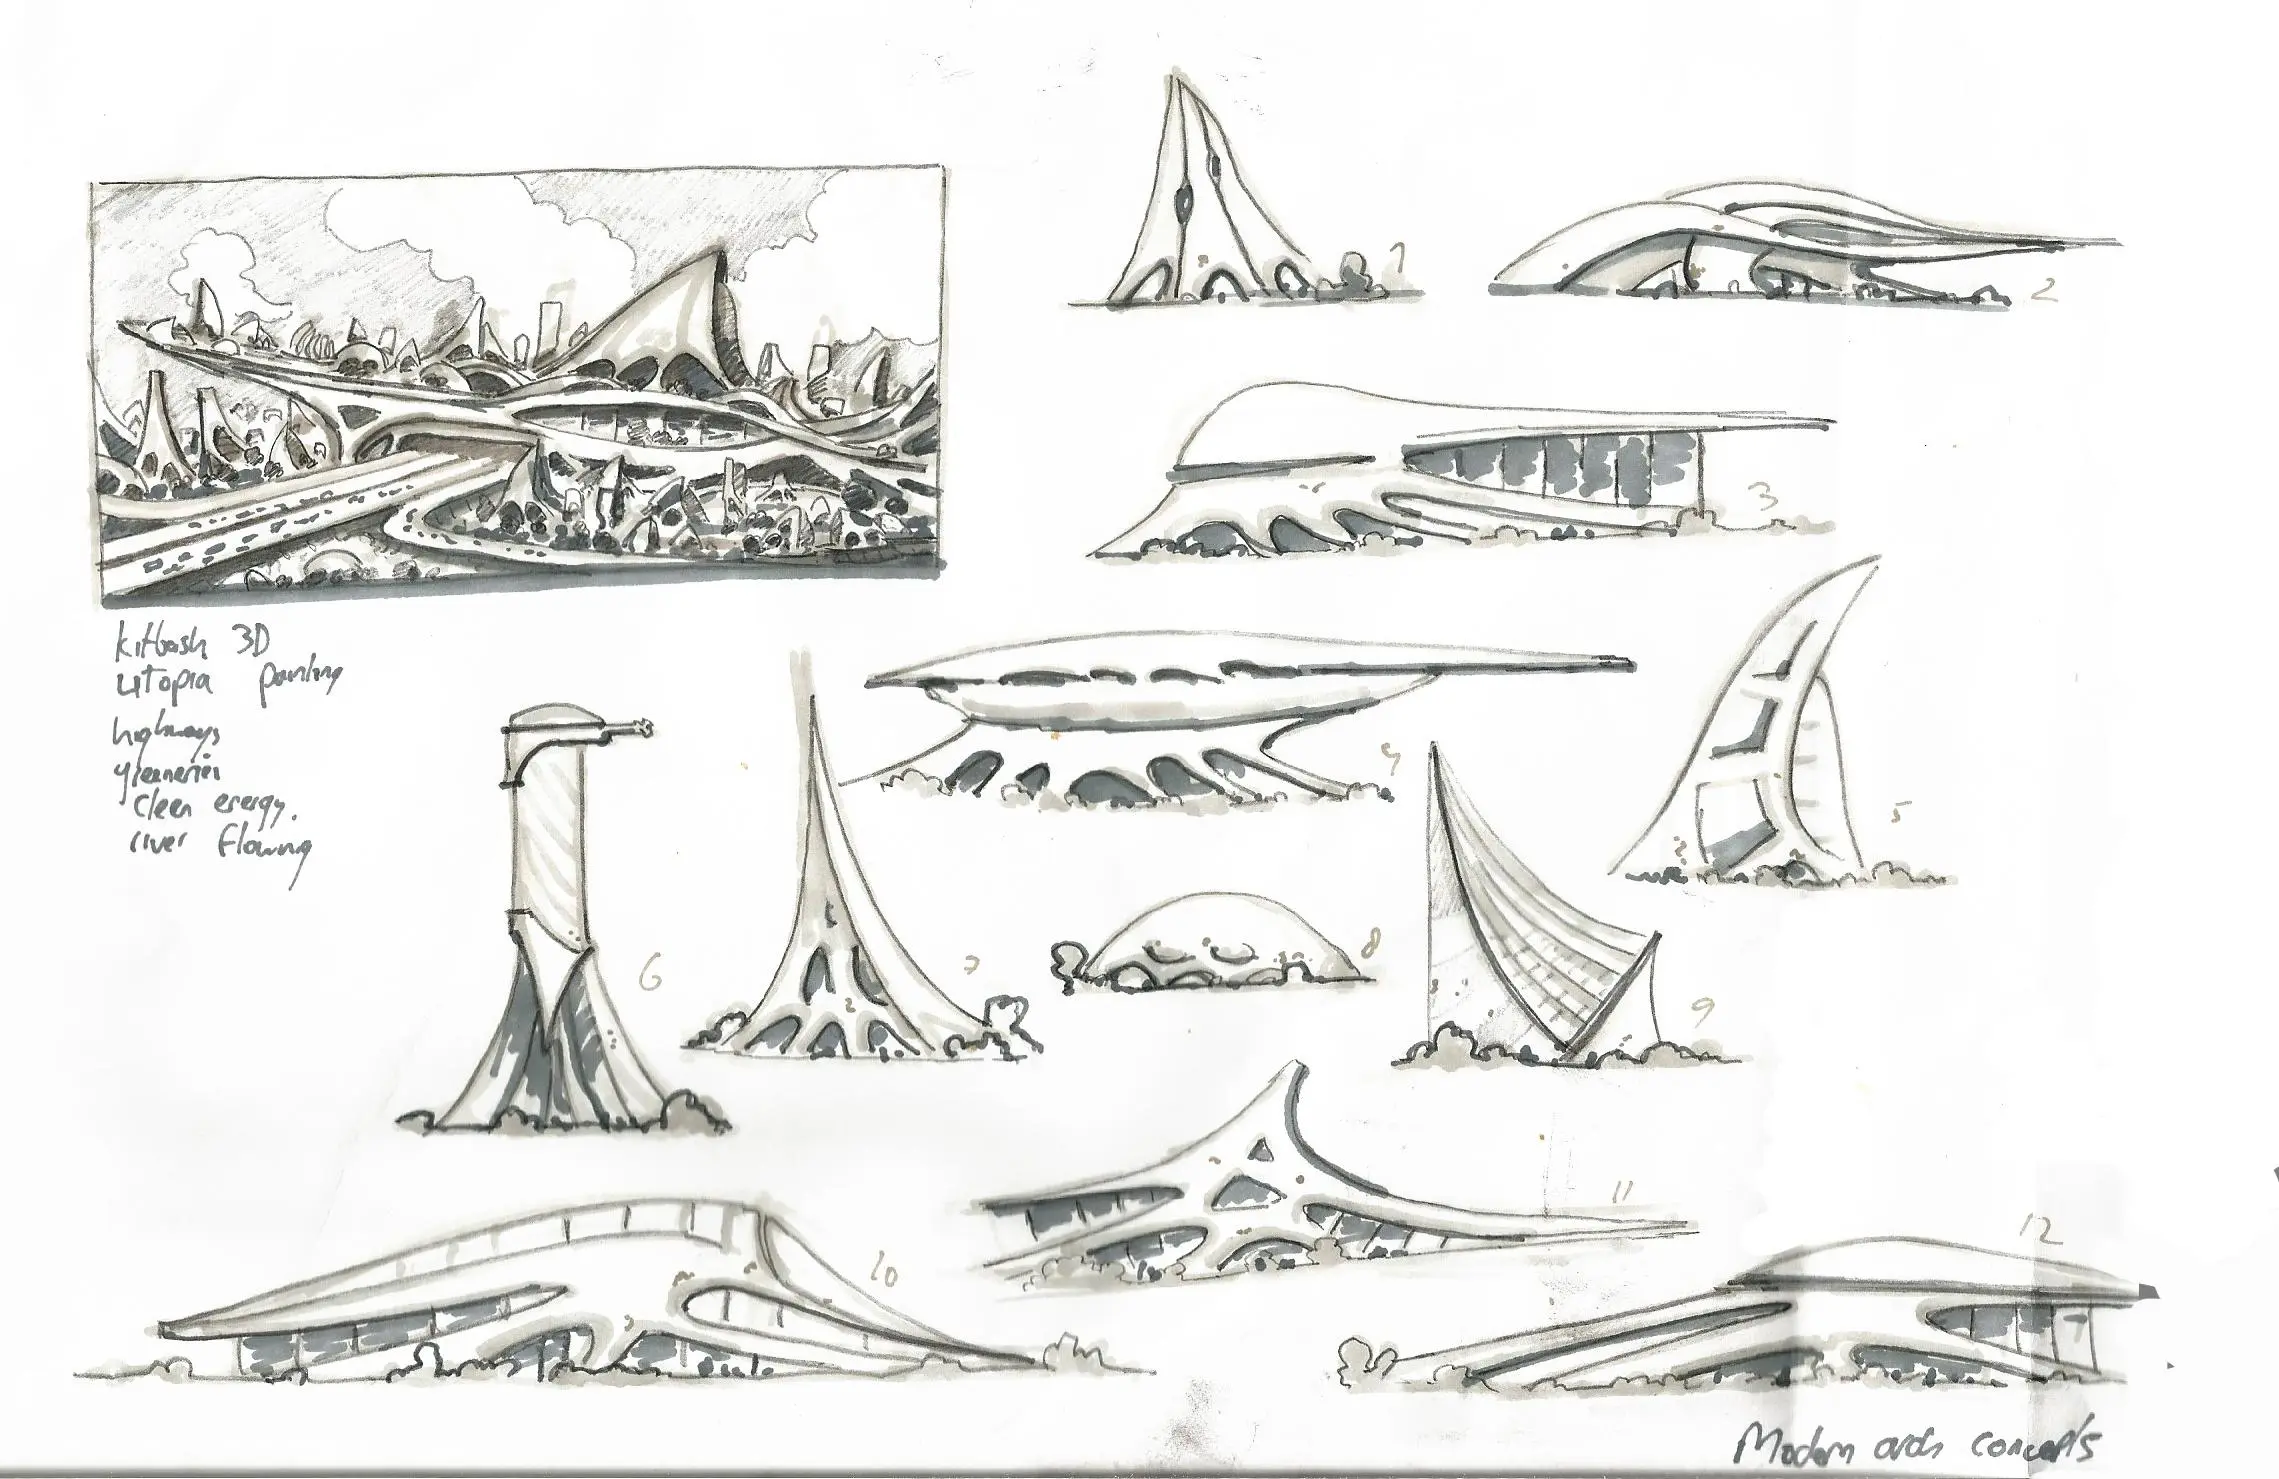
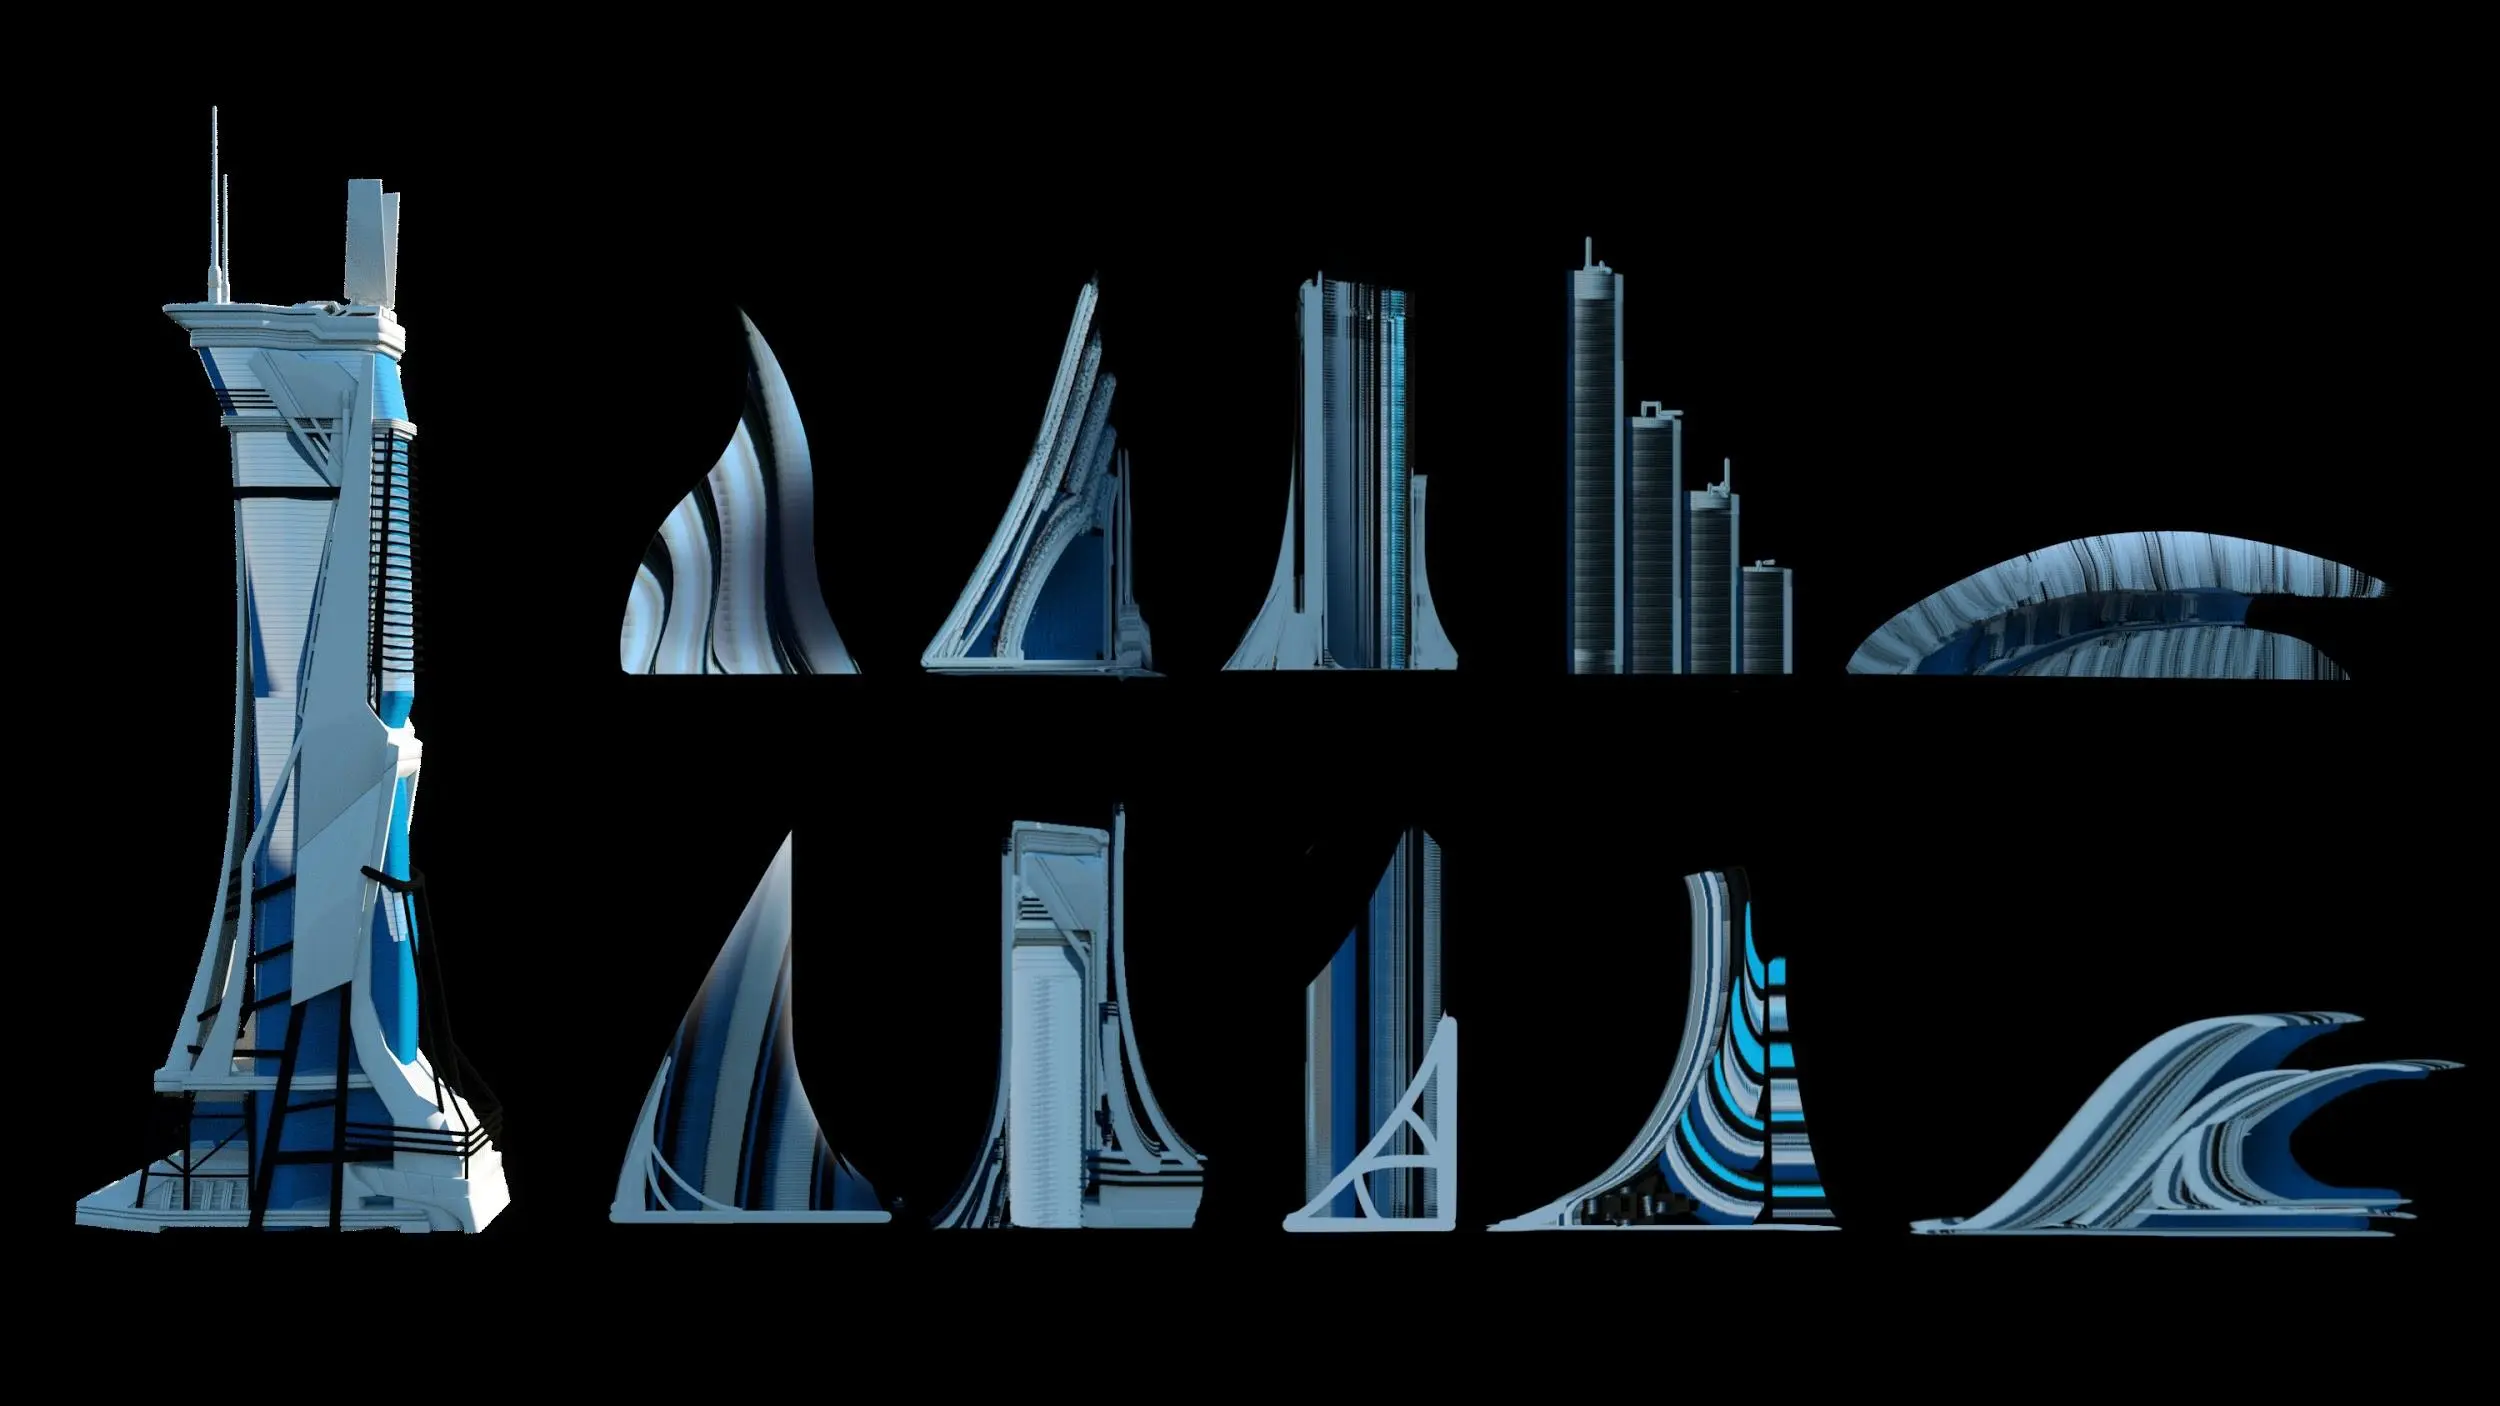
After some initial sketches and ideas (accompanied by some horrible handwriting,) I got to work. Depending on the project, I start with crude sketches on paper but more often than not, I try to tackle the ideation phase in 3D. This initial research can save time and more often will make your image much more convincing. So after gathering the reference images and an hour of sketching, I dove into 3D to try to figure out the main building featured in the image.

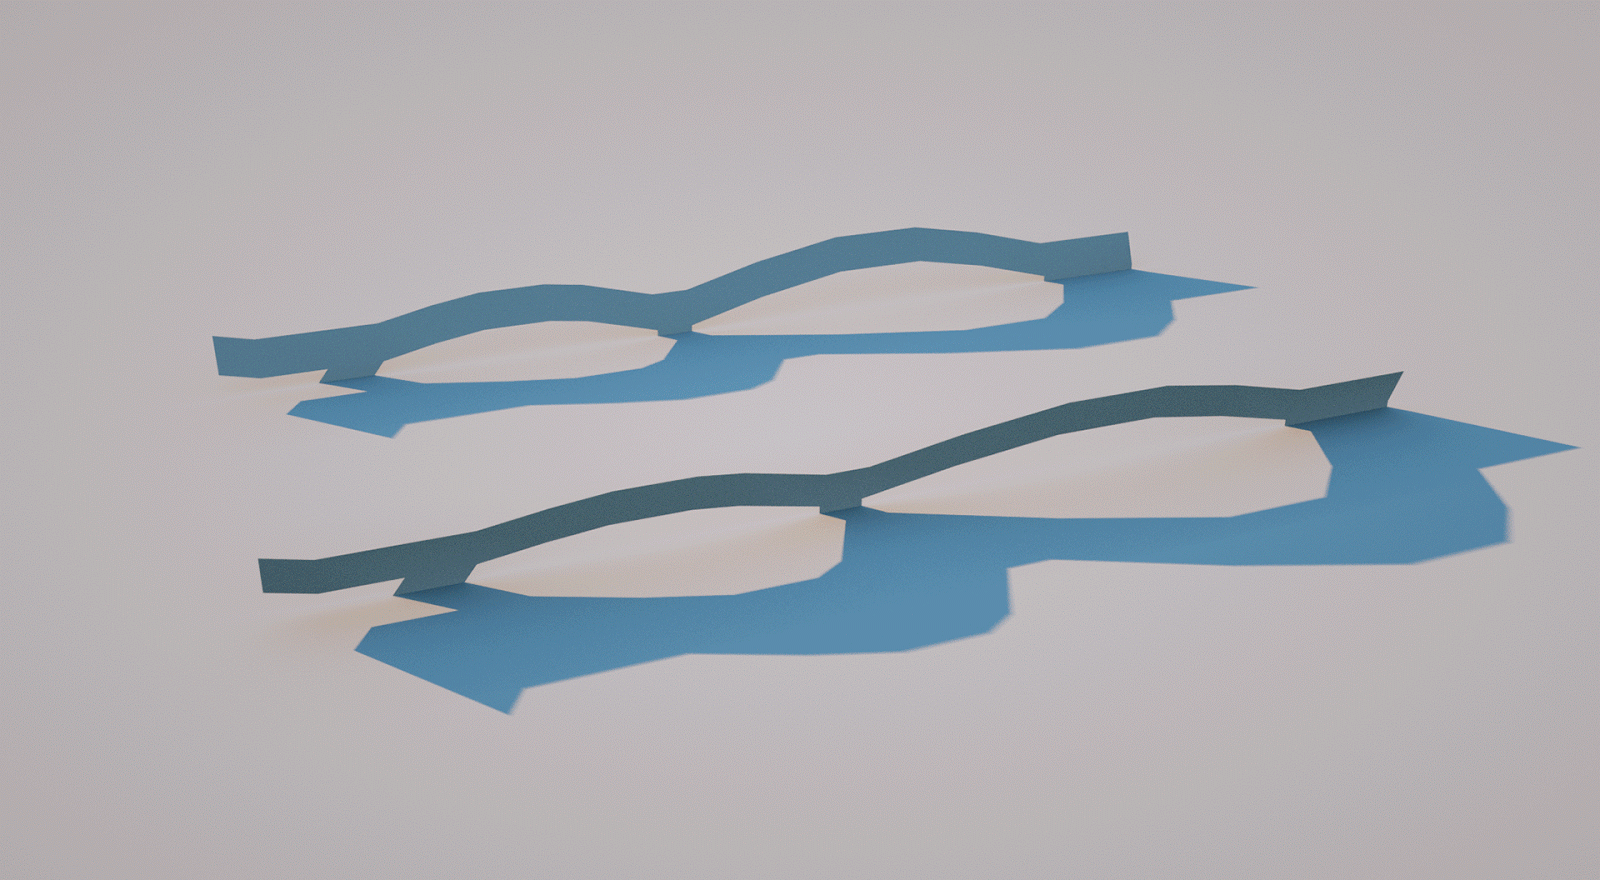
Creating the flowing shapes in the image is not hard at all. If you start with a plane and extrude on of the sides you can quickly create these flowing shapes. Subdividing them in Cinema 4D gave it a more convincing look.

With that initial shape, you can start creating variations. I used Cinema 4D’s brush tool to push and pull the polygons to create interesting new shapes. You can create a ton of iterations in a matter of minutes this way. To give these shapes some weight, you can just extrude them so that they look like solid shapes instead of deformed planes.
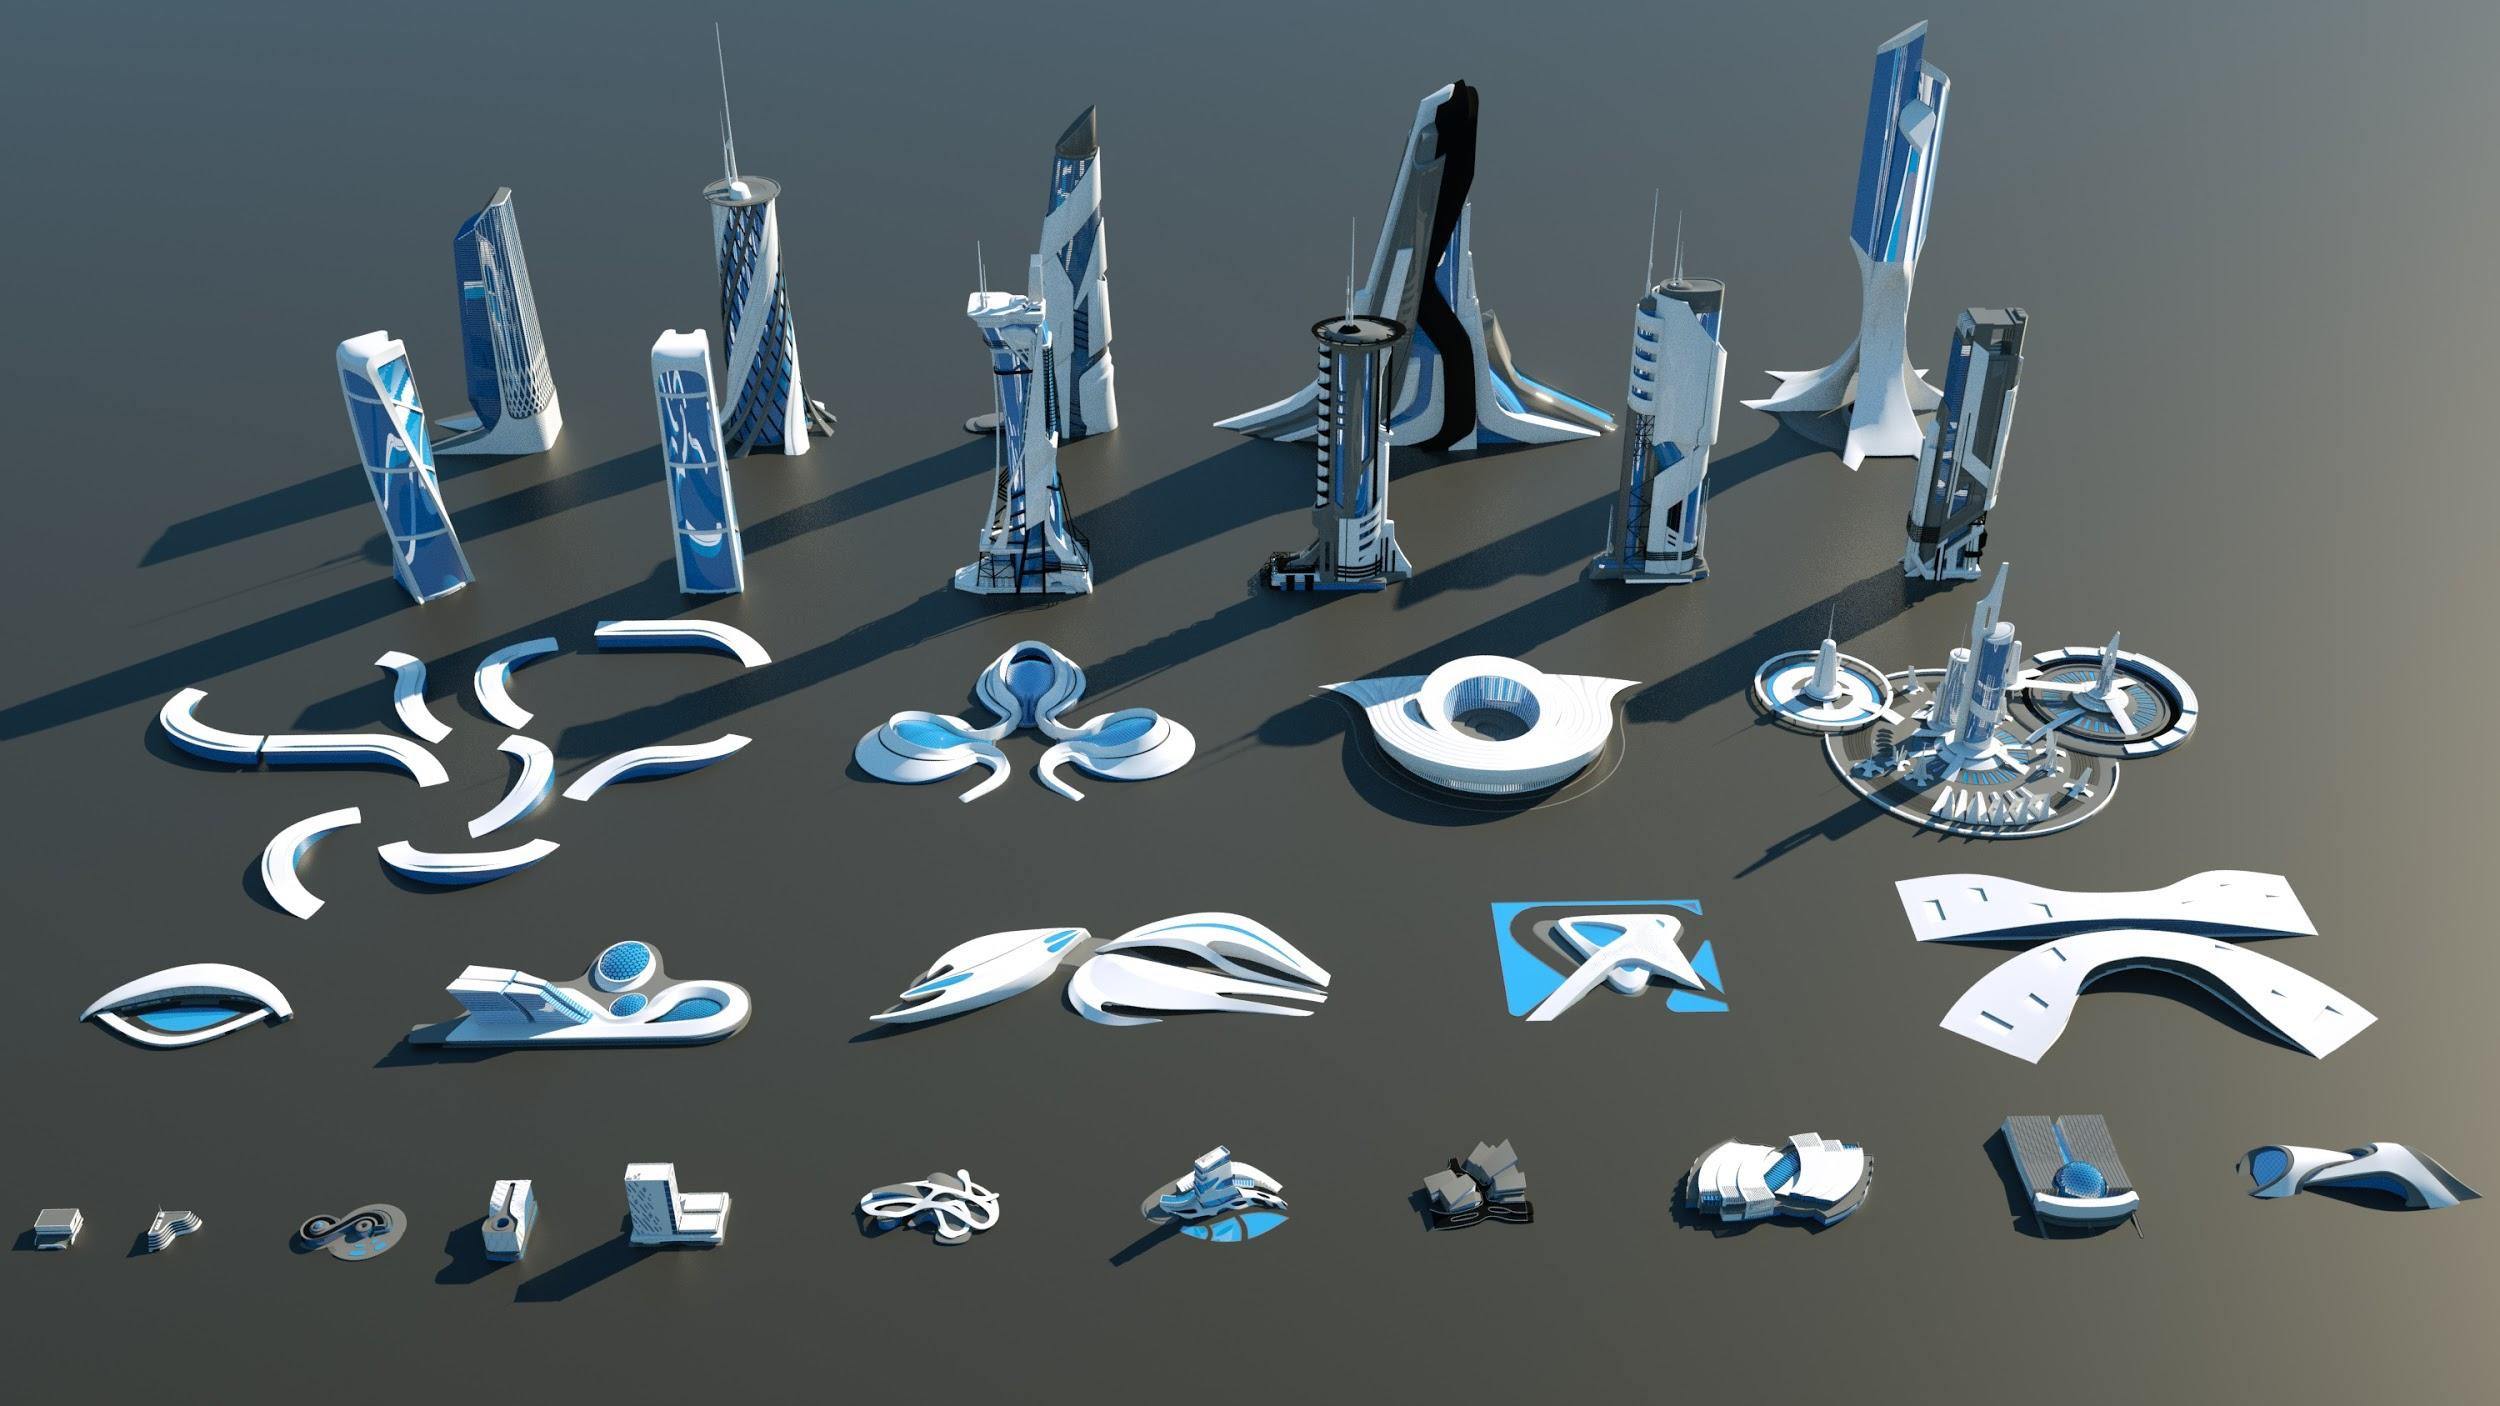
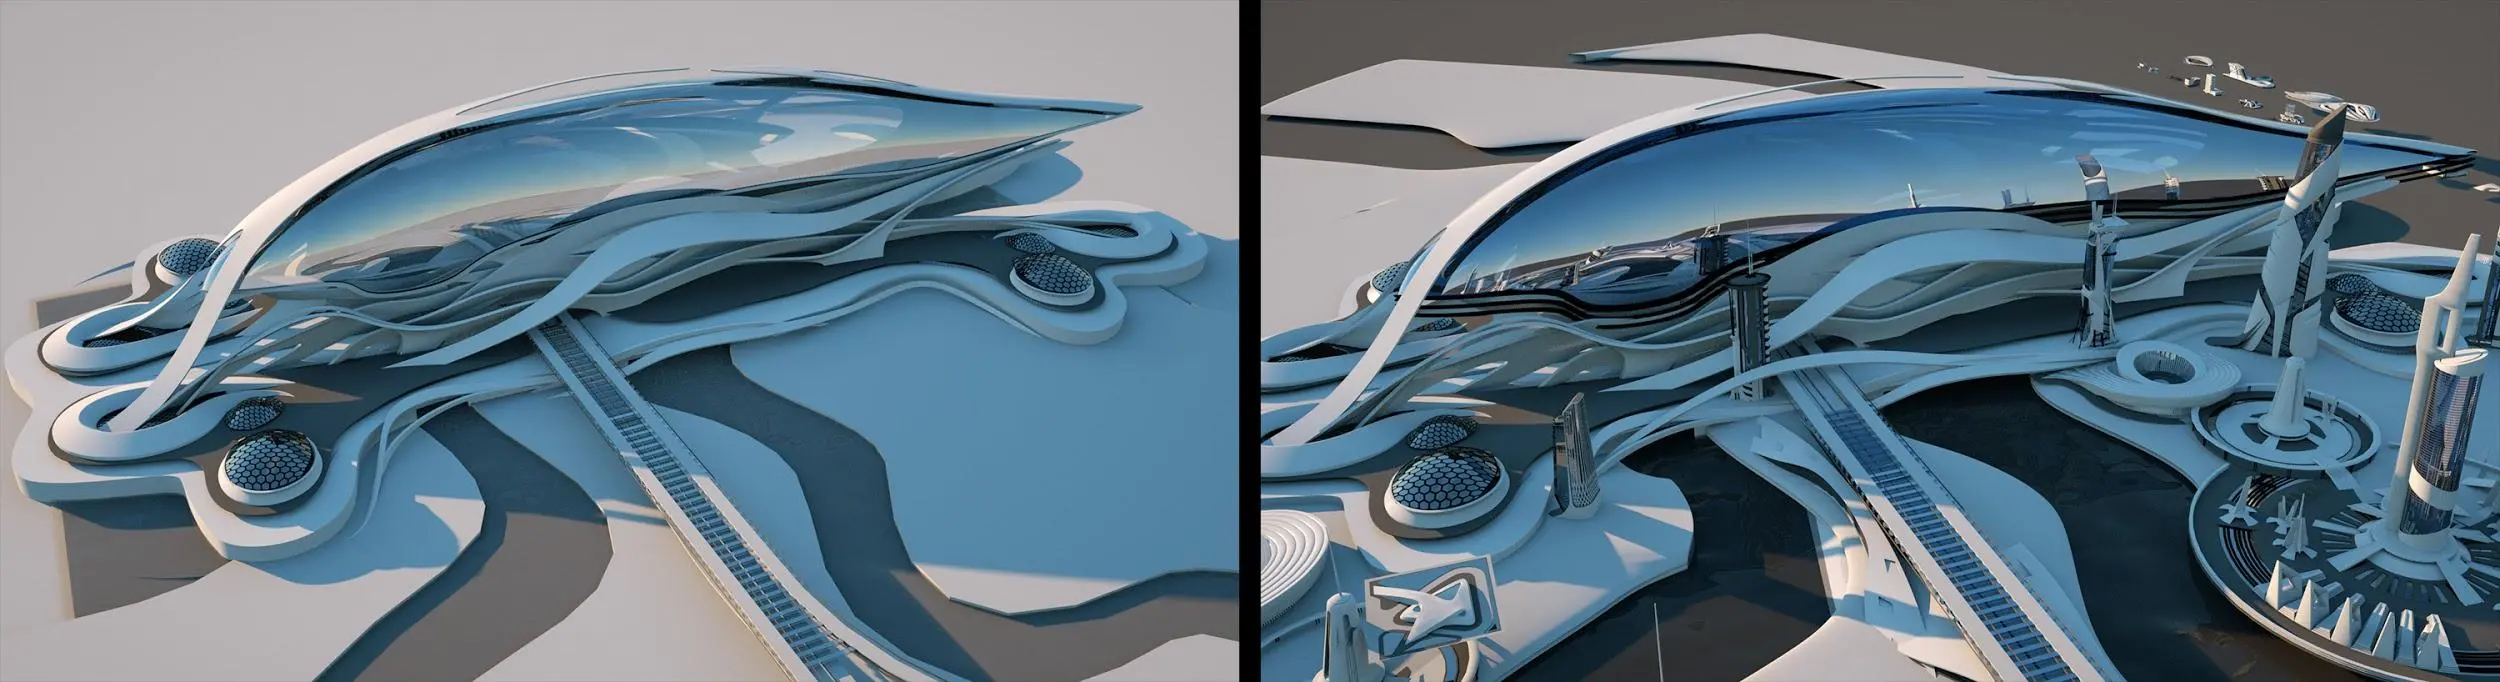
In the Gif below, you can see some of the steps I took to create the main building (which I threw away and changed in the end).
Using the technique I just described, I created a series of shapes which I then mirrored to create a symmetrical building. I added a distorted dome on top to create a building that could resemble a train station building in this scene. I used some of the KitBash3d models to give the building some detail. With some quick materials, I turned the dome into a glass structure.

With the main structure ready,I now had the time to import some of the Utopia models to populate the scene.
After adding some river shapes using the same technique in Cinema 4D, utilizing the brush tool to push the polygons in to place, I started adding more buildings.
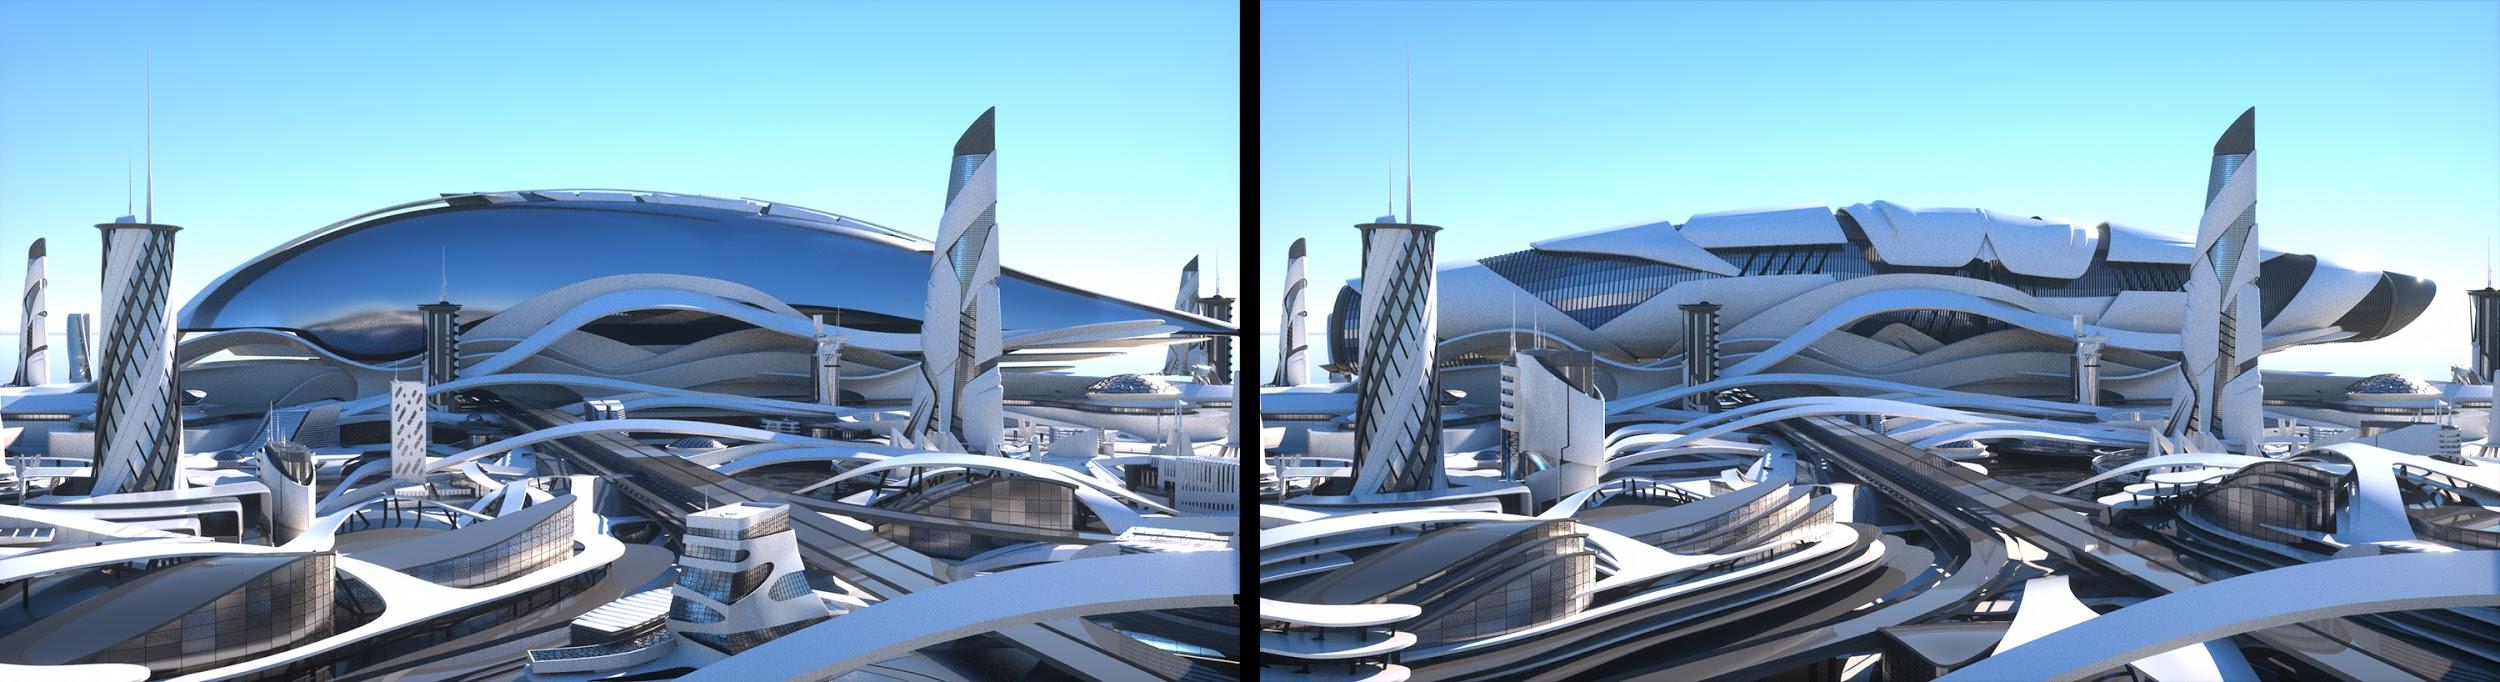
While I populate the frame, I try to figure out a good composition for the final scene. Working in 3D like this is a very organic workflow where you are building your scene while keeping in mind how it is going to look in the final image. At this point, I am constantly adding and removing assets to come up with a nice set of shapes. I added some highways to suggest that this main building could be a station or a central hub of some sorts. I ended up changing the central dome with some of the KitBash3d buildings because they provided me with a lot more detail.
While working on these scenes, I am not afraid to delete polygons or add them as I go. Since my final product is the illustration, I don’t have to pay attention to correct topology or texture errors since I can paint over my mistakes in Photoshop. This makes the 3D workflow feel very relaxing and loose, like a kid playing with Lego pieces!
At this point, I was a bit bothered with the horizontal feeling of the scene so I decided to make the main building a vertical one to make it stand out more in the composition while also creating some guiding lines to the main building. This made most of the shapes, like the highway and the flowing structures, point your focus towards the main building.
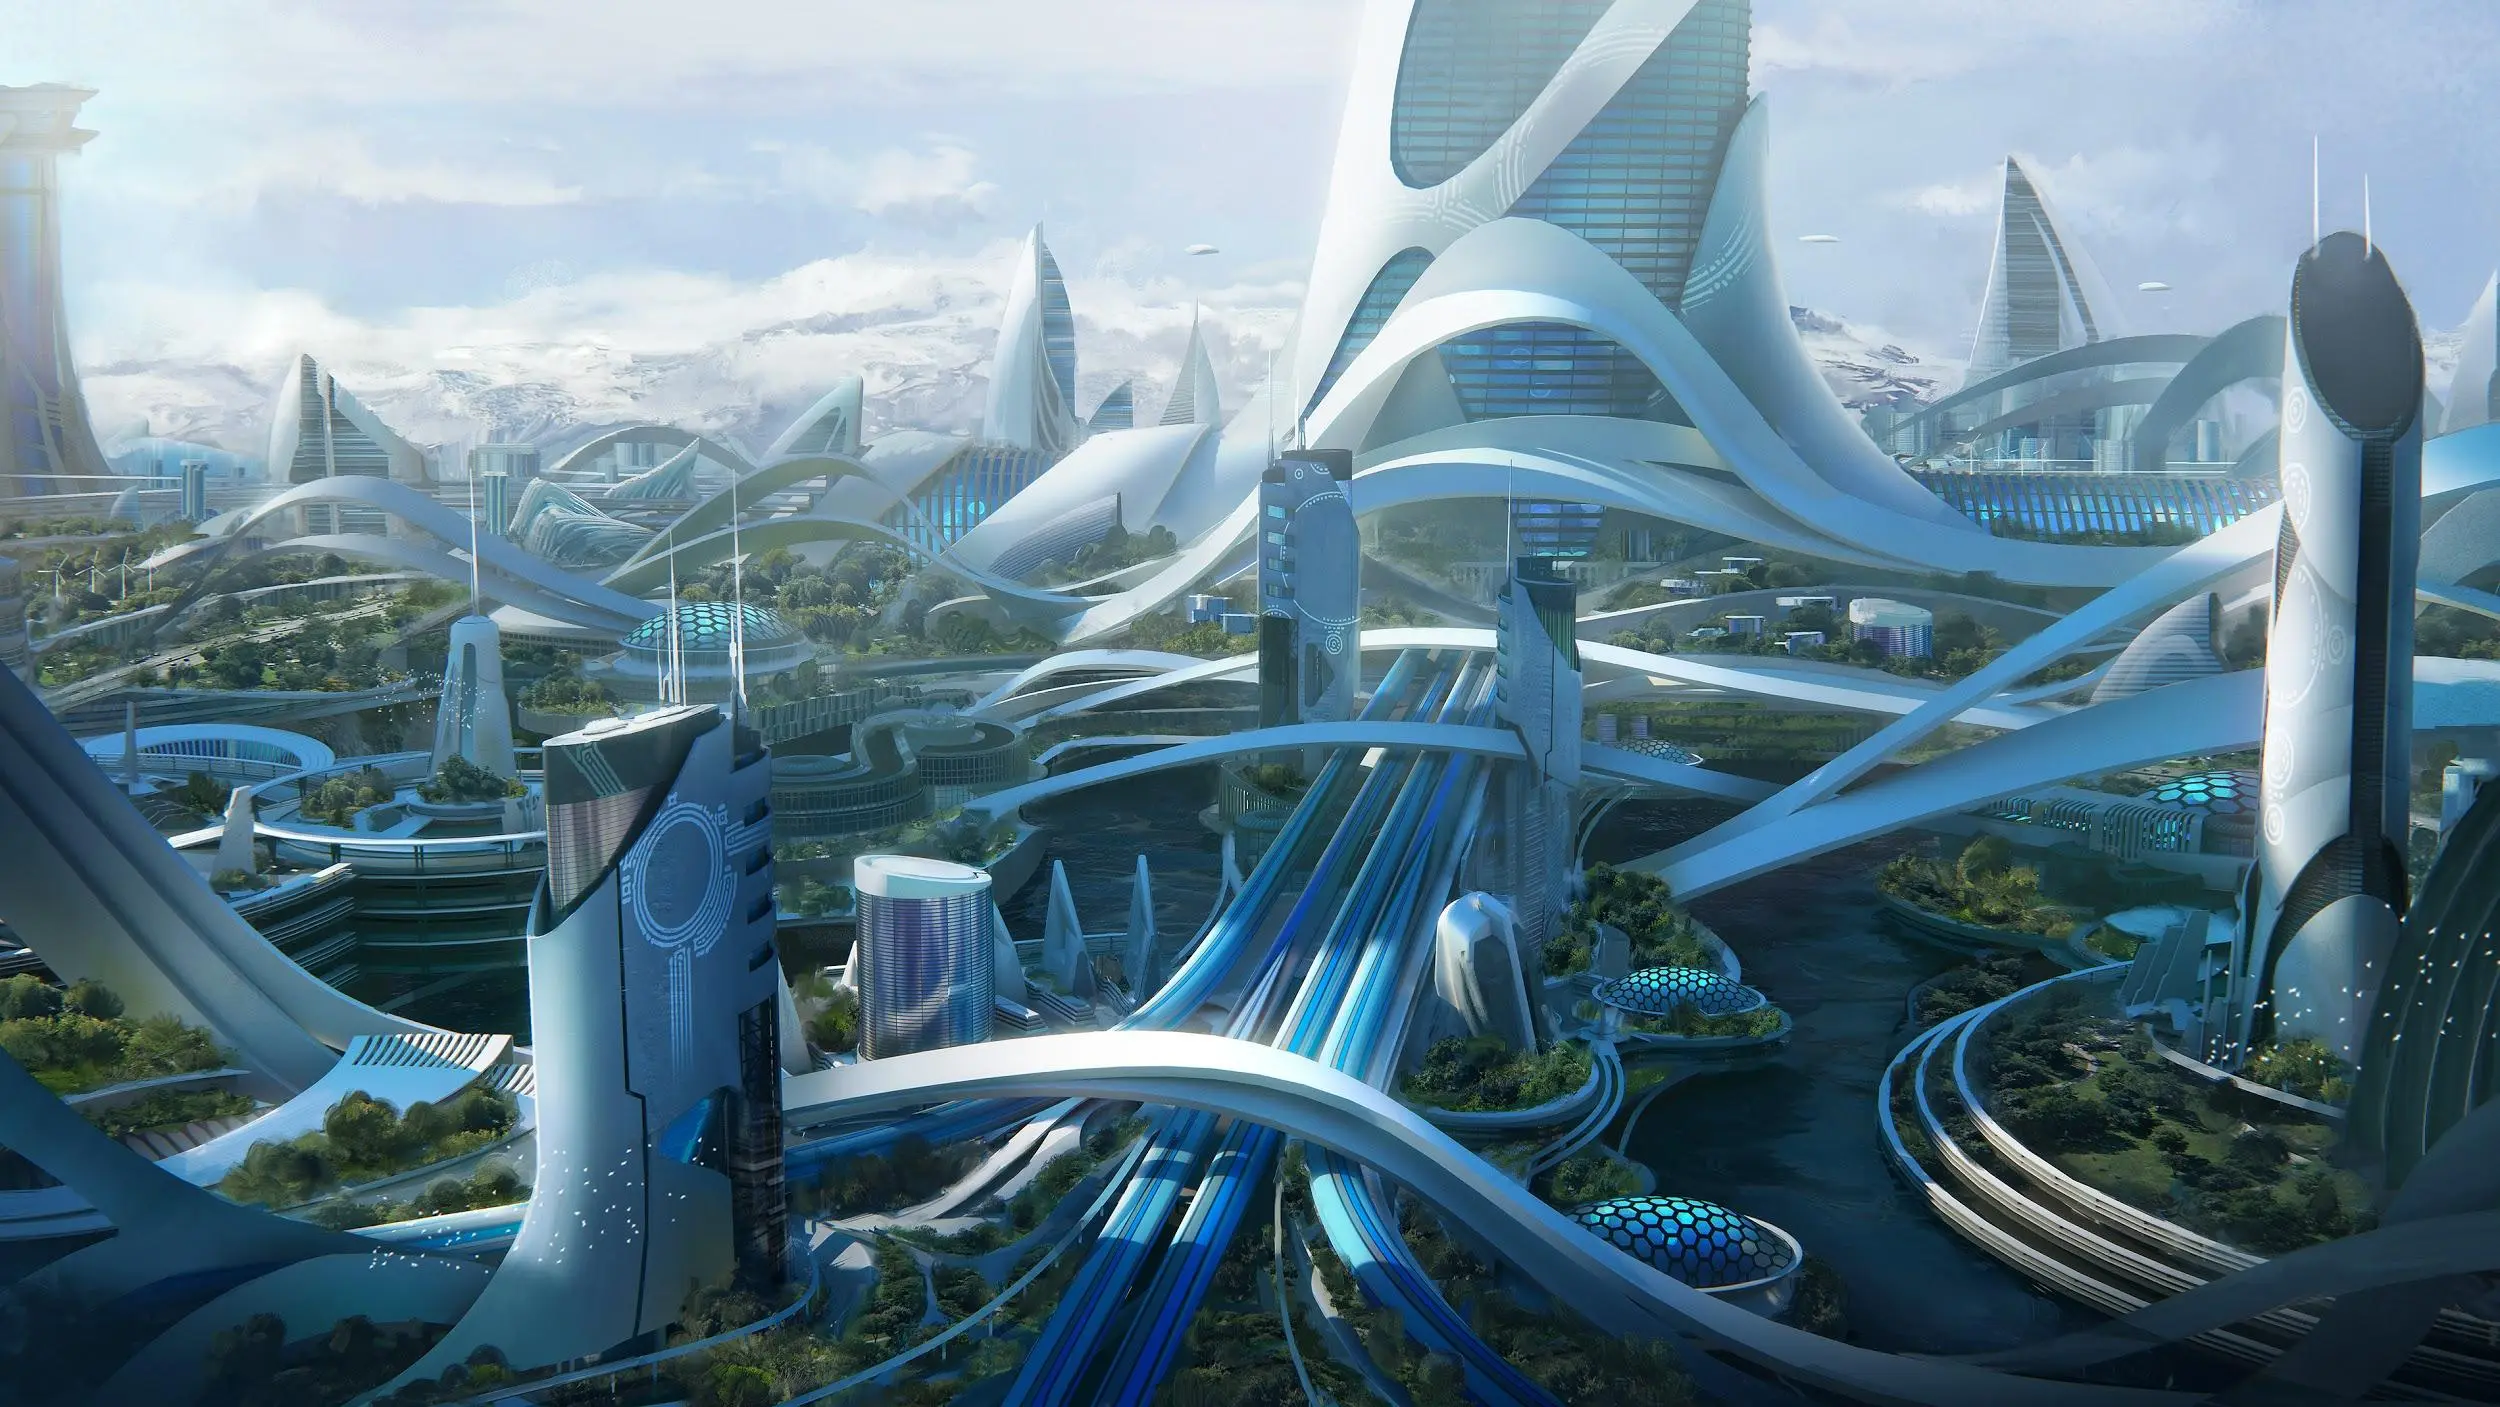
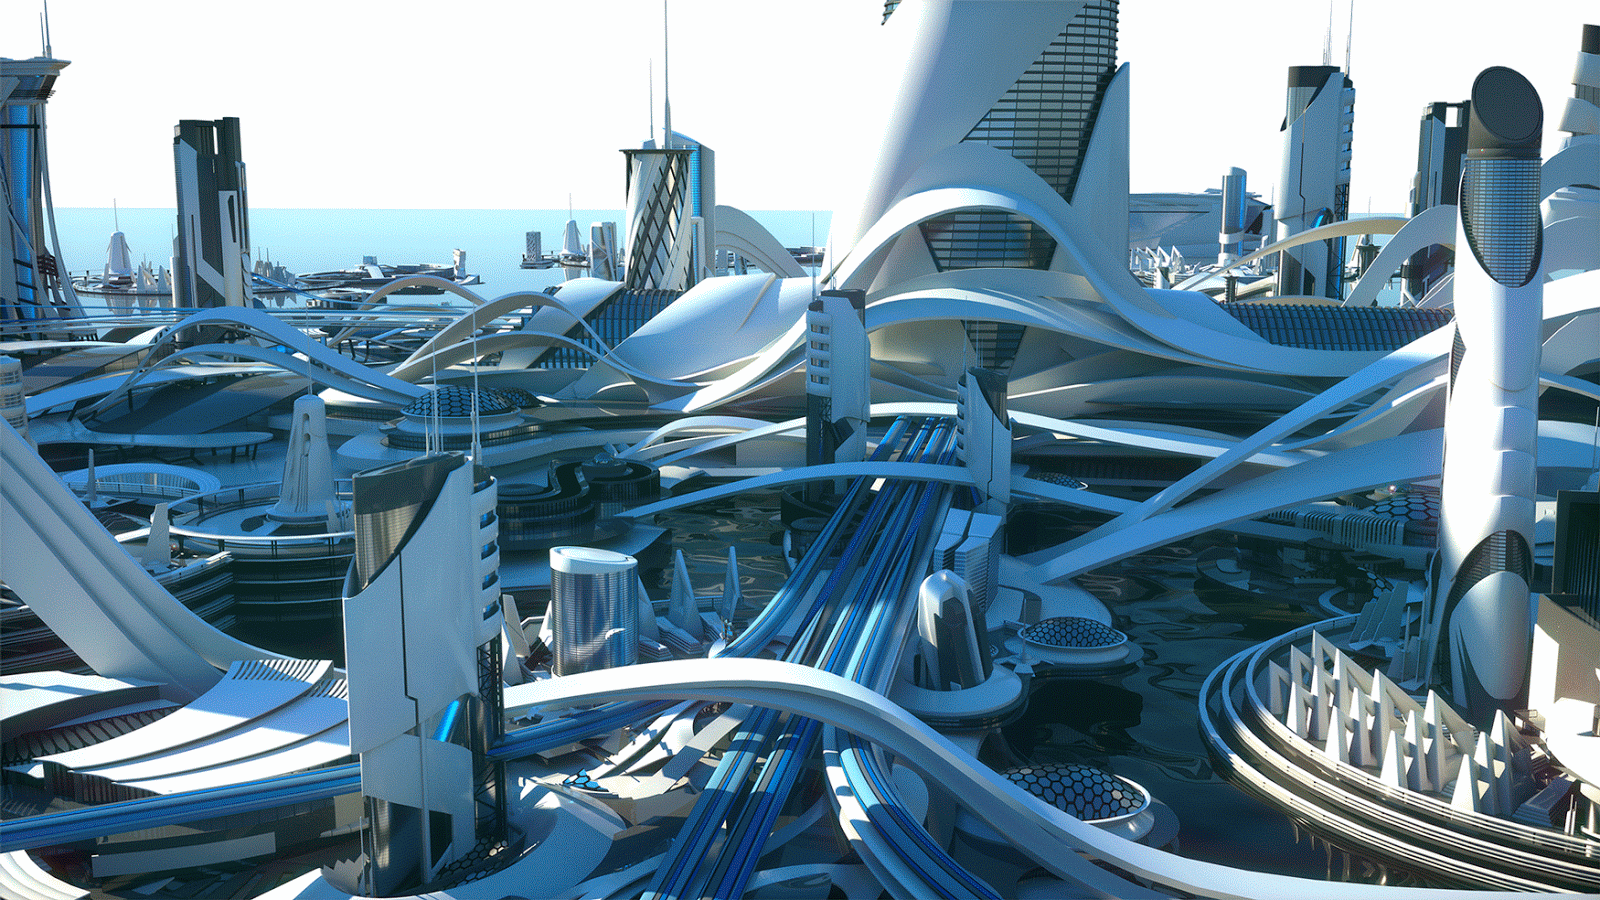
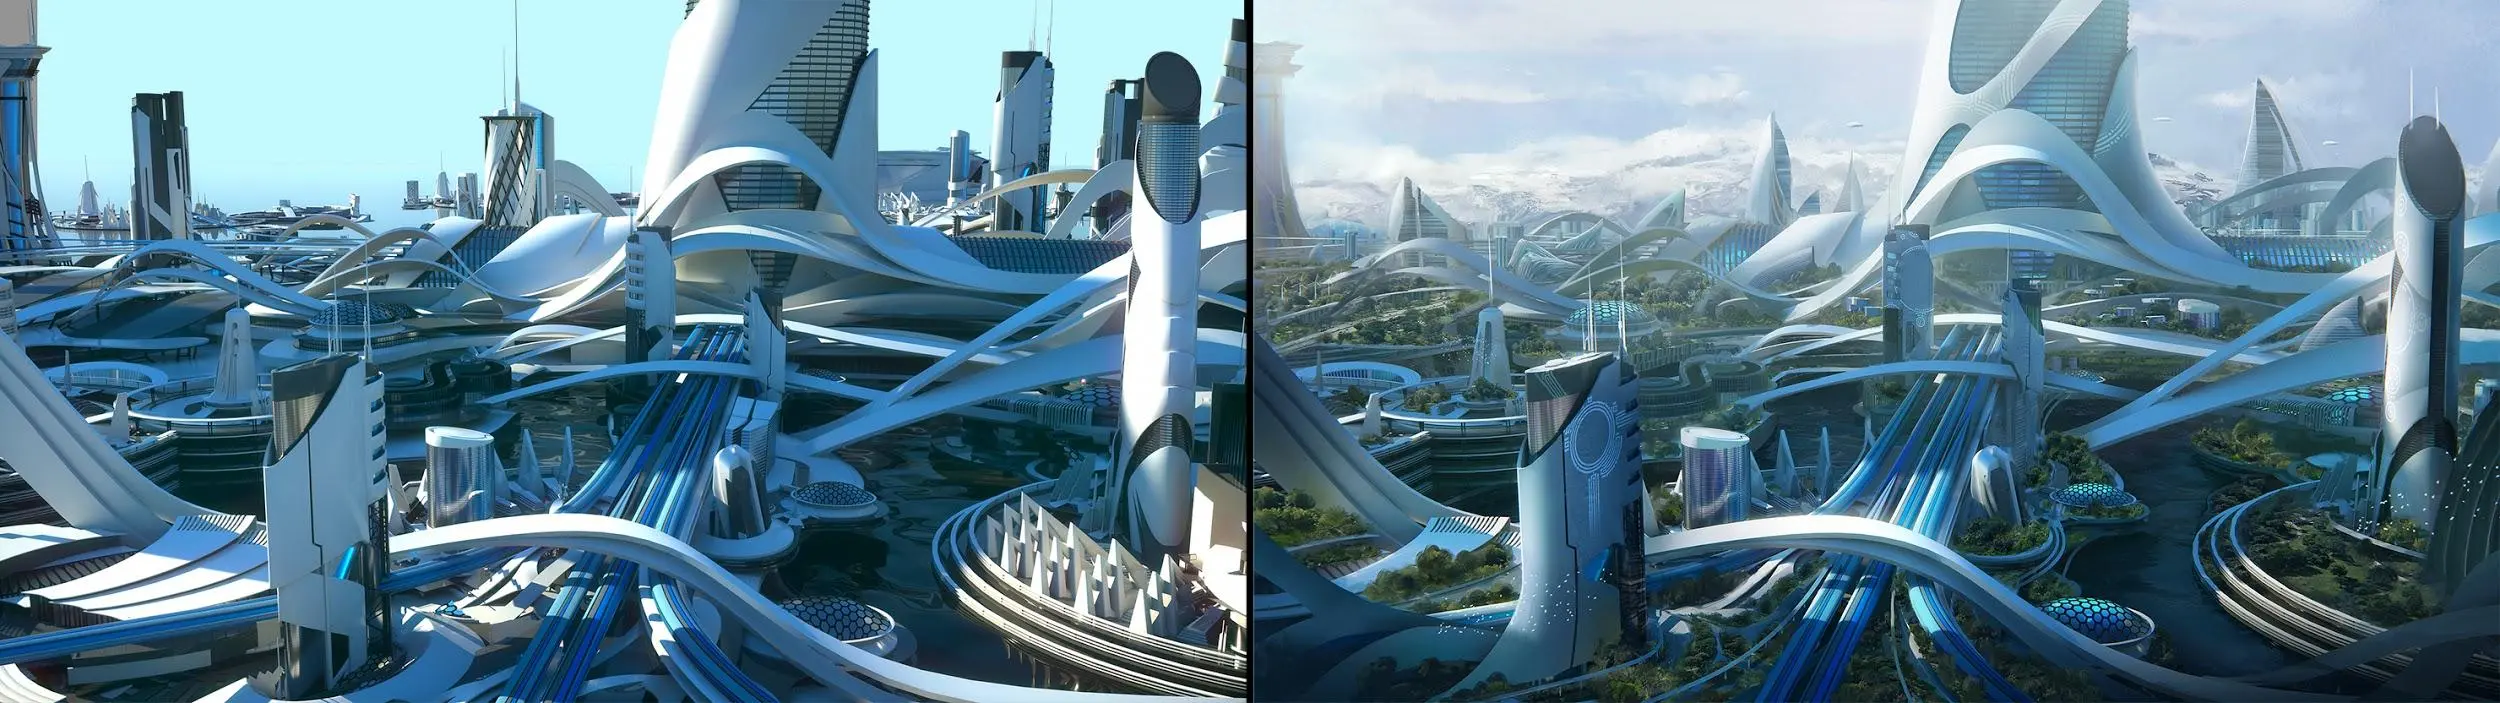
After a lot of iterations, and shedding a few tears, I ended up with the image below as the final render.
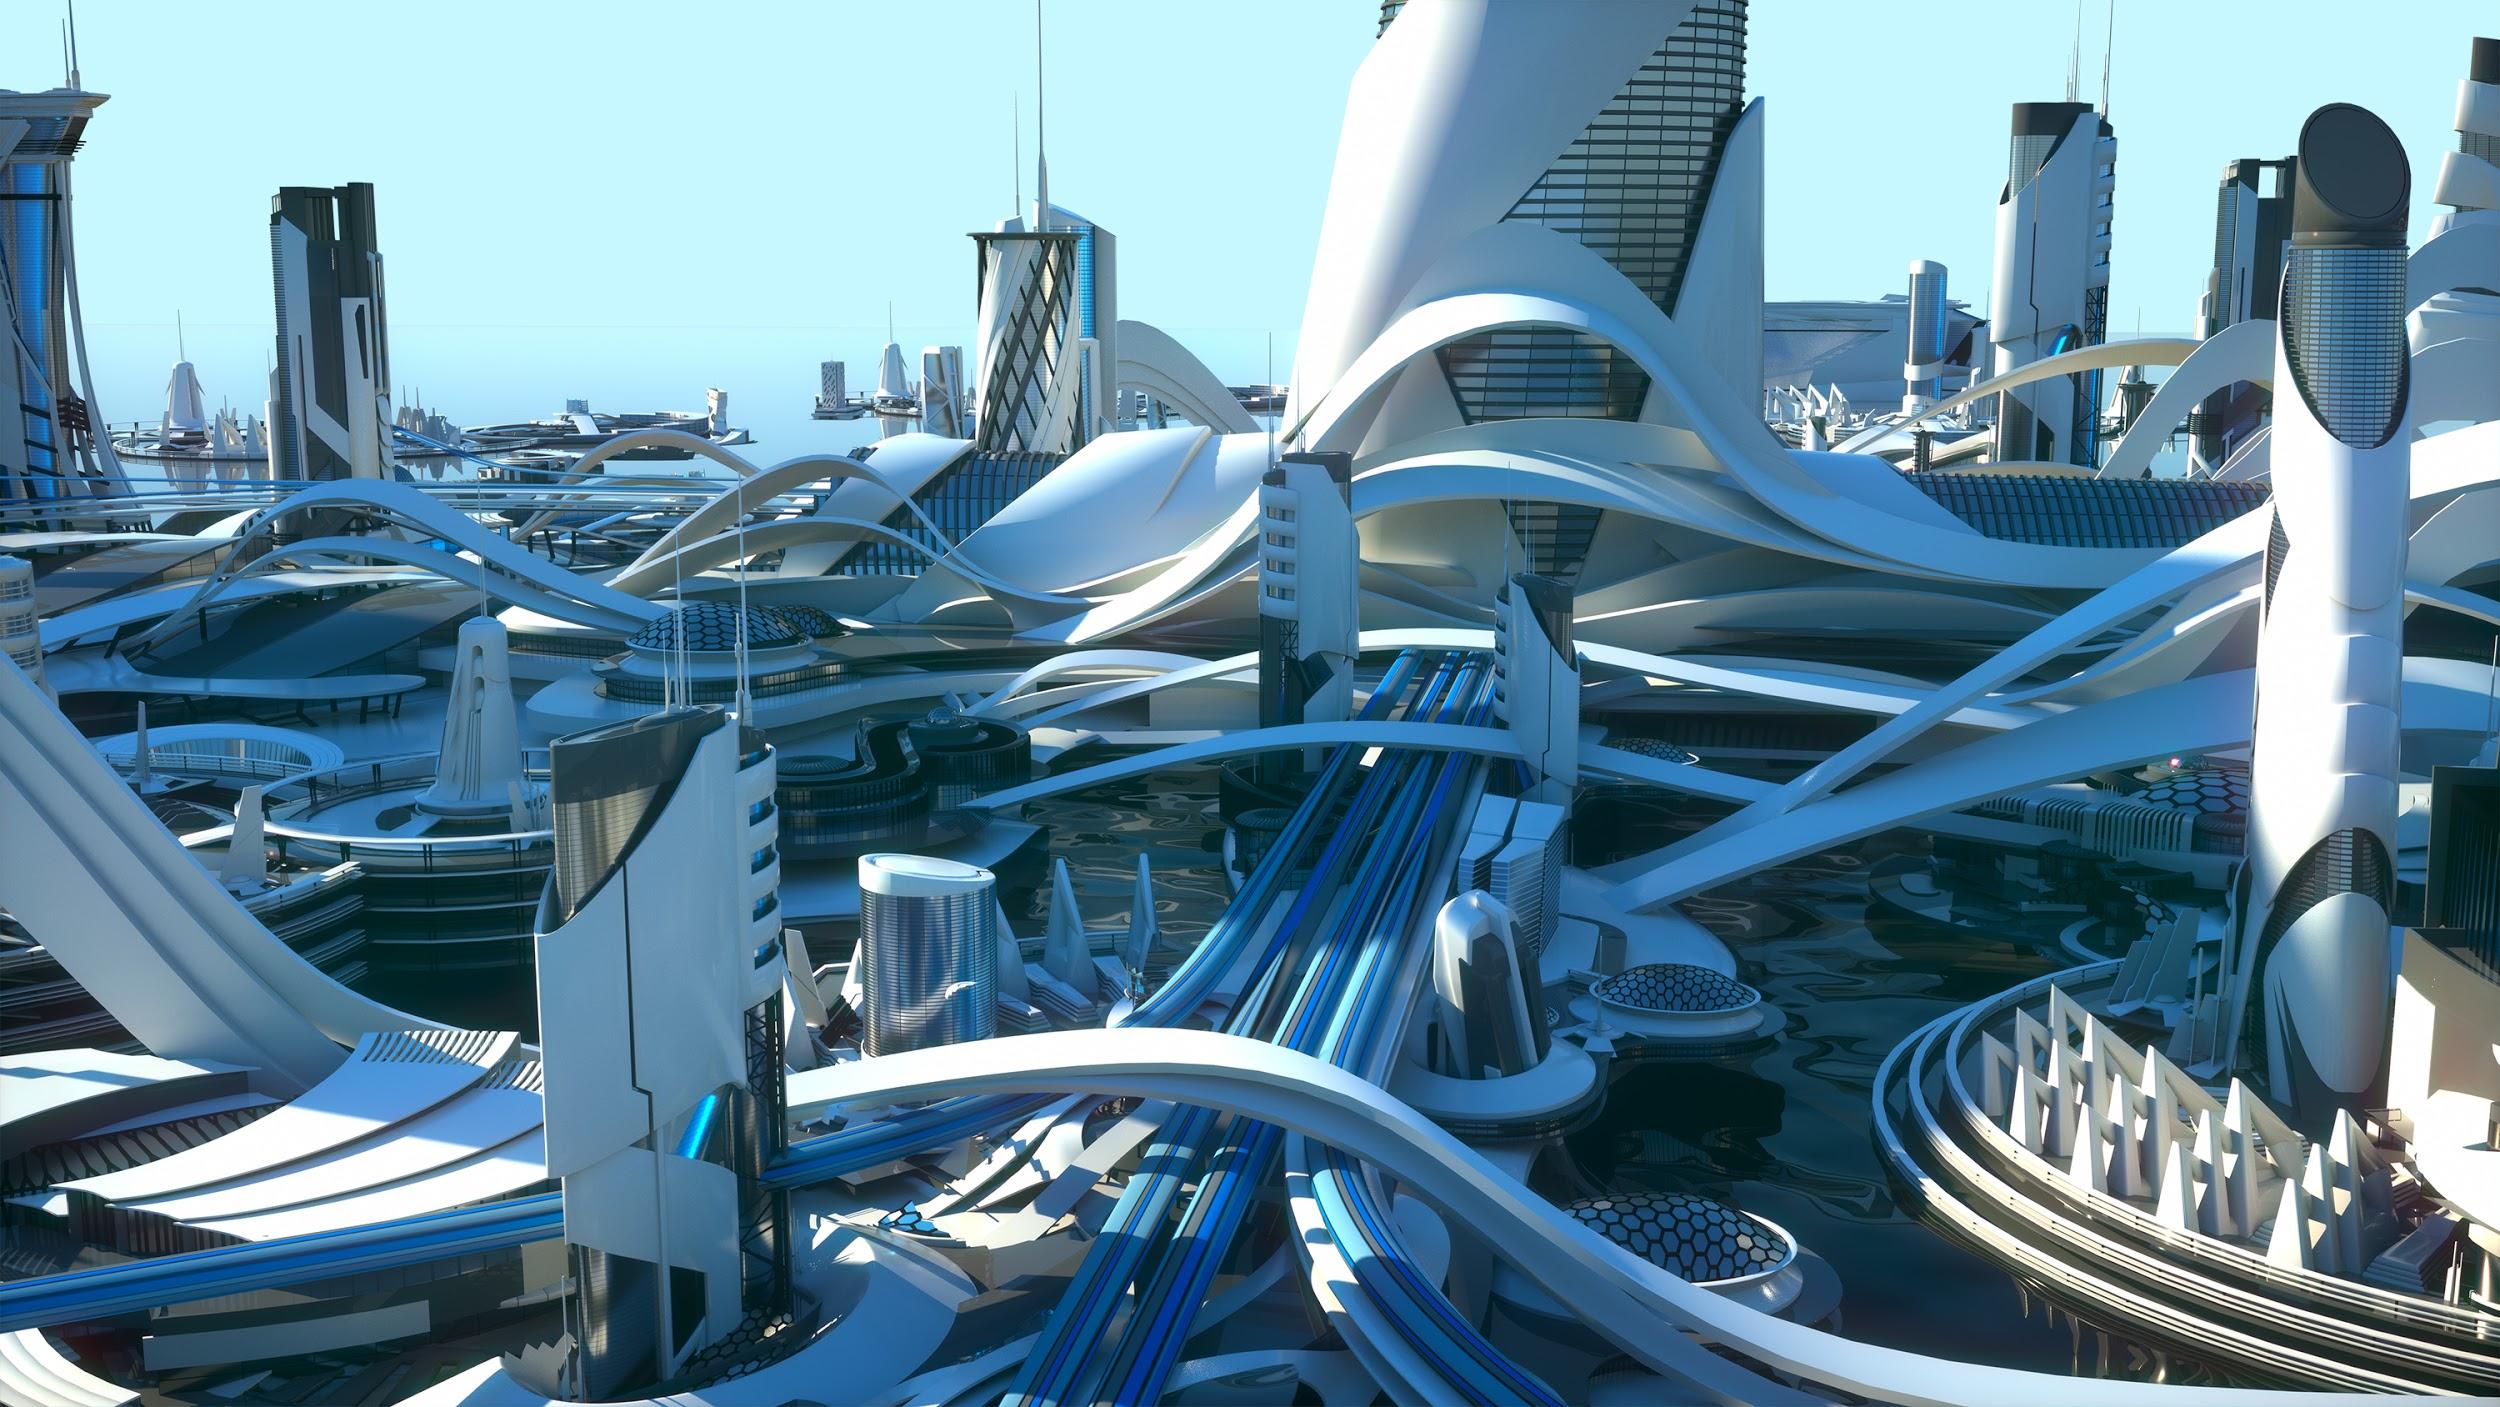
This is the kind of final render that I take into Photoshop. 3D renders like this provide a good base for an illustration since you don’t have to pay that much attention to important things like: perspective, lighting and composition anymore, because most of this is figured out in 3D!
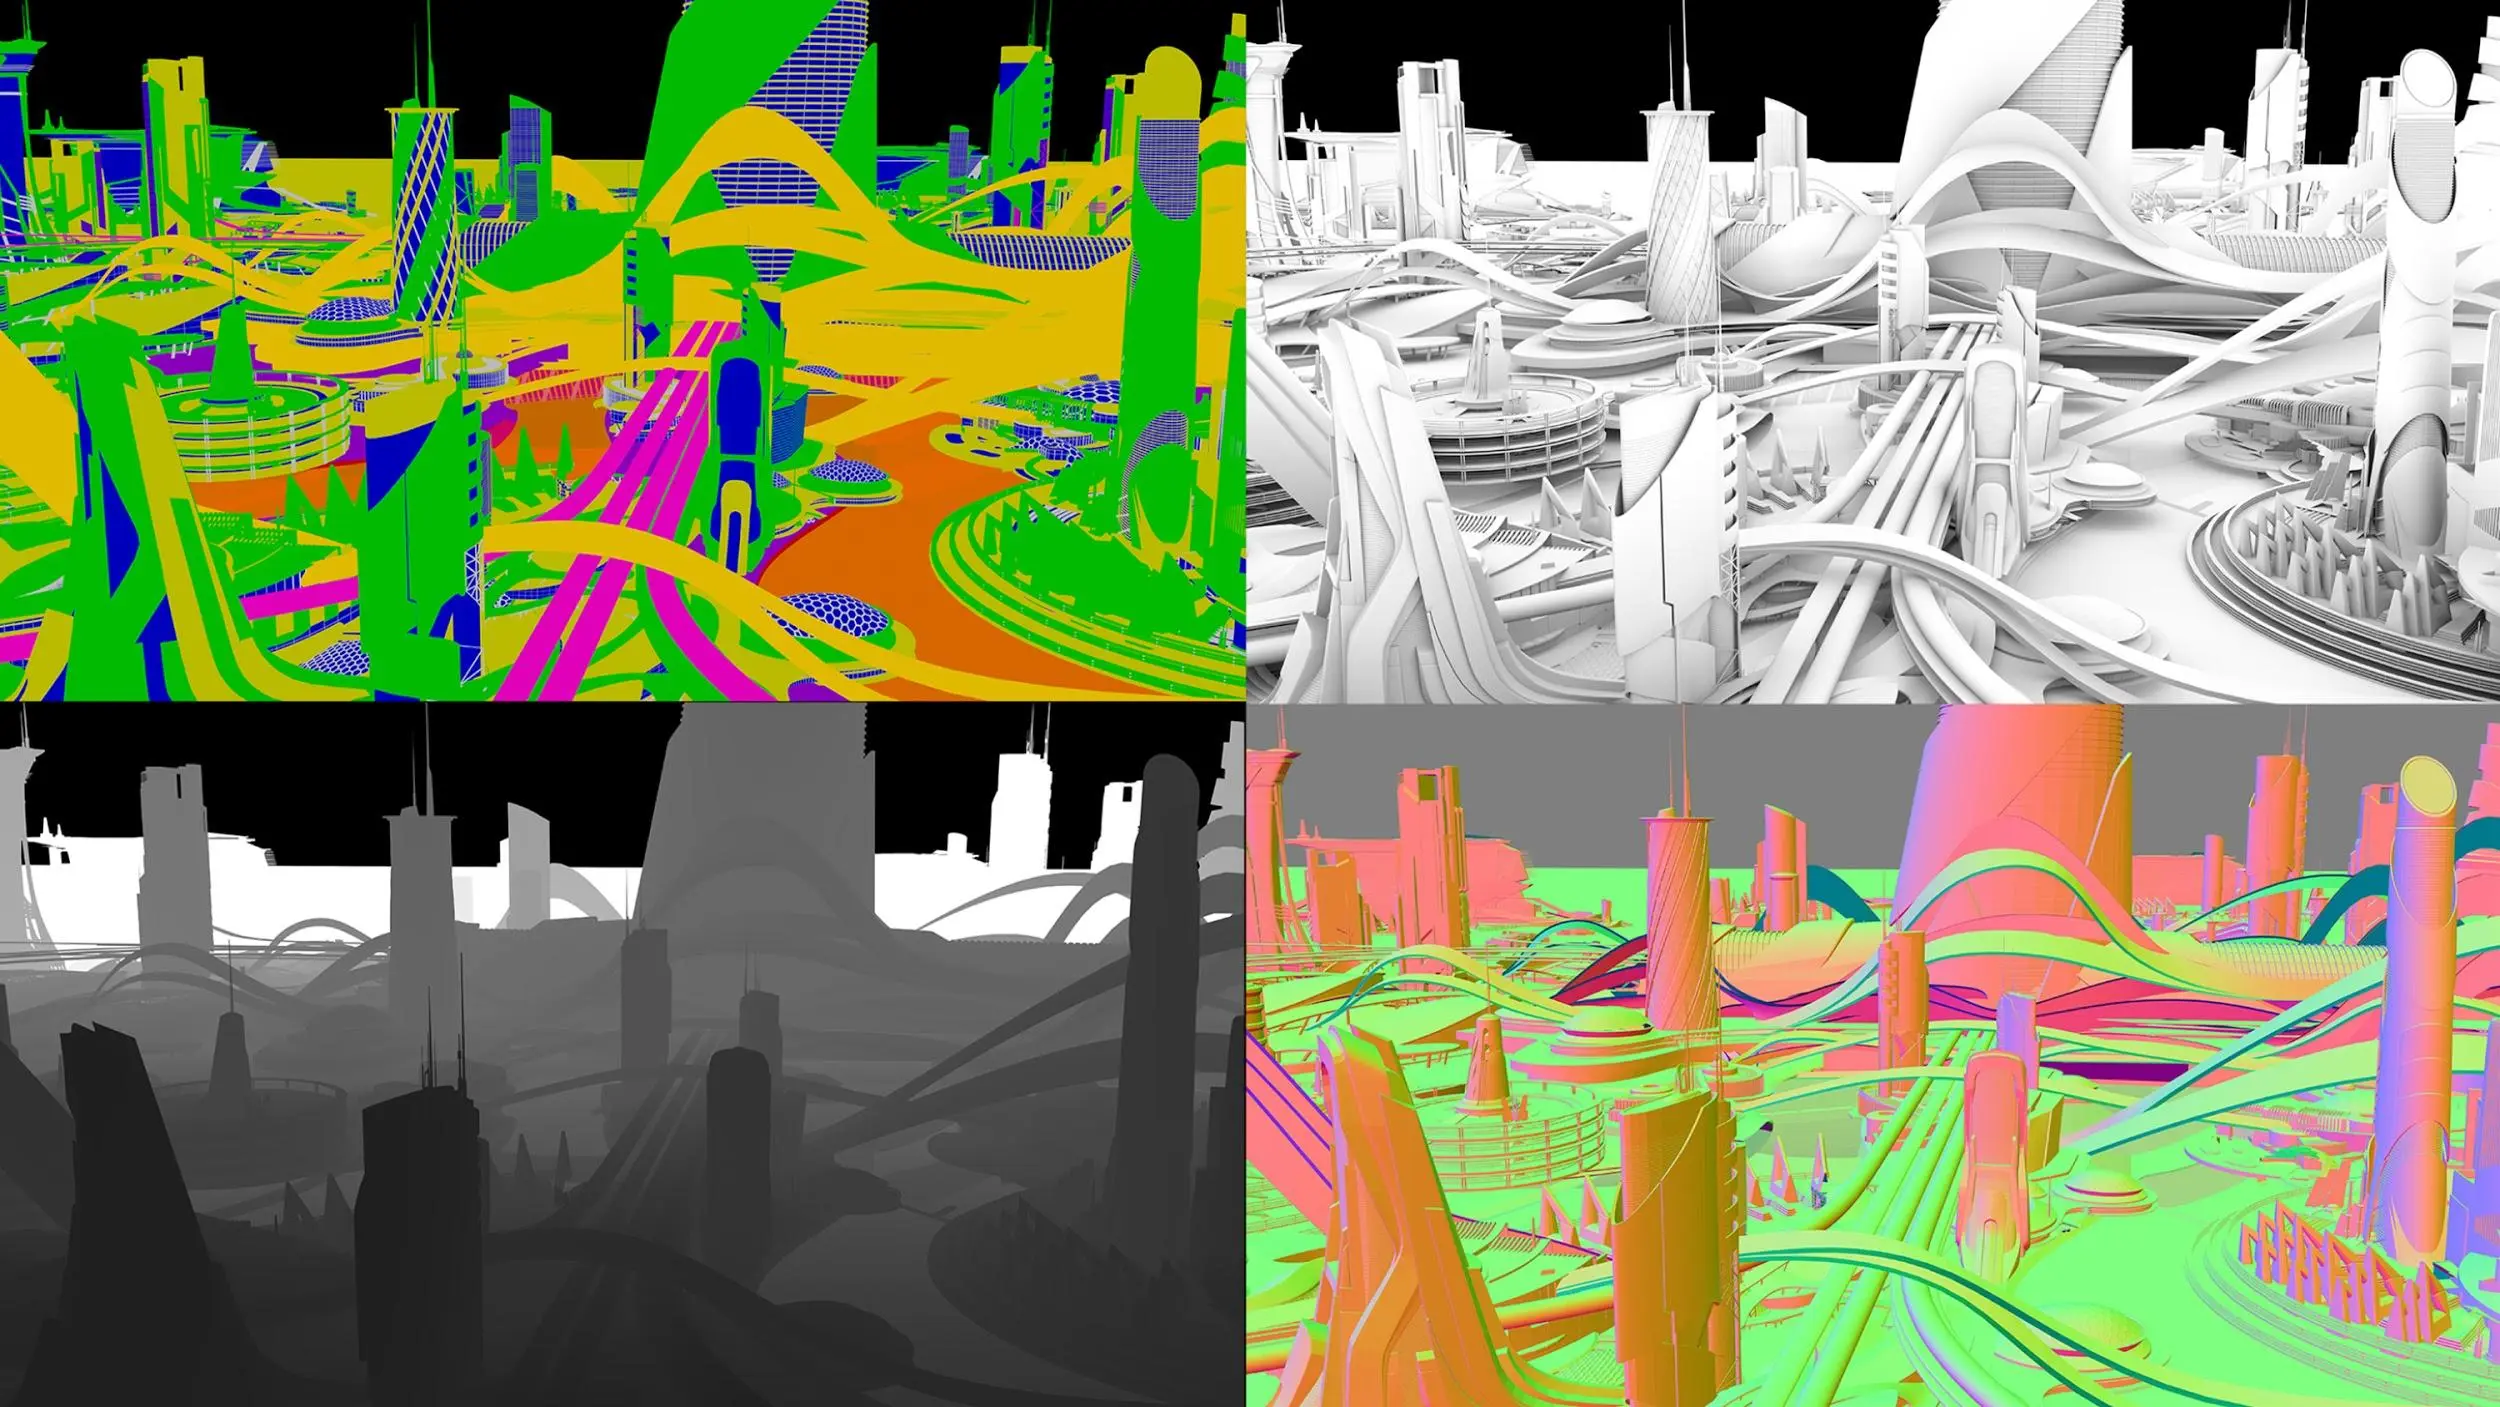
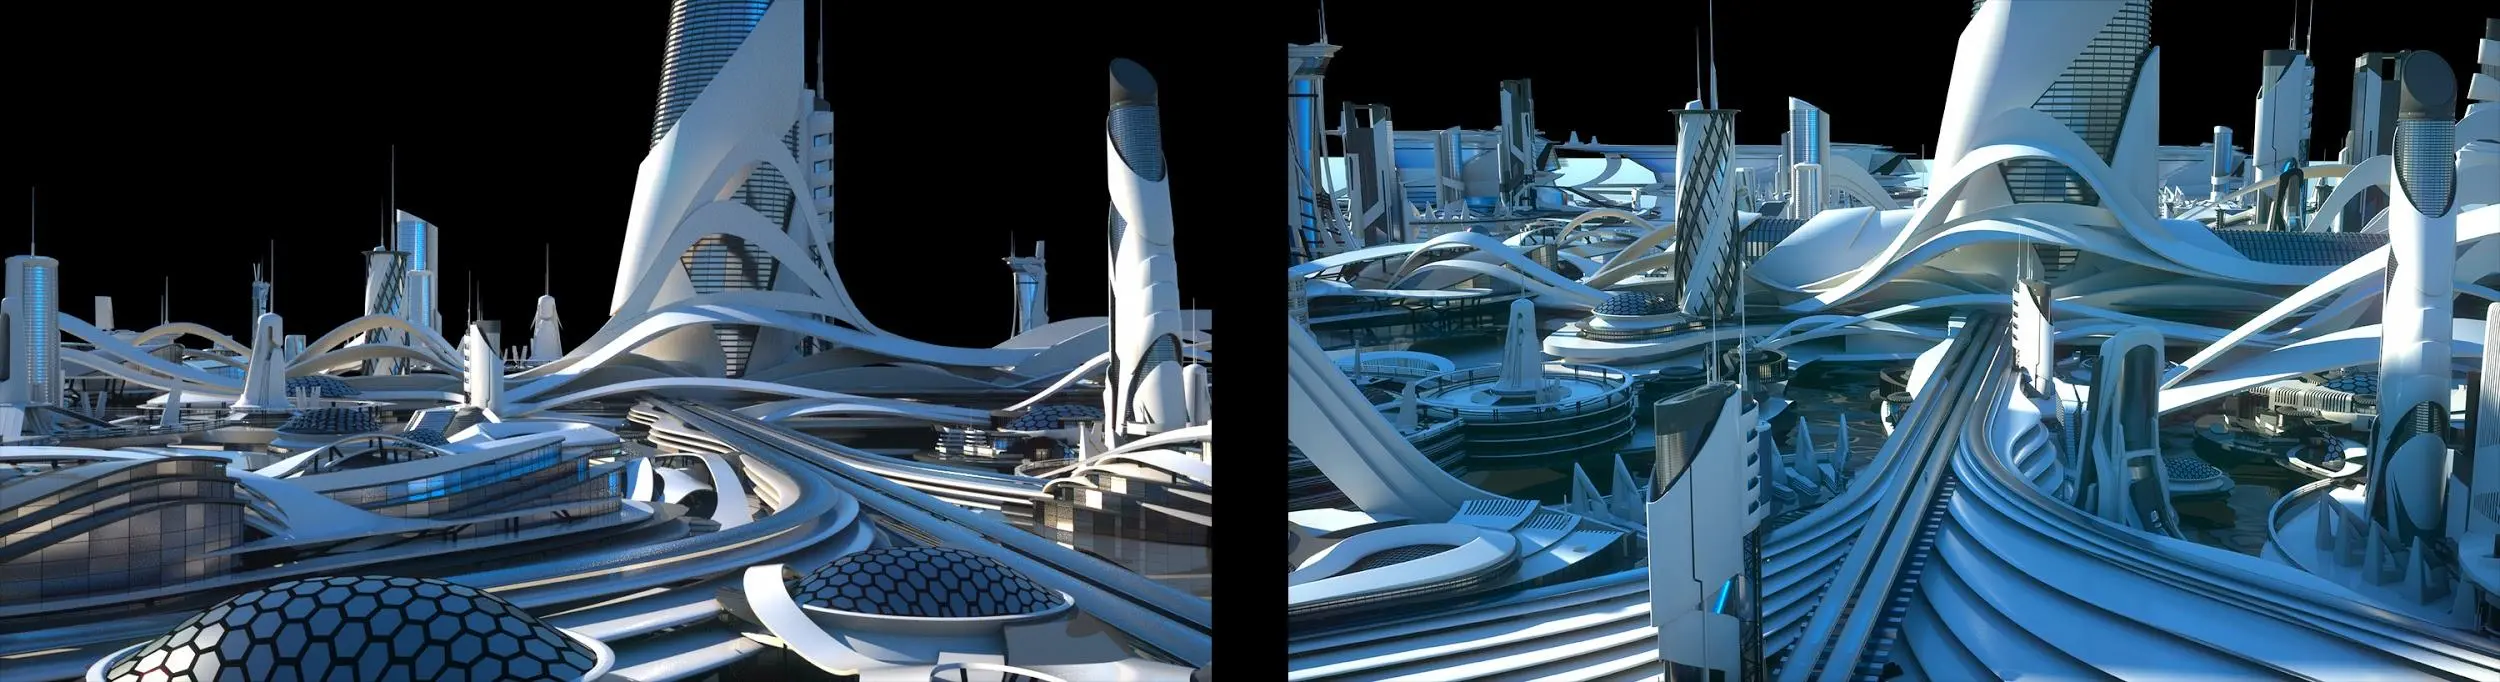
The final render is not the only thing that comes out of the 3D software though. I also made sure to make a Material ID pass, an Ambient Occlusion pass, a Z-depth pass and a Normals pass. These passes can help out a lot in Photoshop if you are a concept illustrator or matte painter, for example:
- If I wanted to give the windows in my scene a different color in photoshop, I could select the blue color in my Material ID pass to select all the windows at once!
- An Ambient Occlusion pass can be great to create some contrast and shadows in my scene.
- Z-depth is great to use as a layer mask in a fog layer. Meaning that the buildings in the front will get less fog than the buildings in the back.
- The Normals pass gives the assets a color based on where the polygons are facing. The polygons facing up are green in this instance. A pass like this can be great for selecting specific sides of buildings to light them or apply shadows.
Below is a Gif of the painting process.
I will try to explain a bit of my rather destructive way of painting. As you can probably see there doesn’t appear to be a very structured way of detailing this image. Usually I am rather chaotic when it comes to painting, and lack a specific way of structuring an image. Since the 3D render gave me a lot of information already, it was just a matter of making the image come to life a bit.
I started adding in atmosphere using the z-depth pass and slowly started adding in photos of parks and trees to get some of that Utopia green going. Since in my mind, a utopia doesn’t deal with brands competing for bags of money anymore, I didn’t have to bother with adding commercial signs everywhere. In the harmony that is a utopia – you don’t need cash or credit! It seems like a bright future!
As you can see in the Gif, a lot of the KitBash3d buildings remained intact throughout the painting process. Some of them are removed or added to improve the composition. I also ended up adding a lot of the small new buildings. These little additions are usually made with the mixer brush.
The mixer brush is a brilliant little tool in Photoshop that allows you to sample bits of your painting and literally use them as a brush. In the example above, I created a bunch of small new buildings sampling bits and pieces from the big building from the Utopia kit. In this case the 3D render provides so much information that I could simply sample bits and pieces over and over to create new buildings and assets. The mixer brush is also used to give the trees and grass in the image a more hand painted look. The mountain in the back also got the mixer brush treatment to unify the image a bit more.
The fun part of working in both 3D and 2D is that it is very organic. The 3D render is rarely the final image. I try to leave some room for creativity while I model the scene, so later in Photoshop there is still some room to fix mistakes, add new things, and keep things loose.
There were a lot of white highlights in the 3D render that were very distracting to the eye so I ended up removing most of the distracting spots to create a bit of flow in the image.
I spent a lot of time making the render detailed as possible. While I will never be as clean as a matte painter, this was a great challenge to try and pay more attention to the cleanliness of the image because normally my work looks a bit more loose and dirty.
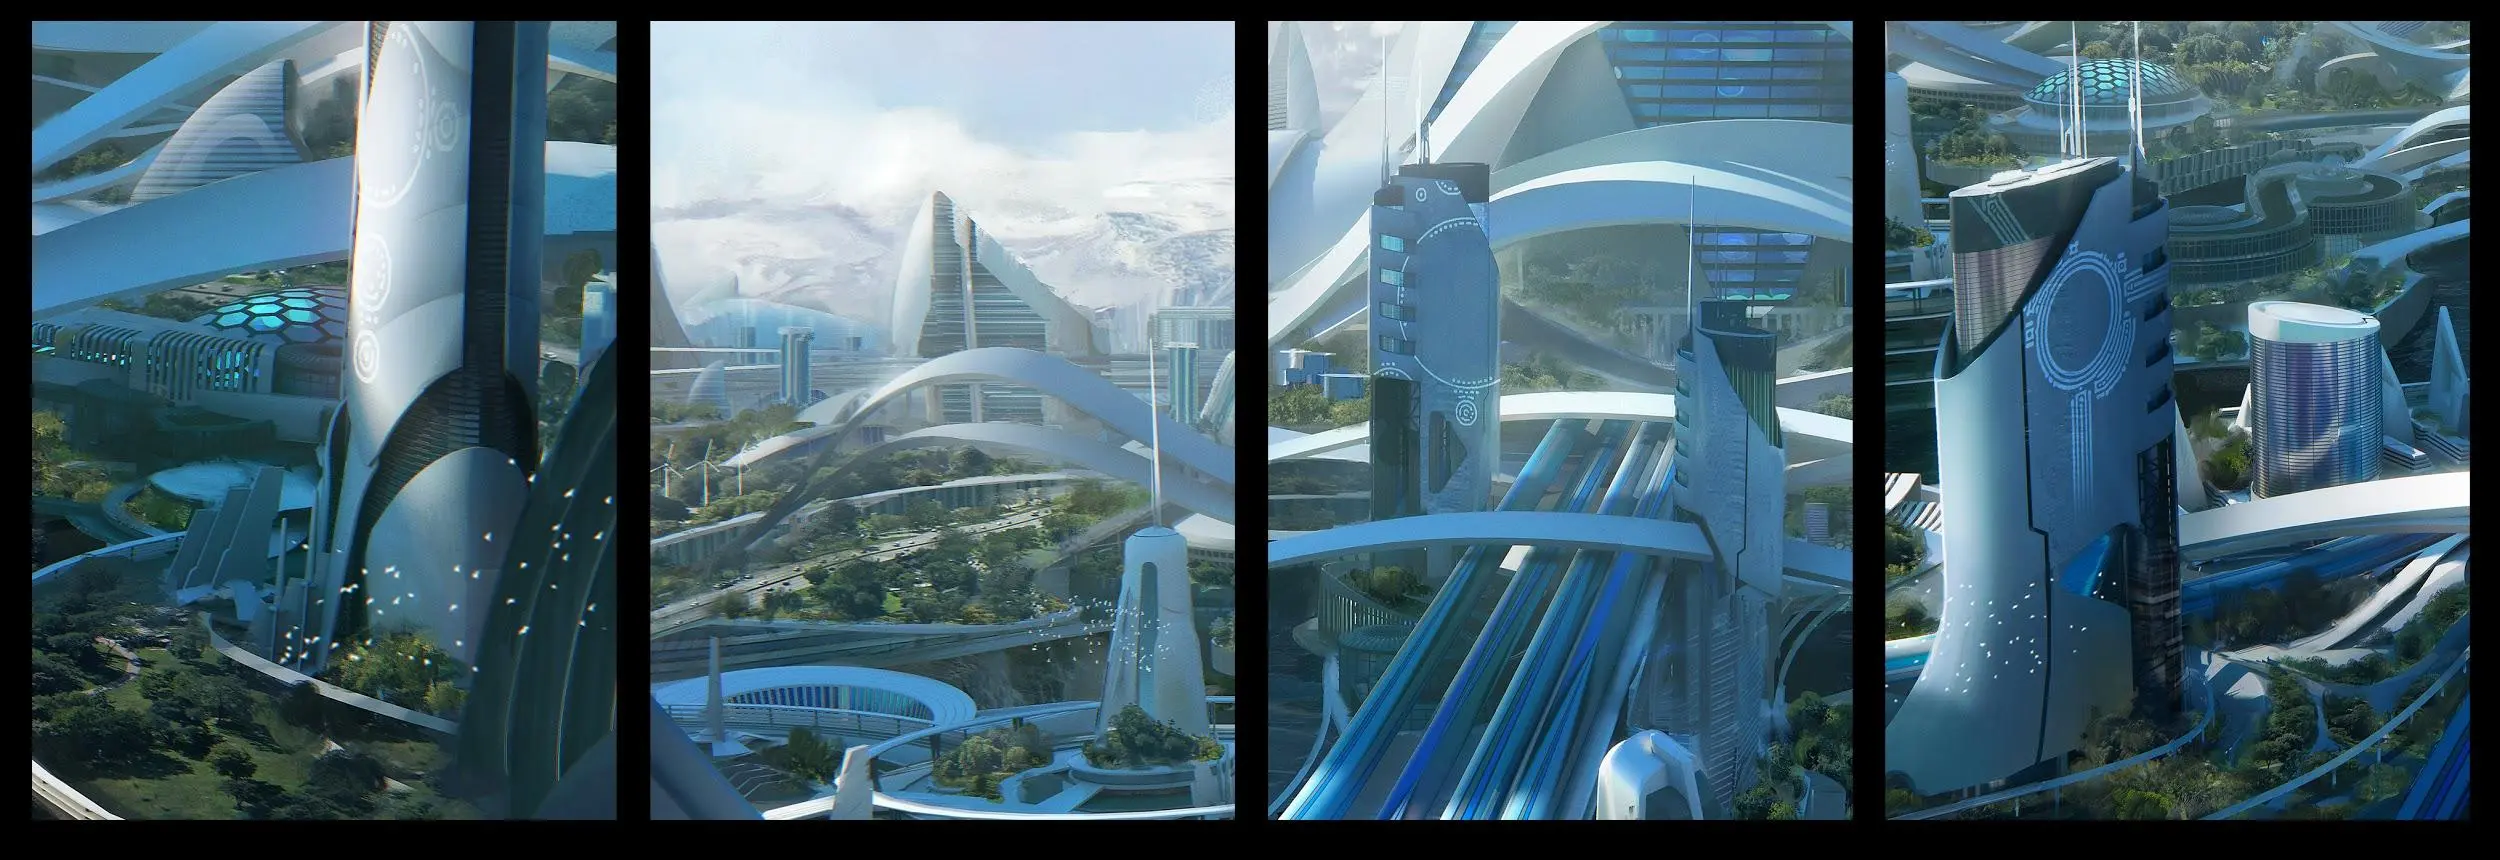
These are some detail crops of the illustration. The markings on the buildings were made using the so called “reaction-diffusion” action in Photoshop (google this, it’s awesome). With this action, you can turn simple shapes into very organic looking patterns. These matched quite well with the overall scene so I decided to put them in. After adding some life to the image with some friendly utopian birds and post effects I was ready to call the image done.
One of the most important factors of working in this industry for me is to have fun. I believe if you have fun working on your projects instead of forcing your way through it will make your work better. And believe me when I say I had a ton of fun working on this image!
I hope this little article proves useful to some of you out there! Thanks for reading.
You can pick up this amazing new kit and others at www.KitBash3d.com. For a more in-depth discussion and Q&A on this project, check out the KB3D Live Show with Leon, Maxx Burman and Banks Boutté. The recording will also be available soon on the Kitbash3d Youtube Channel. Follow them for updates and more.