3D Artist Julian Santiago shows how to create a stylized character using Reallusion’s Character Creator and iClone
With the release of Character Creator 1.5, artists will now have the ability to create custom clothing for their characters that will automatically conform to any custom-made character inside Character Creator. Characters with custom clothes can then be brought into iClone to be posed or animated. This tutorial will show you the process of creating a stylized character with custom clothing. We will be using Reallusion’s Character Creator, 3DXchange Pro, and iClone as well as some external 3D programs to model, texture, and bind our character and clothes. In this tutorial, 3D artist Julian Santiago uses Blender, ZBrush, and Substance Painter, though most 3D applications will work. All that is required is that the main 3D program can rig export to FBX.
Julian created this character as a guest artist on the Reallusion 3D Character Design Contest, Reallusion’s annual contest where artists from all over the world compete for a collection of prizes from several A-list sponsors including HTC Vive, Perception Neuron Mocap Suit, ZBrush, Substance Designer, Marvelous Designer, Marmoset Toolbag, Game Textures, Renderosity, CGTrader and many more. Entries for the Reallusion 3D Character Design Contest can be submitted until the deadline of October 16, 2016.
Step 1: Base Mesh Creation in Character Creator
I begin making this character in Character Creator. You can modify the default character by either clicking and drag on various parts of the character’s body or by using the sliders in the Modify panel. At this stage, the most important thing to remember is to get the proportions of your character right. Things like the placements of the joints and the lengths of the body parts should all be done inside Character Creator so that the character can be animated in iClone without issue. Once you are done, export an OBJ file to be edited in ZBrush. Note that you will need a 3DXchange Pro or Pipeline license to perform this step. An ObjKey file will be generated along with the OBJ file which will be needed in bringing the edited character back into Character Creator.
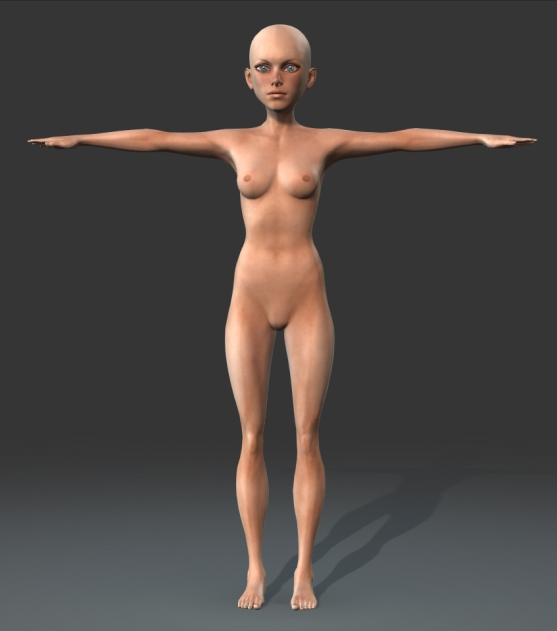
Starting work on the character with Character Creator
Step 2: Editing in ZBrush
In ZBrush, I edit the mesh to match the design. I don’t add any subdivision levels at this point and I use mostly the Move and the Move Topological brushes in shaping the mesh. At this stage, I pay close attention to the silhouette of the character and the various lines and curves of the design. Remember that you should not be editing the proportions of the model at this stage. Also take note that editing the facial features could cause the facial animation morphs to break, but this is an easy enough problem to fix in a later step.

Editing the Character in Brush
Step 3: The High-Resolution Character Sculpt
Subdividing a model in ZBrush makes unintended changes to the zero-level mesh and this isn’t something that we want. Before making any subdivisions, I first store a morph target of the current mesh by pressing StoreMT under Morph Target. I then subdivide the mesh until I have enough resolution to get all the details that I want. Once I have enough subdivisions, I go down to the lowest subdivision level and press Switch under Morph Target to return to the unedited low-resolution mesh. Now, if you increase your subdivision levels, you will see that it now conform better to the shape of our original mesh. You can now sculpt the high-resolution details.
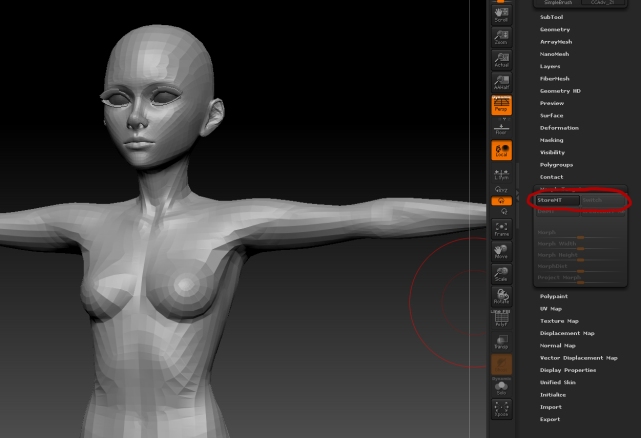
Remember to store a morph target before subdividing
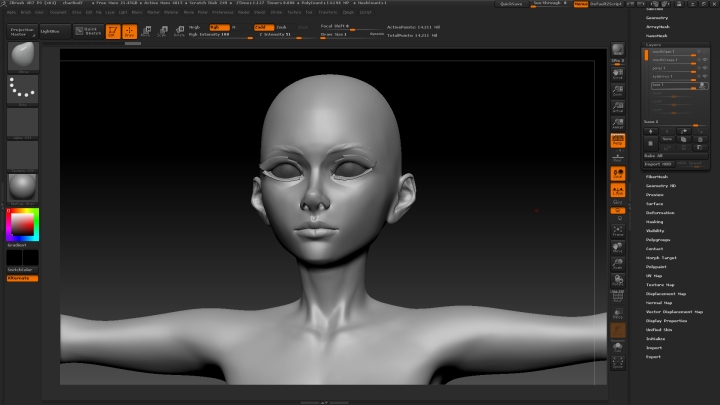
The high-resolution sculpt of the head
Step 4: Preparing the UVs for Baking
To properly bake the normal maps of the body in ZBrush, we need to make sure that each set of faces assigned to different materials occupy separate UV tiles. Import your character into your 3D application which in my case is Blender. Go into edit mode. In the material properties, you will see a list of materials. If you select one of the materials in the list and press the Select button, you will select the components of the mesh that are assigned to the highlighted material. With these components selected, you can move them to a different tile in the UV/image editor.

Blender does not have the proper UI to handle multiple UV tiles, but you can still accomplish this by moving your UVs by the number of pixels of the image assigned to the selected components. If no image is applied, it will assume a texture size of 256. With your components selected, unlink the texture by pressing the ‘x’ button in the UV/image editor.

To move the selected UVs to the UV tile directly to the right of the main tile, press ‘G’ to activate the grab tool, press ‘X’ to constrain movement to the x-axis, and then press ‘256’ to move the UVs to a separate UV tile. You can move the other UVs to other UV tiles by moving them in x using values that are multiples of 256 (512,1024,2048,etc.). Once you have done this, you can bring this model back into ZBrush.

The fixed UV layout
Step 5: Transfering UVs
When importing the corrected UVs into ZBrush, it would be best to import it as a separate tool and then transfer the UVs to your main model using the UV master plugin. With your corrected UV model selected, go to Zplugin>UV Master>Copy UVs. Now select your main model and press Paste UVs under UV Master. You can now bake your normal maps using the Multi Map Exporter. It will save out multiple normal maps that correspond to the UV tiles that you set in the previous step.

Use UV Master to copy and paste UVs

Use Multi Map Exporter to bake the normal maps
Step 6: Back to Character Creator
Export an OBJ from ZBrush. Back in Character Creator, go to Create>Morph Slider to bring up the Morph Slider menu. For your Source Morph, select Default Morph. For the Target Morph, select File and load your OBJ in the dialogue box underneath. In the Checksum File Path, you will need to load the ObjKey file that was created when you first exported your model from Character Creator. You can also use the Morph Name text box to assign a custom name to your slider. Click OK and the slider should be created in the Morphs panel.

Before setting your new slider to 100, first select Actor in the Morphs panel and press Reset. This will reset all your sliders to 0. Set your newly created slider to 100 and you should see the edits that you created in ZBrush applied to your character.

The edited character back in Character Creator
Step 7: Texturing the Body
Characters from Character Creator have multiple materials assigned to different parts of the body each with their own set of textures. To make custom textures for the head and body, I chose to use Blender’s Texture Paint mode as it has the ability to paint across multiple materials. From Character Creator, I once again exported the body as an OBJ file and imported that into Blender. The OBJ loads with the materials from Character Creator already assigned, which is convenient. With the character selected, switch to Texture Paint mode to begin texturing. For this character, I chose to modify the default textures instead of starting from scratch. In keeping with the stylized design, I painted out most of the skin details leaving only subtle color variations.
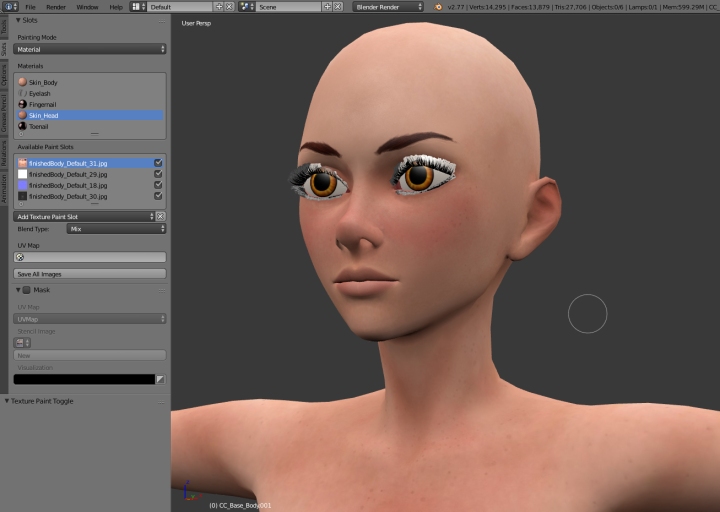
Texturing in Blender
Step 8: High-Resolution Clothes
It is now time to start working on the clothes. There are two workflows that you can use to create clothes for Character Creator. If you have 3DXchange Pipeline, you can export an FBX of your custom character and build your clothes around that. If you don’t have 3DXchange Pipeline, you can still create clothes using the template files provided by Reallusion. I will be demonstrating the workflow that uses templates. You can find the template files by following this link.
I start out by importing the Female.obj mesh into ZBrush.

I then build the clothes around this template using the many powerful tools available in ZBrush, such as Extract, Dynamesh, and Zremesher. The clip brushes are particularly useful for cleaning extracted sub tools and the Clay Buildup and Standard brushes are good for sculpting cloth details.


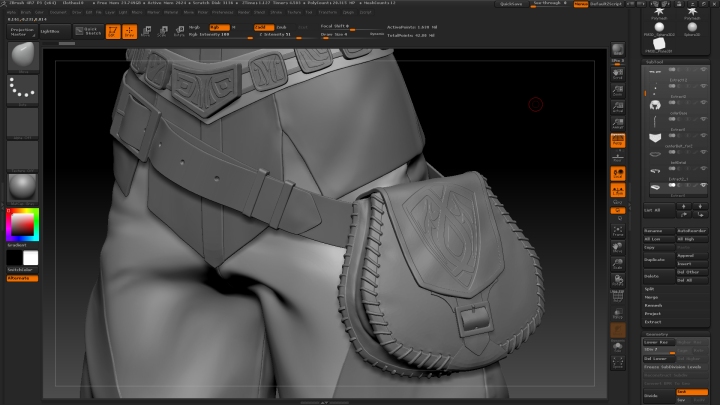
The high-resolution sculpt
Step 9: Retopology
Decimate your high-resolution meshes using the Decimation Master plugin and export them as OBJ files. Back in Blender, I load the decimated mesh and create the low-resolution mesh using Blender’s retopology tools such as face snapping and the shrinkwrap modifier.
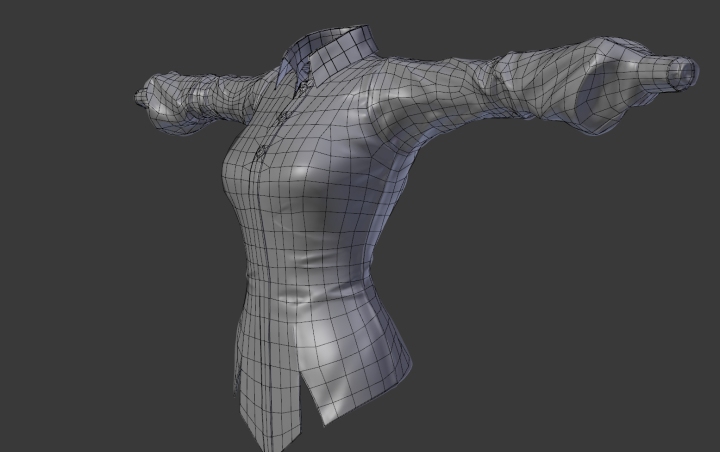

All clothes retopologized
Step 10: Hair
Hair for use in Character Creator has two parts: the hair strips and the scalp. The scalp can be created by duplicating the faces of the head and the hair strips are just simple polygon strips are arranged and textured to form the main part of the hair. All the hair strips and the scalp must be combined into a single object. The hair strips and the scalp should also be assigned separate materials.

The two parts of the hair: the scalp and the strips
Step 11: UV Mapping the Clothes
When UV mapping clothes, you want to place the seams where the seams on a real piece of clothing will be. You can assign a grid texture to your objects to see if there is any texture stretching.
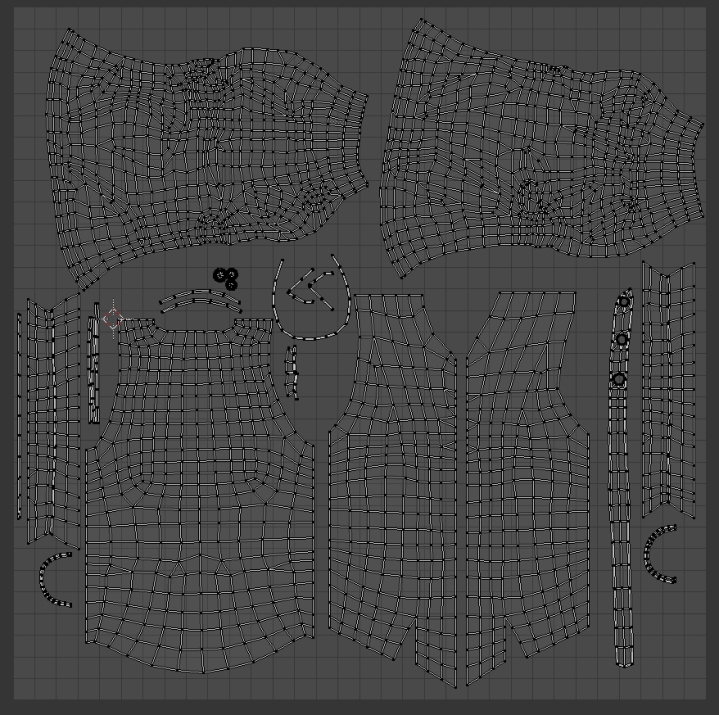
The UV layout of the shirt
Use grid textures to test for stretching
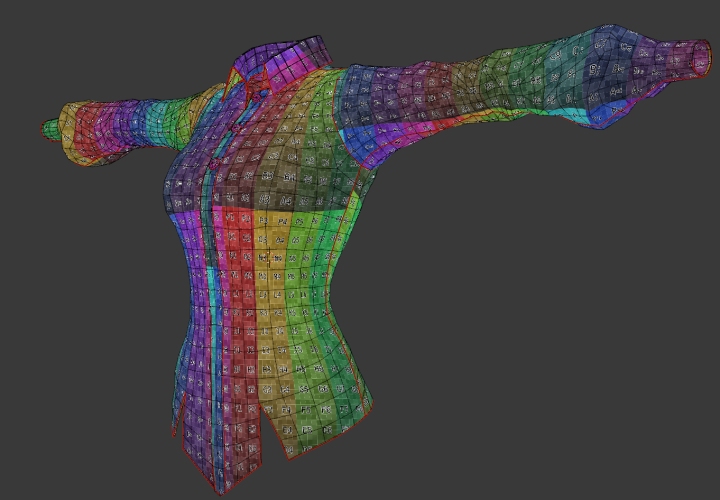
Step 12: Baking Normal Maps (Part 1)
I am going to be using Substance Painter to bake the normal maps of the clothes. I prepare the high-resolution and the low-resolution meshes inside Blender. The high-resolution shirt has separate meshes for the sleeves, the collar, and the vest. This will make baking the normal maps easier for us. Give each mesh and appropriate name and append “_high” to the end of it.
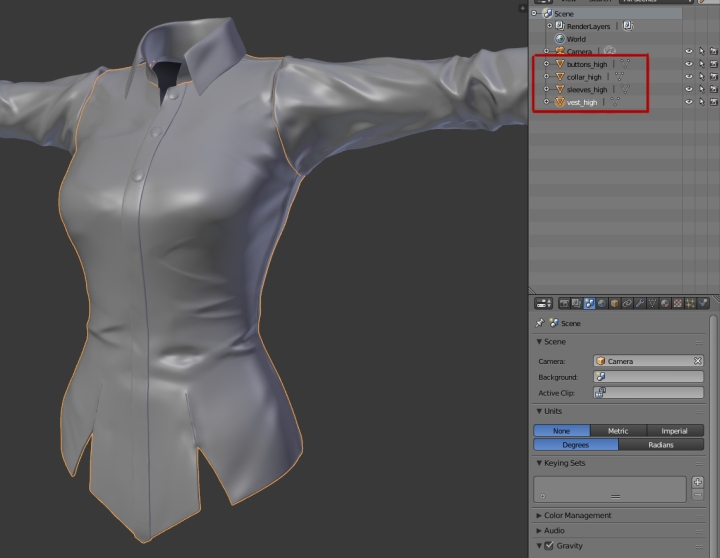
Name the high-resolution meshes appropriately
I create a special, low-resolution mesh for baking. While the final low-resolution mesh will be a single object, I split up the bake mesh to match the separation of the parts of the high-resolution mesh. Once the mesh has been split up, name them in a similar way to the high-resolution meshes but this time, append “_low” to the end. For example, if the high-resolution sleeves are called “sleeves_high,” then the low-resolution sleeves should be called “sleeves-low.” Lastly, make sure that the same material is assigned to all low-resolution meshes. Once this is done, select all the high-resolution objects and export them to an FBX file. Do the same for the low-resolution objects.

Do the same for the low-resolution meshes
Step 13: Baking Normal Maps (Part 2)
In Substance Painter, create a new project and load your low-resolution mesh. In the Texture Set Settings, press the Bake Textures button to bring up the Baking menu. Make sure that only the Normal Map option is checked and load your high-resolution mesh into the High Definition Meshes window. For the Match option, select By Mesh Name so that only the details from similarly named meshes will be baked (sleeves to sleeves, collar to collar, etc.). Press Bake Textures to generate the normal map. If there are artifacts in your mesh, you can increase or decrease the values for frontal and rear distance. You can also bake other maps, such as ID maps for easy selection, using this process.

The setting for baking normal maps in Substance Painter

The normal maps applied to the low-resolution shirt
Step 14: Texturing the Clothes
To make the clothes ready for painting inside Substance Painter, assign a different material for each piece of clothing and name it appropriately. This will make it easy to select the different texture sets for painting inside Substance Painter. Select all the objects and export them as an FBX file.
In Substance Painter, create a new project and load in your mesh. Load your previously baked maps into Substance painter by dragging them into the texture shelf. To load them into the appropriate texture set, select your desired texture set and drag your maps to the appropriate slots in the TextureSet Settings. Using the pre-made materials that come with Substance Painter is a good place to start, but make sure to edit them and add your own hand painted details to better fit your design. It is this step that I add in some smaller details like stitches on the seams. The embroidery patterns were created in Photoshop and were used as a layer mask in Substance Painter.

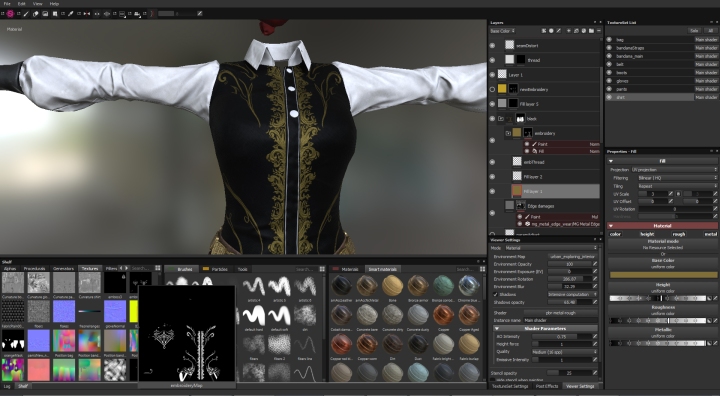
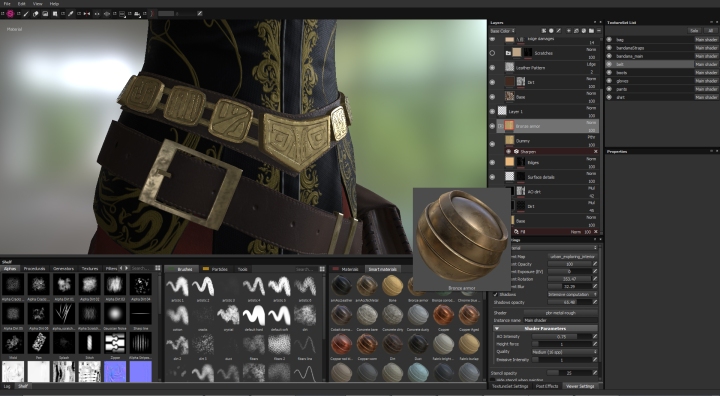
Texturing the clothes in Substance Painter
Step 15: Binding the Clothes
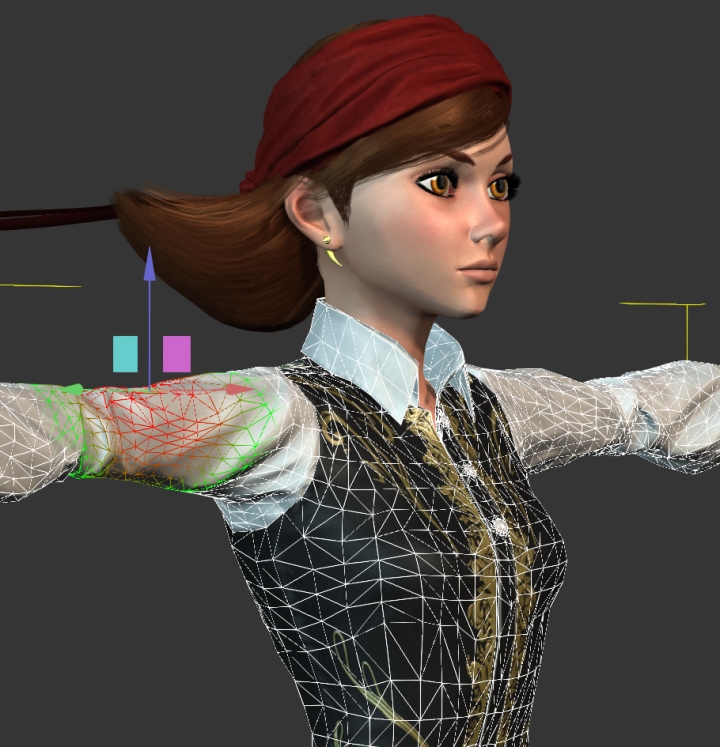
To bring custom clothes into Character Creator, you will need to bind the clothes to one of the provided FBX files. Because I started with the Female.obj file, I’m going to bind the clothes to the Female.fbx file. If your 3D program has a method for copying weights, it would be best to copy over the skin weights from the body to the clothes. You may still need to manually edit the weights, but it is a good starting point.
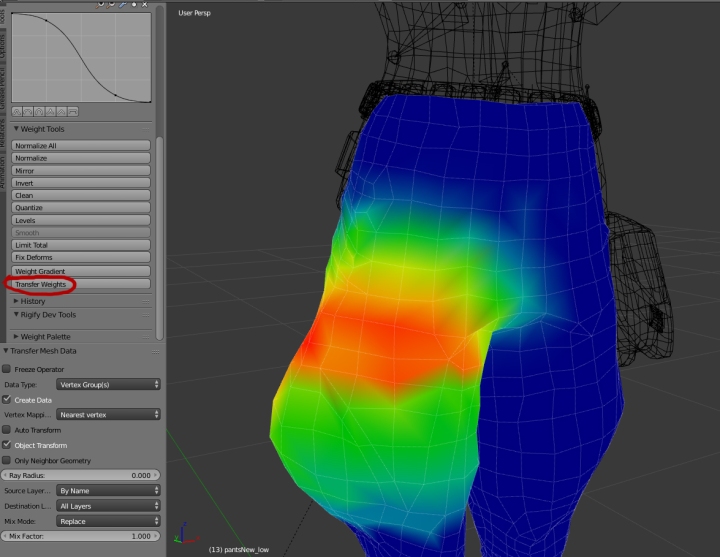
Copy the weights from the body mesh whenever possible
Step 16: Exporting the FBX
To export the FBX, select all the clothes and everything that was imported from the FBX. Go to File>Export>Fbx. In the Export, FBX options to the left, check Selected Objects in the main section to export only the selected objects. Go to the Armatures section and uncheck Add Leaf Bones. With these options, Blender should generate a file that Character Creator will accept. For those using other 3D programs, make sure that you are exporting to FBX 2012 as this is the version that is most compatible with Character Creator.
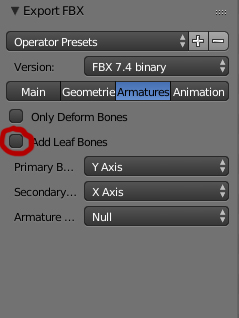
In Blender, turn off Add Leaf Bones or it will cause errors in Character Creator
Step 17: Importing the Clothes
Back in Character Creator, go to Create>Cloth, Hair, Acc… and select the FBX file you just exported. In the Decrypt Key File Dialogue, select the fix key file of the FBX template that you used. In my case, it is Female.fbxkey.

Confirm your import and if it is successful, you will be presented with the Asset Import Status Report window. In this window, set the layer number of your clothing items. This will be used to determine which piece of clothing should be over another if you run collisions. You can also set the type of item you are importing, whether they be normal clothes, gloves, shoes, or hair.

Step 18: Import Errors
There are occasions when the import will fail to load. The common reasons for this are that the cloth item has no Uvs, they are bound to the wrong bones (check for bones with “Nub” in the name and remove their influence) or multiple meshes are bound to the head bone and are being read as hair geometry. For this character, I had to export the bandana and the hair as separate FBX files as they were causing errors during the import process.
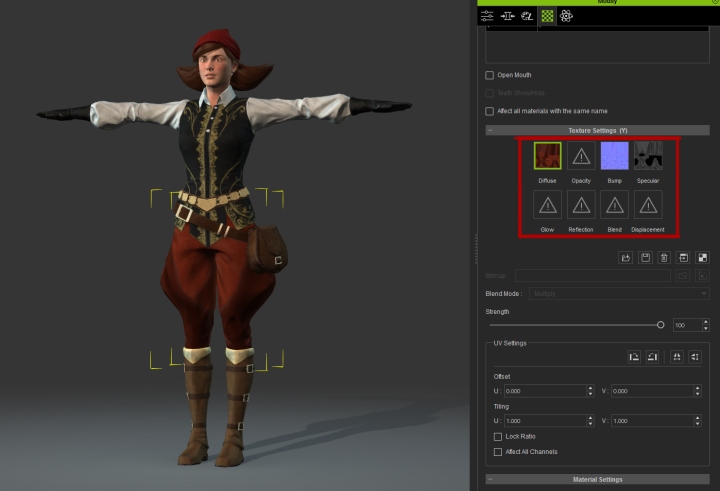
Step 19: Loading your Textures
To load your textures into Character Creator, select your object and go to the Material section of the Modify Panel (checker icon). Select the material in the material list and go down to the Texture Settings to load the various maps that you have created.
Load your maps here
Step 20: Creating Clothing Templates
You can create templates from the clothes that you have created for use with other characters created with Character Creator. This step is also useful for bringing clothes that have been imported from separate FBX files into one project. Select a clothing item and In your content panel, press the Cloth button. Select the proper category for your selected object and switch over to the Custom tab. Click the “+” button at the bottom of the window to create and name your template.

Create custom templates that can be used with other characters
Step 21: Adding Clothes to your Custom Character
In an earlier step, we created a morph slider for our custom character. If the source morph you used to create that slider is the same as the FBX template that you bound the clothes to, you can simply turn up the slider to 100 to apply your custom morph to the current character. If the source morph is different, you can either recreate the slider and use Current Morph as the source or start with a new file and simply drag the templates that you have created onto your custom character.

The custom clothes on the custom character
Step 22: Final Edits
At this stage, you can still edit your character using morph sliders. If you want more control, you can select any mesh and in the Edit section of the modify panel activate Edit Mesh Mode. This will give you face level control over your meshes. You can use this mode to modify the shape of your meshes or hide faces that are not visible to the viewer. For this character, I hid most of the faces of the body keeping only the head, neck, and some portions of the chest.
You can also resolve intersecting clothes by using the Conform operation. This will calculate the collisions of your clothes based on the layer number that you have set and edit them accordingly.

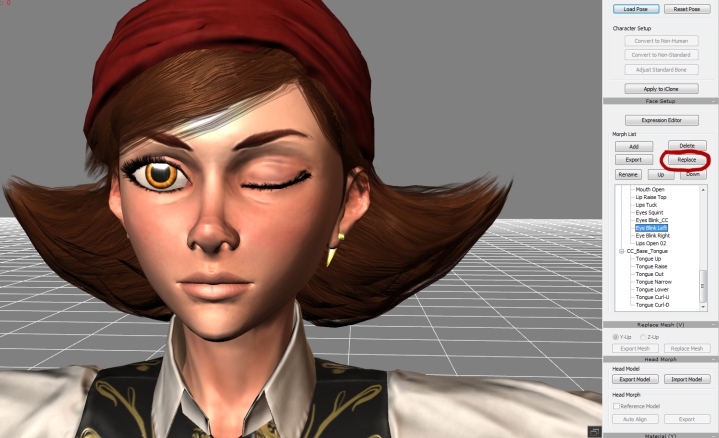
Step 23: Fixing the Facial Animation Morphs in 3DXchange
The character at this point should be ready for body animations inside iClone. Because of the edits that were done to the face in Zbrush, however, there may be a need to fix the facial morphs that are used for animation. Export an iAvatar file from Character Creator and open it in 3DXchange. Scroll down to the Face Setup section of the Modify Panel to find a list of morphs. Go through these morphs to see if any of them need to be fixed or improved to better fit your character. For characters with large eyes, there will usually be a problem with the blink morph.

The eye does not close all the way
Export the morph that you want to fix using the Export button and fix this morph in an external program.
Fixing the eye morph in Blender
Once the edits are finished, export the new morph as an OBJ file and in 3DXchange press the Replace button to load in the edited morph. Once you are done, go to File>Export to save out a new iAvatar file. The character is now fully ready to be used inside iClone.
Bringing the fixes back into 3DXchange
Step 24: Conclusion
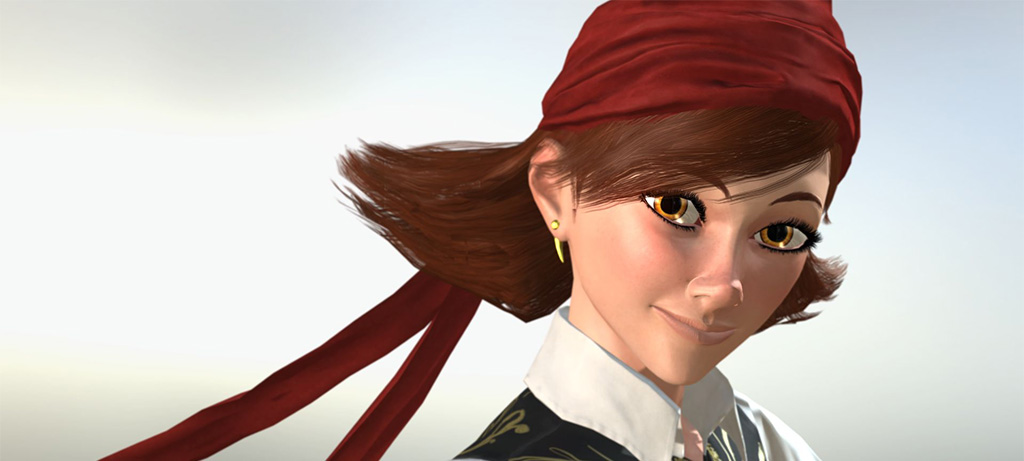
Following the steps above, you can create a custom character for use in iClone. This character can now be posed and animated. Here are a few renders using iClone. I gave her a prop and I even used iClone’s soft cloth physics for her hair and bandana straps.